Projekte

Projects

Sonnenbrillenständer

Sunglasses Stand

08.2020

Überblick

Overview
Geplantes Budget
planed budget
0
Fortschritt
progress

Design

Prepare

Build

Test

Done!

Maschienen und Werkzeuge
Machines and tools
Laserzeit 1h 18min & 1h 2min / Material: Pappelsperrholz 4mm
Kosten: zwei A3 Platten 2,53€ (5er Pack 6,32€)

Zu viele Sonnenbrillen auf einem Haufen. Die Lösung ist ein zusammensteckbarer Sonnenbrillenständer für den Flur.

Zuvor habe ich etliche Schnitt- und Tolleranztests gemacht. Da der Laser recht schwach ist, ist es schwierig dickeres Material zu schneiden. Der Ständer sollte Uhrsprünglich aus 4mm Buchensperrholz gelasert werden aber das Material ist vergleichsweise hart. In meinen Test konnte ich das Sperrholz nur mit folgenden Einstellungen schneiden:

350mm/min, 3x 11x -0,35mm in Z

Das hat aber auch nicht ganz gereicht. Neben der benötigten Zeit die bei derart vielen Durchläufen sehr lange gewesen wäre, wollte ich auch das Material sicher trennen, um saubere Schnitte zu haben und nicht nacharbeiten zu müssen. Daher habe ich mich auf das 4mm Pappelsperrholz fokussiert.

Für die Toleranztest habe ich je zwei rechteckige Teile ausgelasert mit verschieden breiten Nuten. Diese konnte ich dann zusammen stecken und gucken welche die beste Passung haben. Das Material war genau genommen nur 3,8mm dick und das war auch genau die Nutbreite, die am besten gepasst hat. Gerade für diesen Zweck werde ich noch eine eigene Lehre konstruieren um nach den ermittelten Schnittparametern gleich die richtigen Nutbreiten zu ermitteln für etwaige Steckkonstruktionen. Dies wird aber ein späteres Projekt sein.

Für die Nuttoleranz ist generell immer zu bedenken, dass der Laserstrahl eine Kegelform hat, wobei die Leistung an der Spitze maximal ist. Trotzdem haben auch die anderen Bereiche des Laserstrahls das Potenzial Material zu verdampfen. Daher ist der gelaserte Spalt an der Oberseite immer breiter als auf der Unterseite. Dies kann gerade bei Dickeren Materialien zu Problemen führen.

Für das Nasenbügelteil habe ich folgende Schnittwerte verwendet:

350mm/min, 2x 11x -0,35mm in Z

Das lasern hat hierfür 1h 18min gedauert. In den Tests konnte ich ein Quadrat sauber ausschneiden. Beim Nasenbügel Teil hat dies jedoch nicht geklappt (s. Fotos). Gerade auf den letzten 1/10mm gab es große Probleme bei quer liegenden Fasern im Holz. Die Materialbeschaffenheit durch das Material scheint auch einen Einfluss darauf zu haben, ob der Laser das Material komplett durchtrennen kann. Somit musste ich mit einem Messer die Kontur von der Hinterseite nachschneiden und das Teil teilweise herausbrechen. Da ich das beim nächsten Teil vermeiden wollte habe ich wieder neue Tests gemacht. Zudem wollte ich auch versuchen Zeit zu sparen, da 2 mal 11 Durchläufe sehr lange gedauert haben. Dies hat zu folgenden Schnittwerten geführt:

200mm/min, 10x -0,4mm in Z

Was in den Test gut geklappt hatte war in der Praxis aber wieder ein Fehlschlag. Wo bei die Summe der vollständig geschnittenen Wege etwas mehr wahren. Die Teile sind zwar nur bedingt vergleichbar aber die erhoffte Zeitersparnis war praktisch nicht vorhanden. Dies ist wohl auf die halbierte Schnittgeschwindigkeit zurückzuführen. Ein 1600mW Laser ist halt kein Laserschwert.

Nach dem zusammenstecken viel mir auf das zum einen die Schlitze nicht lang genug wahren und Ober- sowie Unterkante nicht miteinander abgeschlossen haben. Letzteres auch unabhängig von der Schlitzlänge. Ich habe mich dann dafür entschieden die Oberkante abschließen zu lassen und das eine Teil der Unterseite durch Sägen anzugleichen. Dafür war ein Kreissägeaufsatz für das Multitool sehr hilfreich.

Die DXF-Dateien im Download-Bereich sind noch nicht korrigiert. Zu diesem Punkt möchte ich noch investigieren, da die Endmaße der Teile von denen in CAD und den Importierten in Luban abweichen. Die aus Rhino exportierten DXF-Dateien sind 1:1 aber wenn sie in Luban importiert werden, ist die Größe auch anders. Diese habe ich dann über den Editor in Luban an die in CAD angeglichen/ausgeglichen. Trotz der Unterschiedlichen Endmaße hat dies aber nicht die Spaltbreite beeinflusst. Möglicherweise hat die Maschine eine minimale Toleranzabweichung, die sich durch Addition bei großen Teilen bemerkbar macht.

Laser Time 1h 18min & 1h 2min / Material: poplar plywood 4mm
Price: two A3 sheets 2,53€ (Pack of 5: 6,32€)

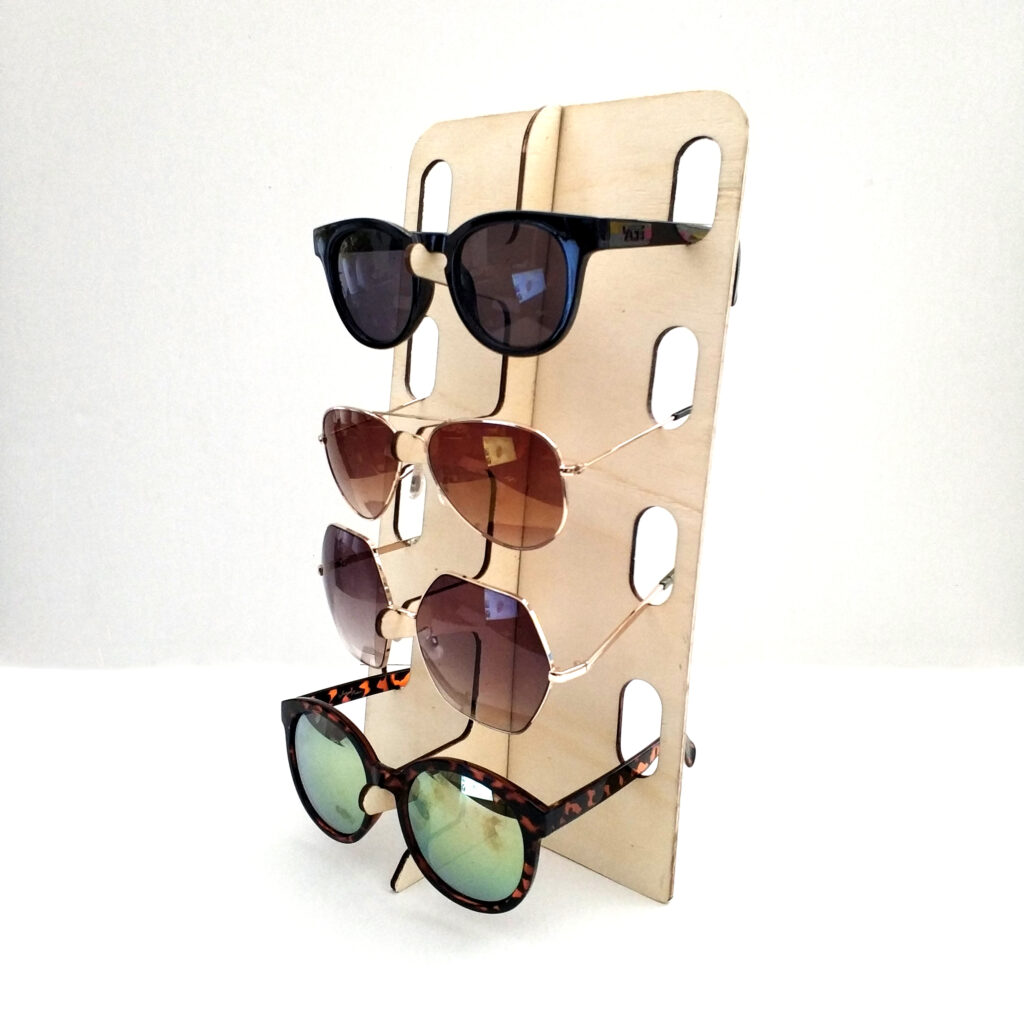
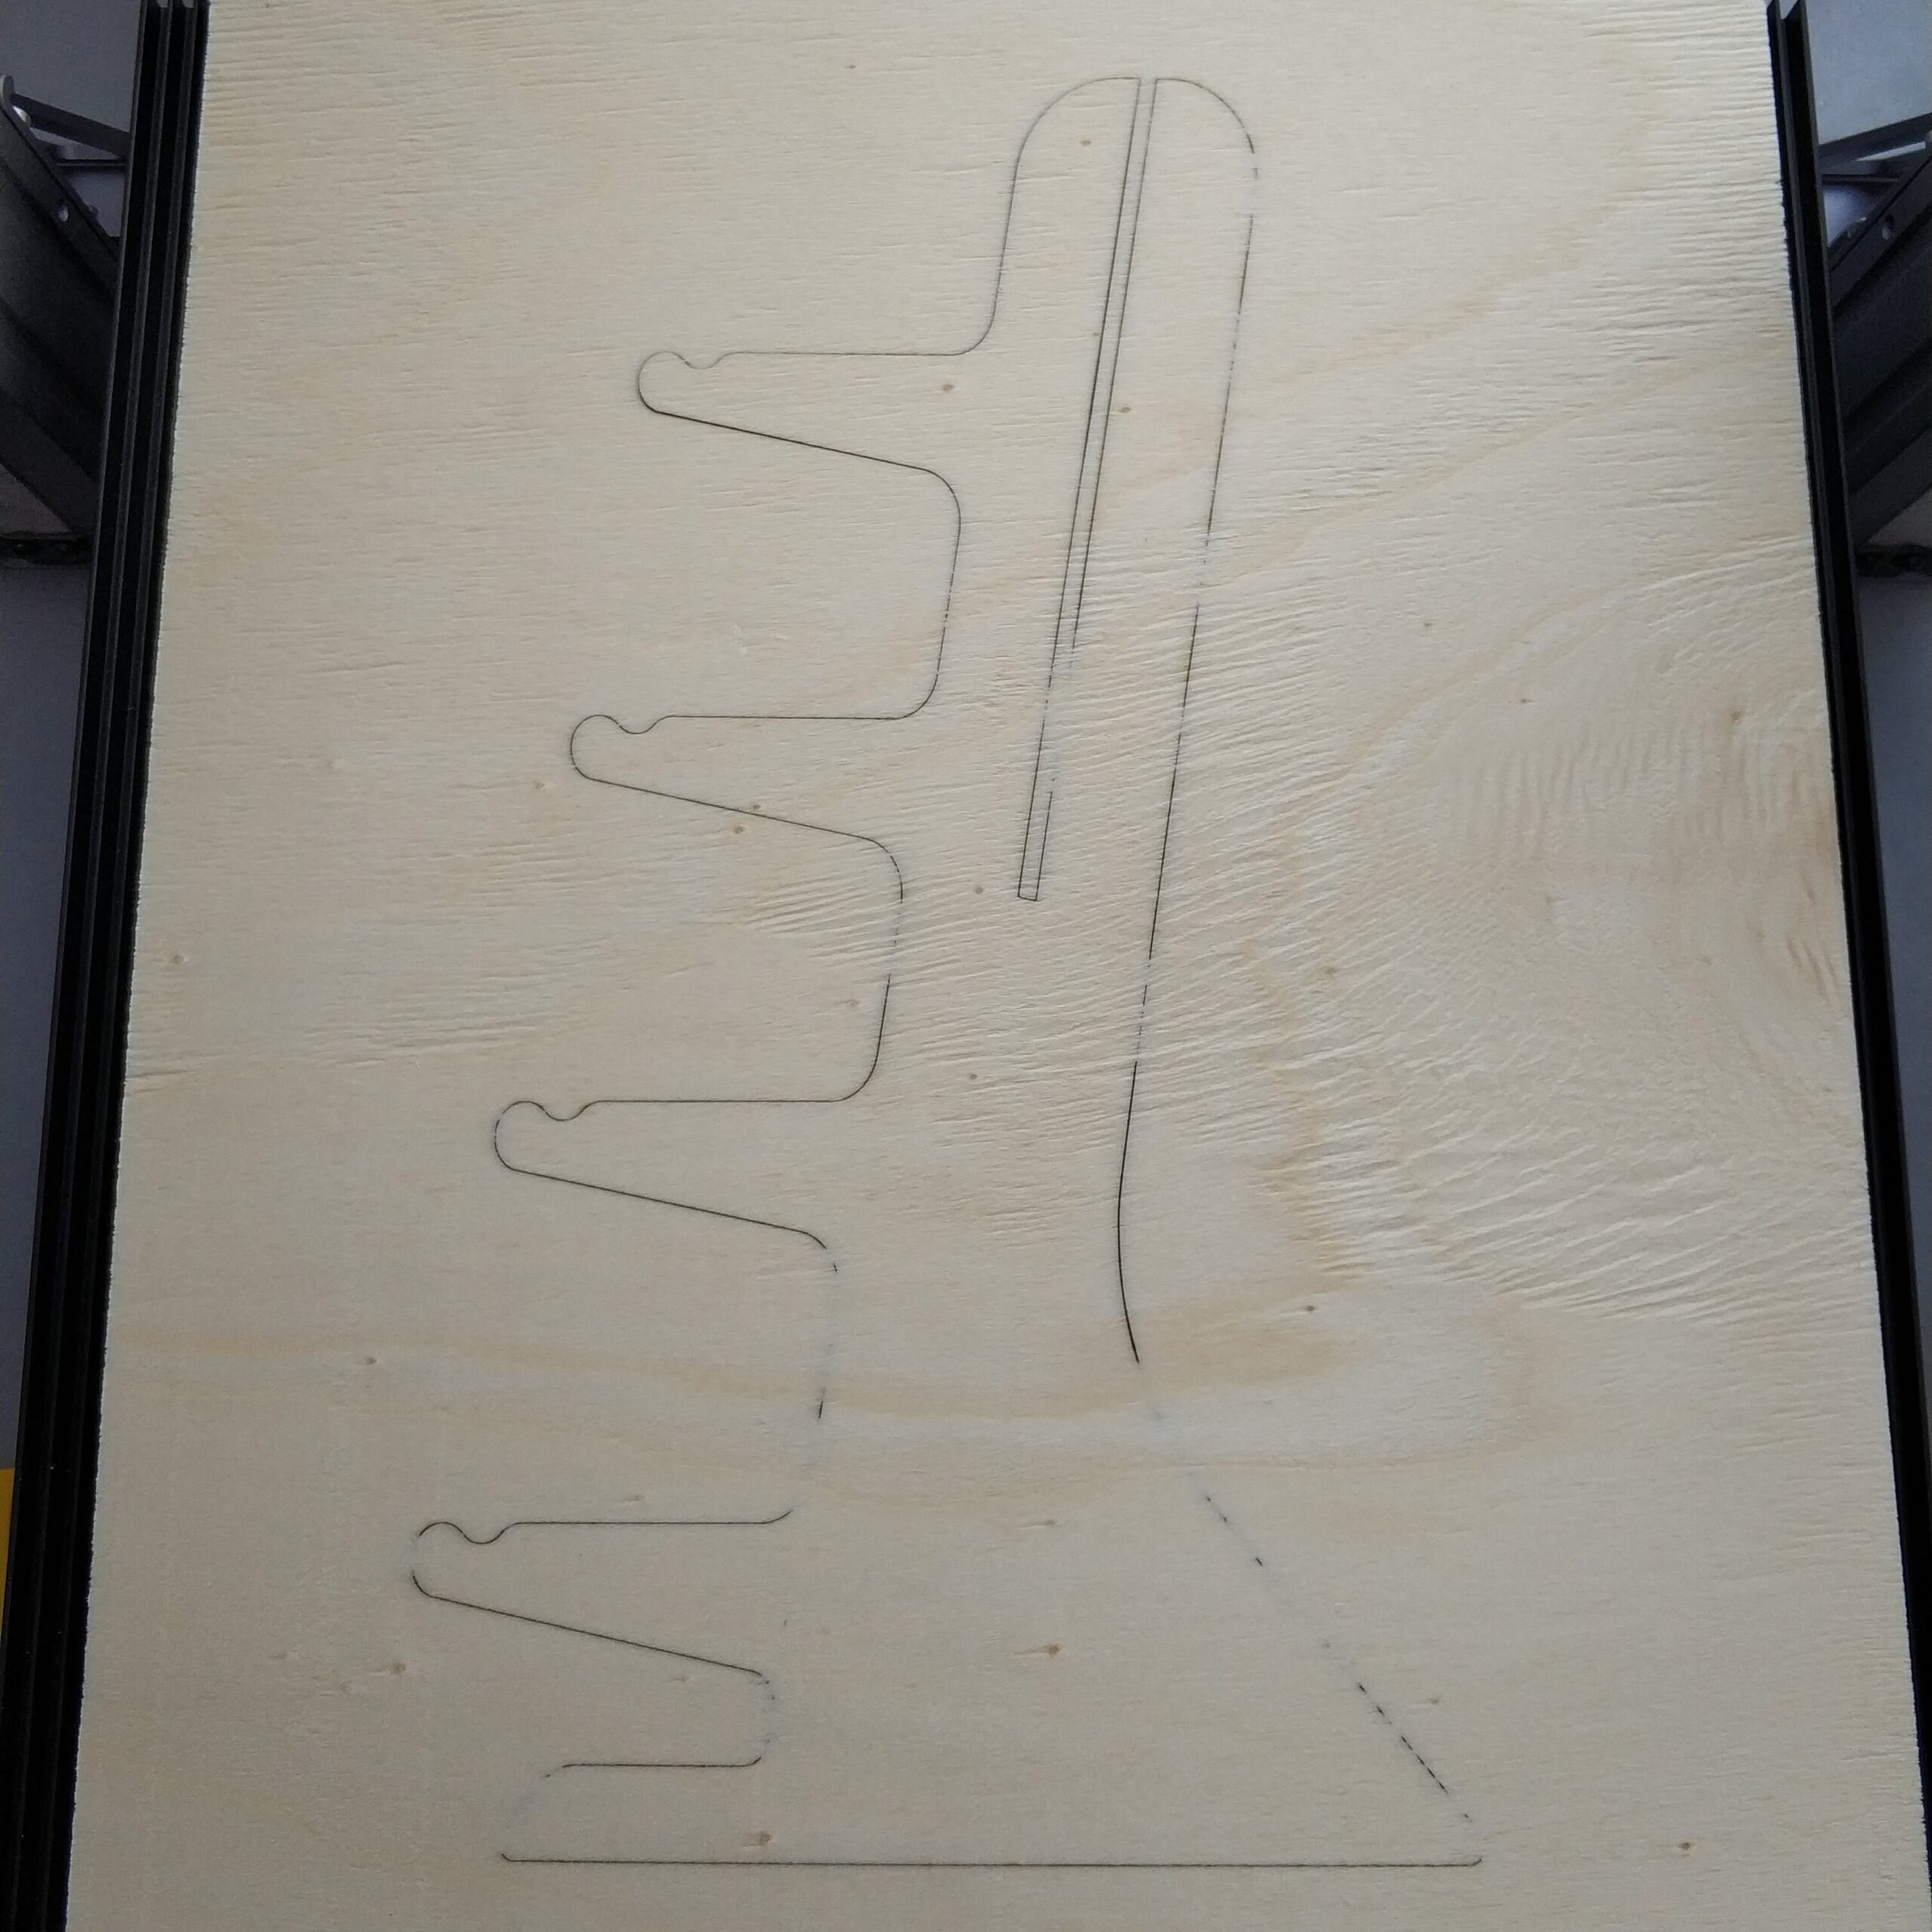
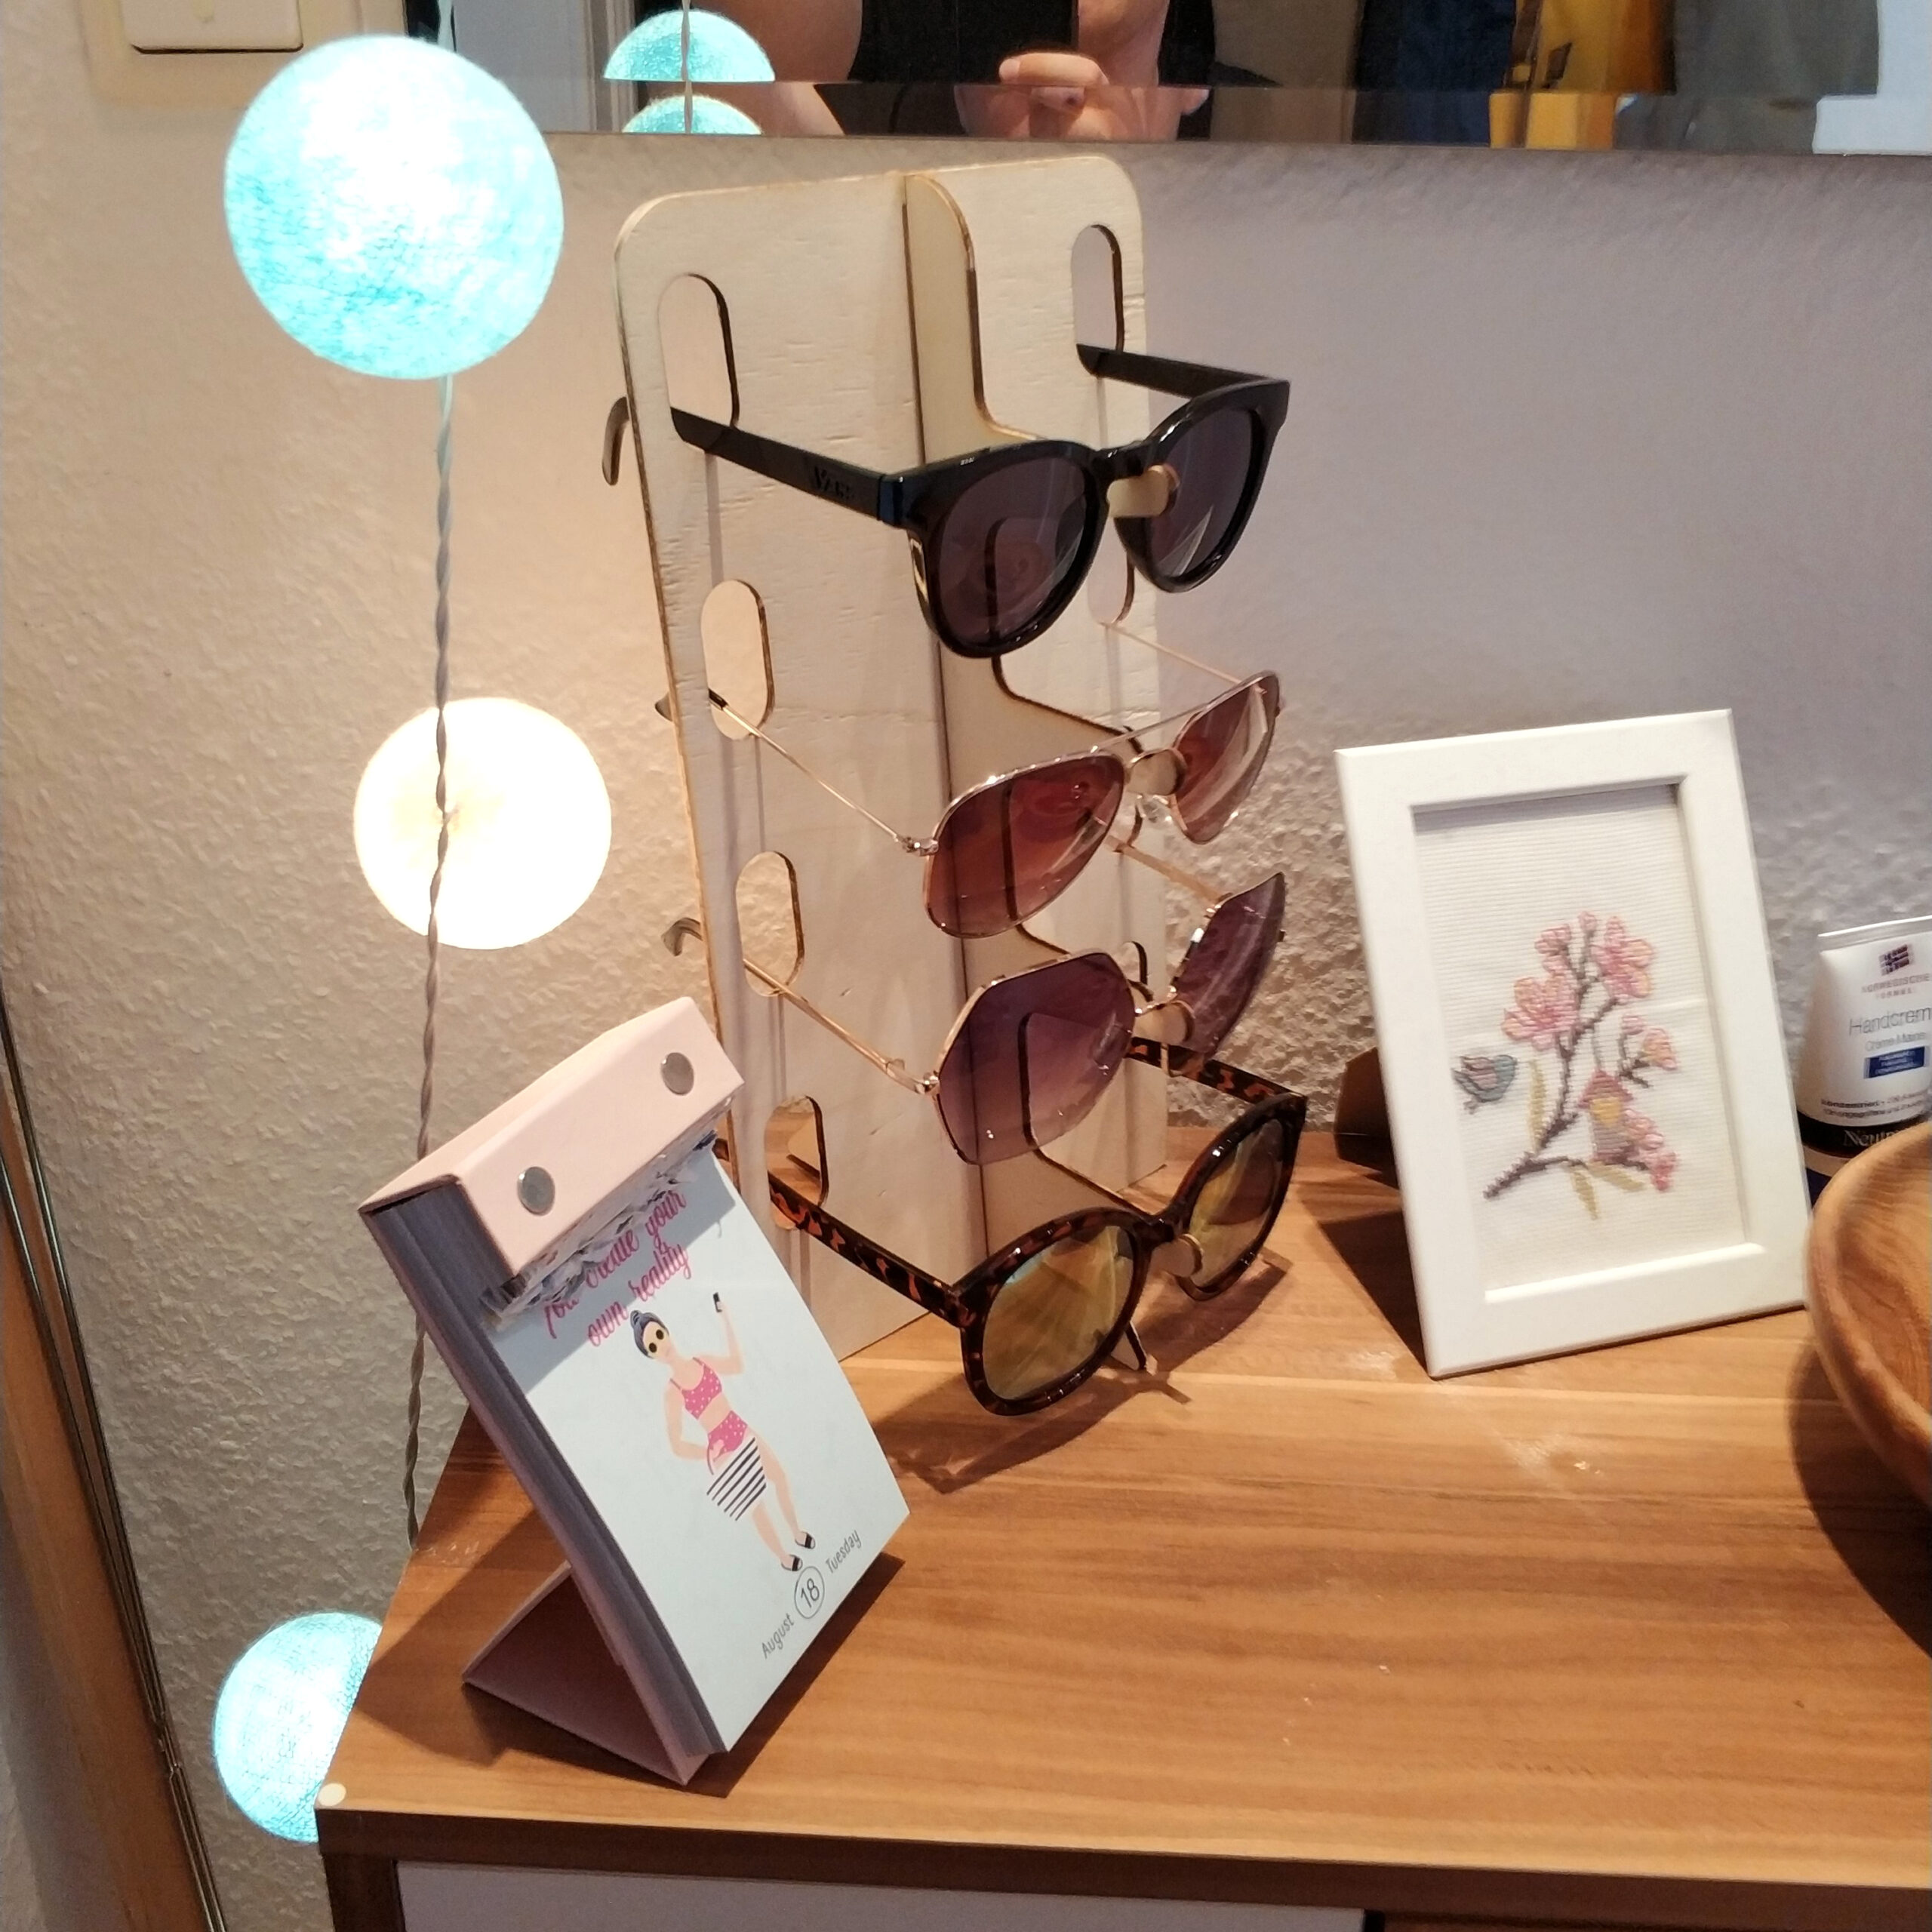
Too many sunglasses in one pile. The solution is a interlockable sunglasses stand for the hallway.

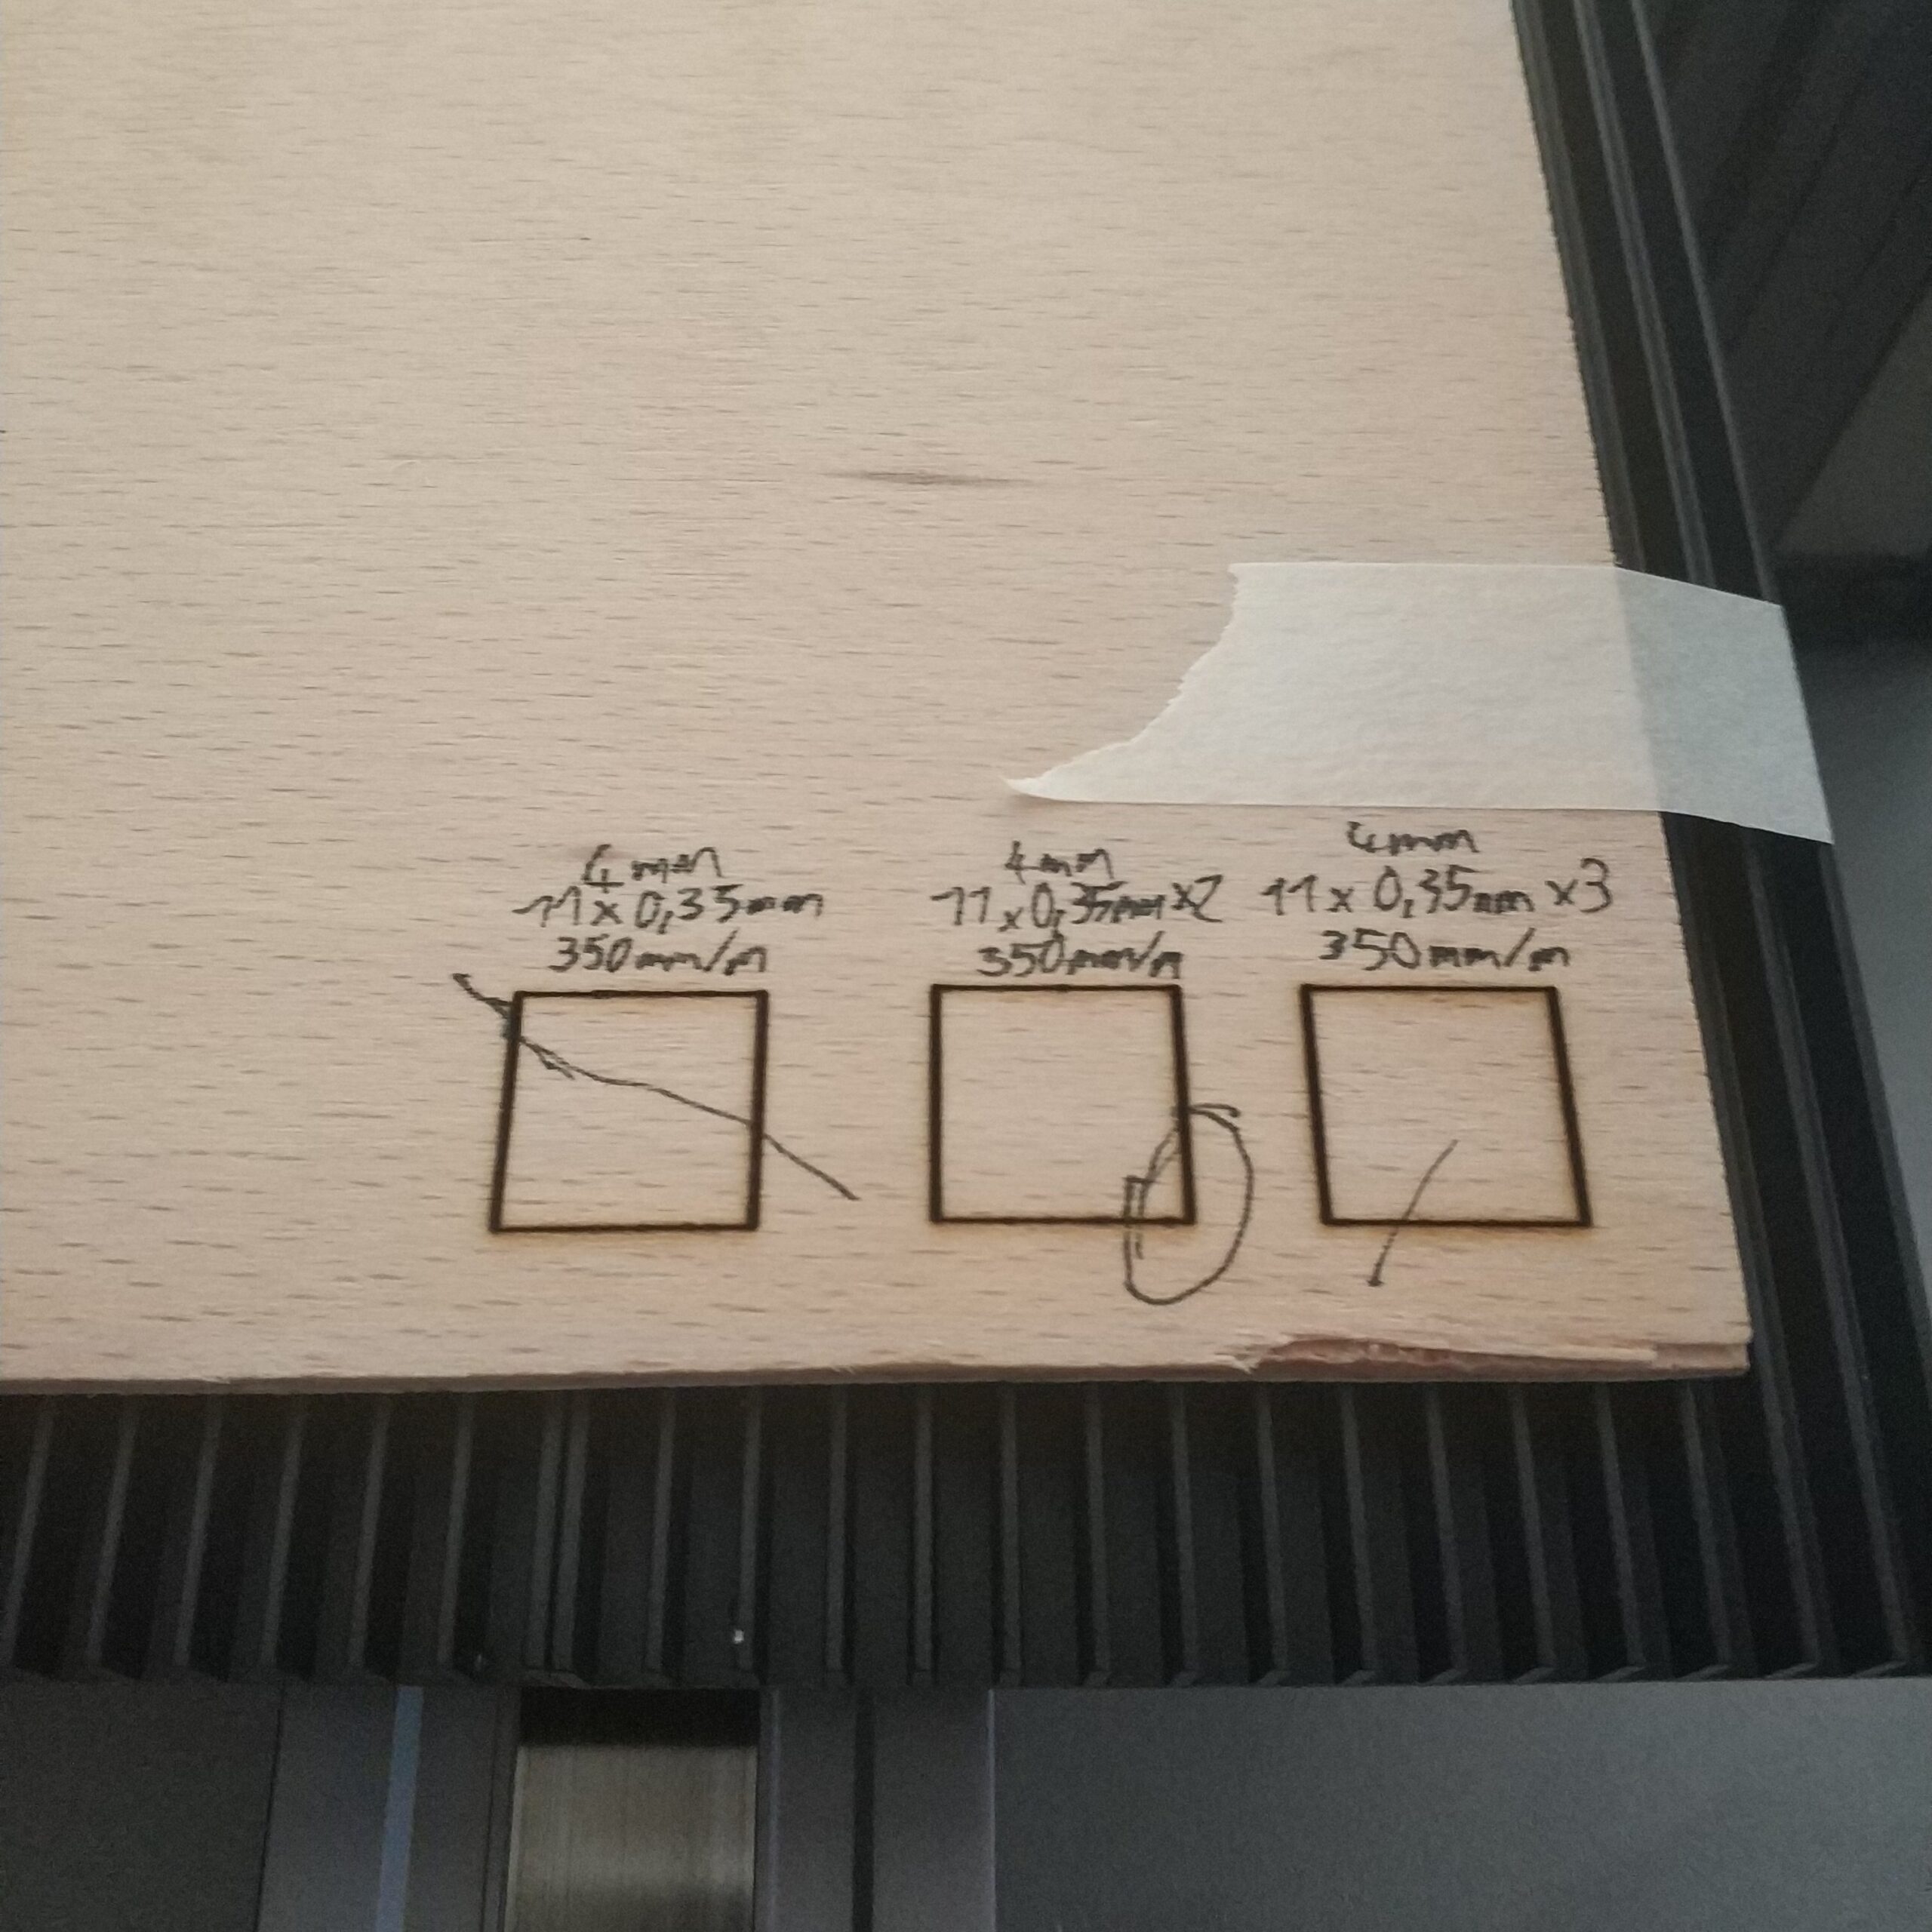
Before that I did a number of cutting and tolerance tests. Since the laser is quite weak, it is difficult to cut thick material. The stand was originally supposed to be lasered from 4mm beech plywood, but the material is comparatively hard. In my test, I could only cut the plywood with the following settings:

350mm/min, 3x 11x -0.35mm in Z

But that wasn’t quite enough either. In addition to the time required, which would have been a long time with so many runs, I also wanted to safely separate the material in order to have clean cuts and not have to rework. So I focused on the 4mm poplar plywood.

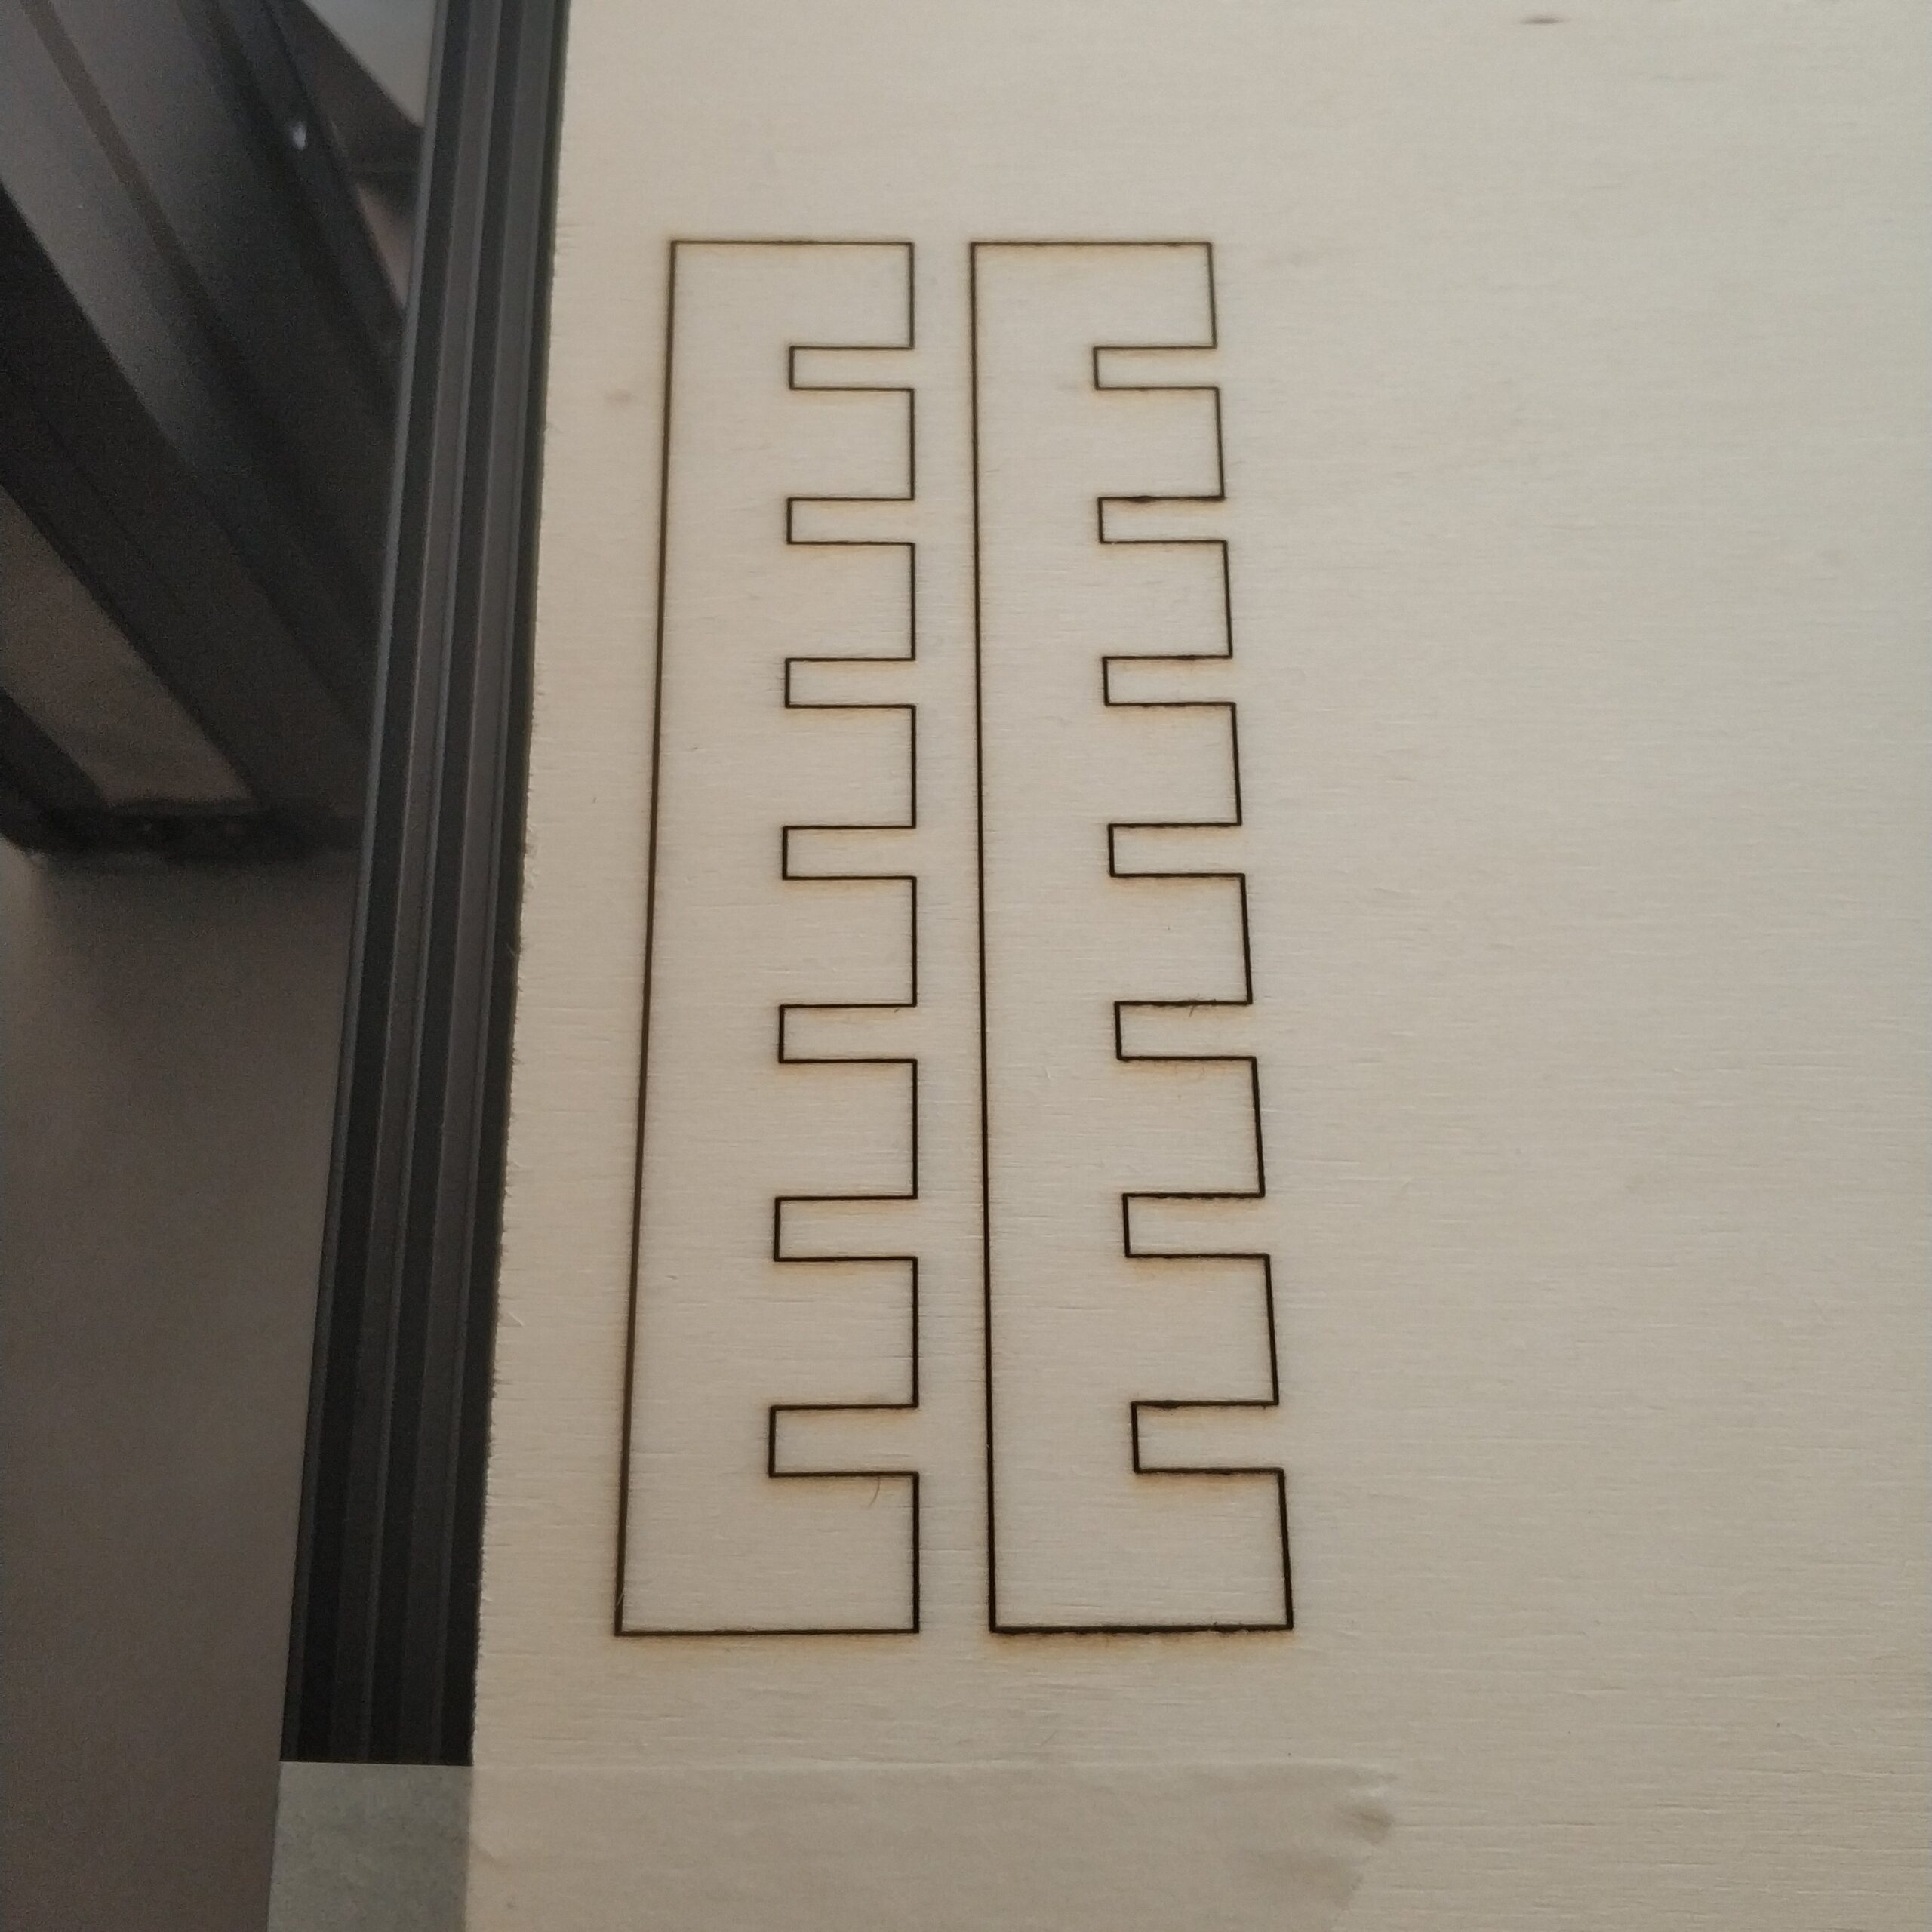
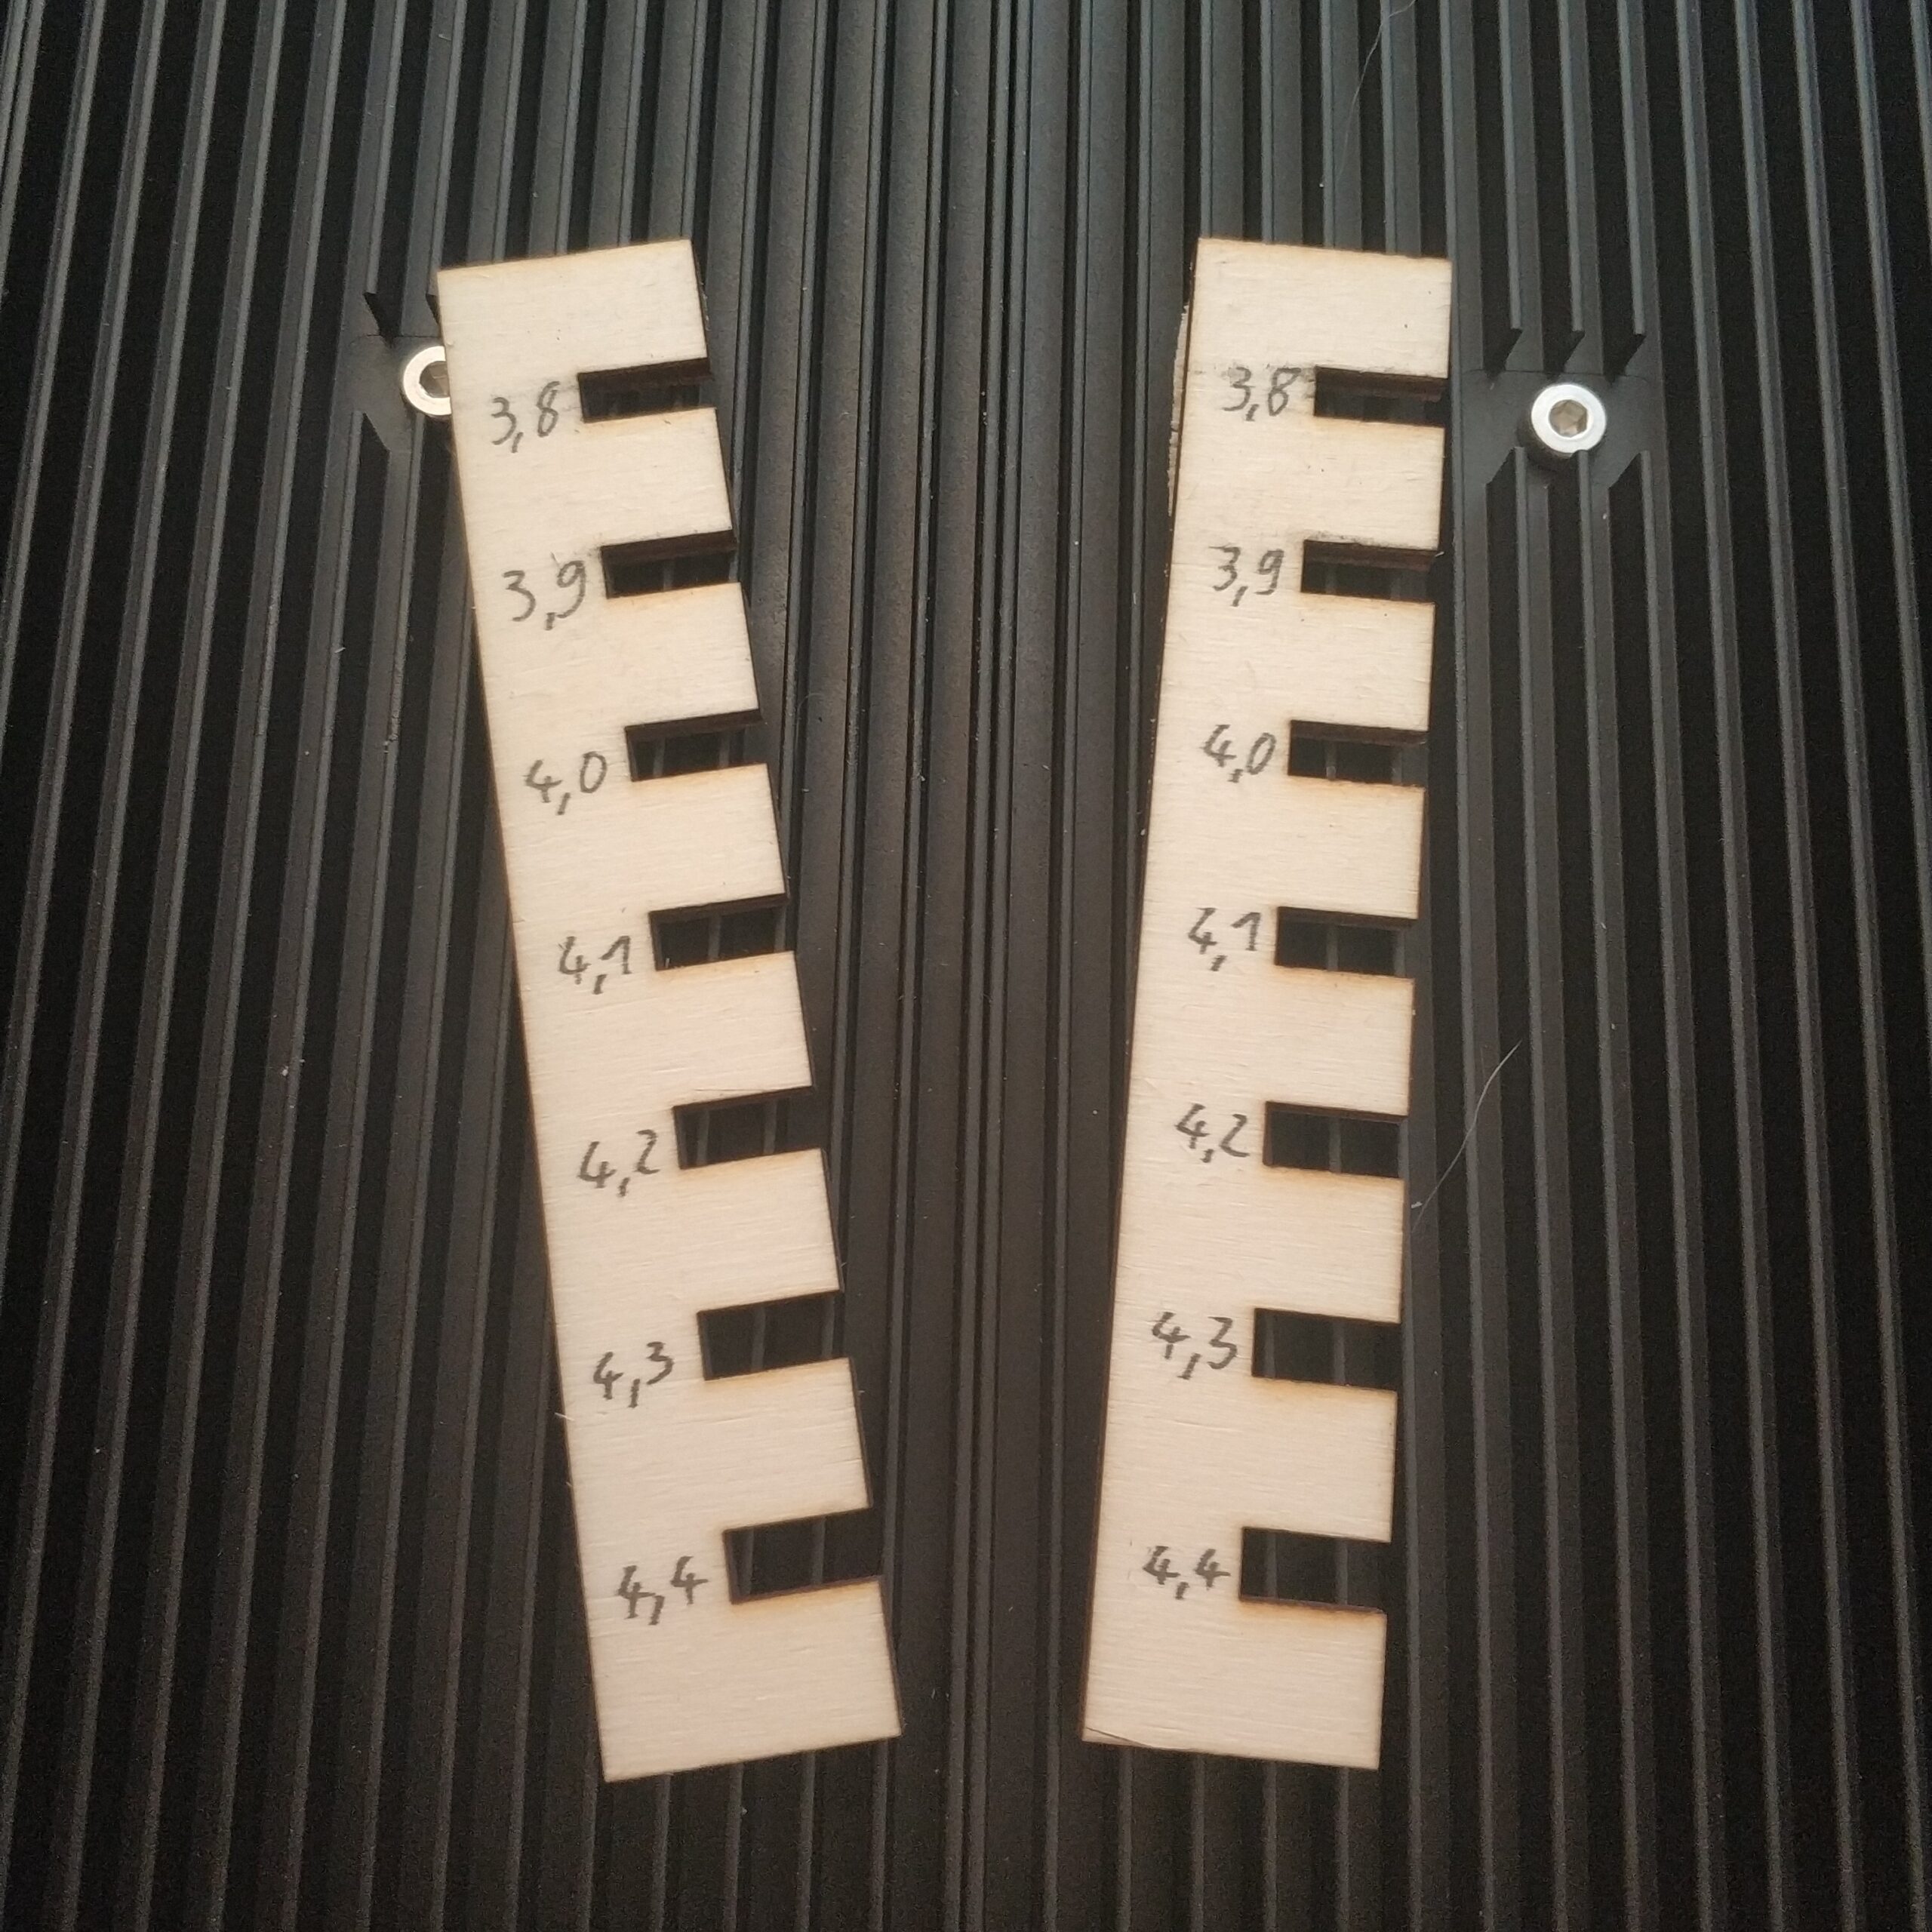
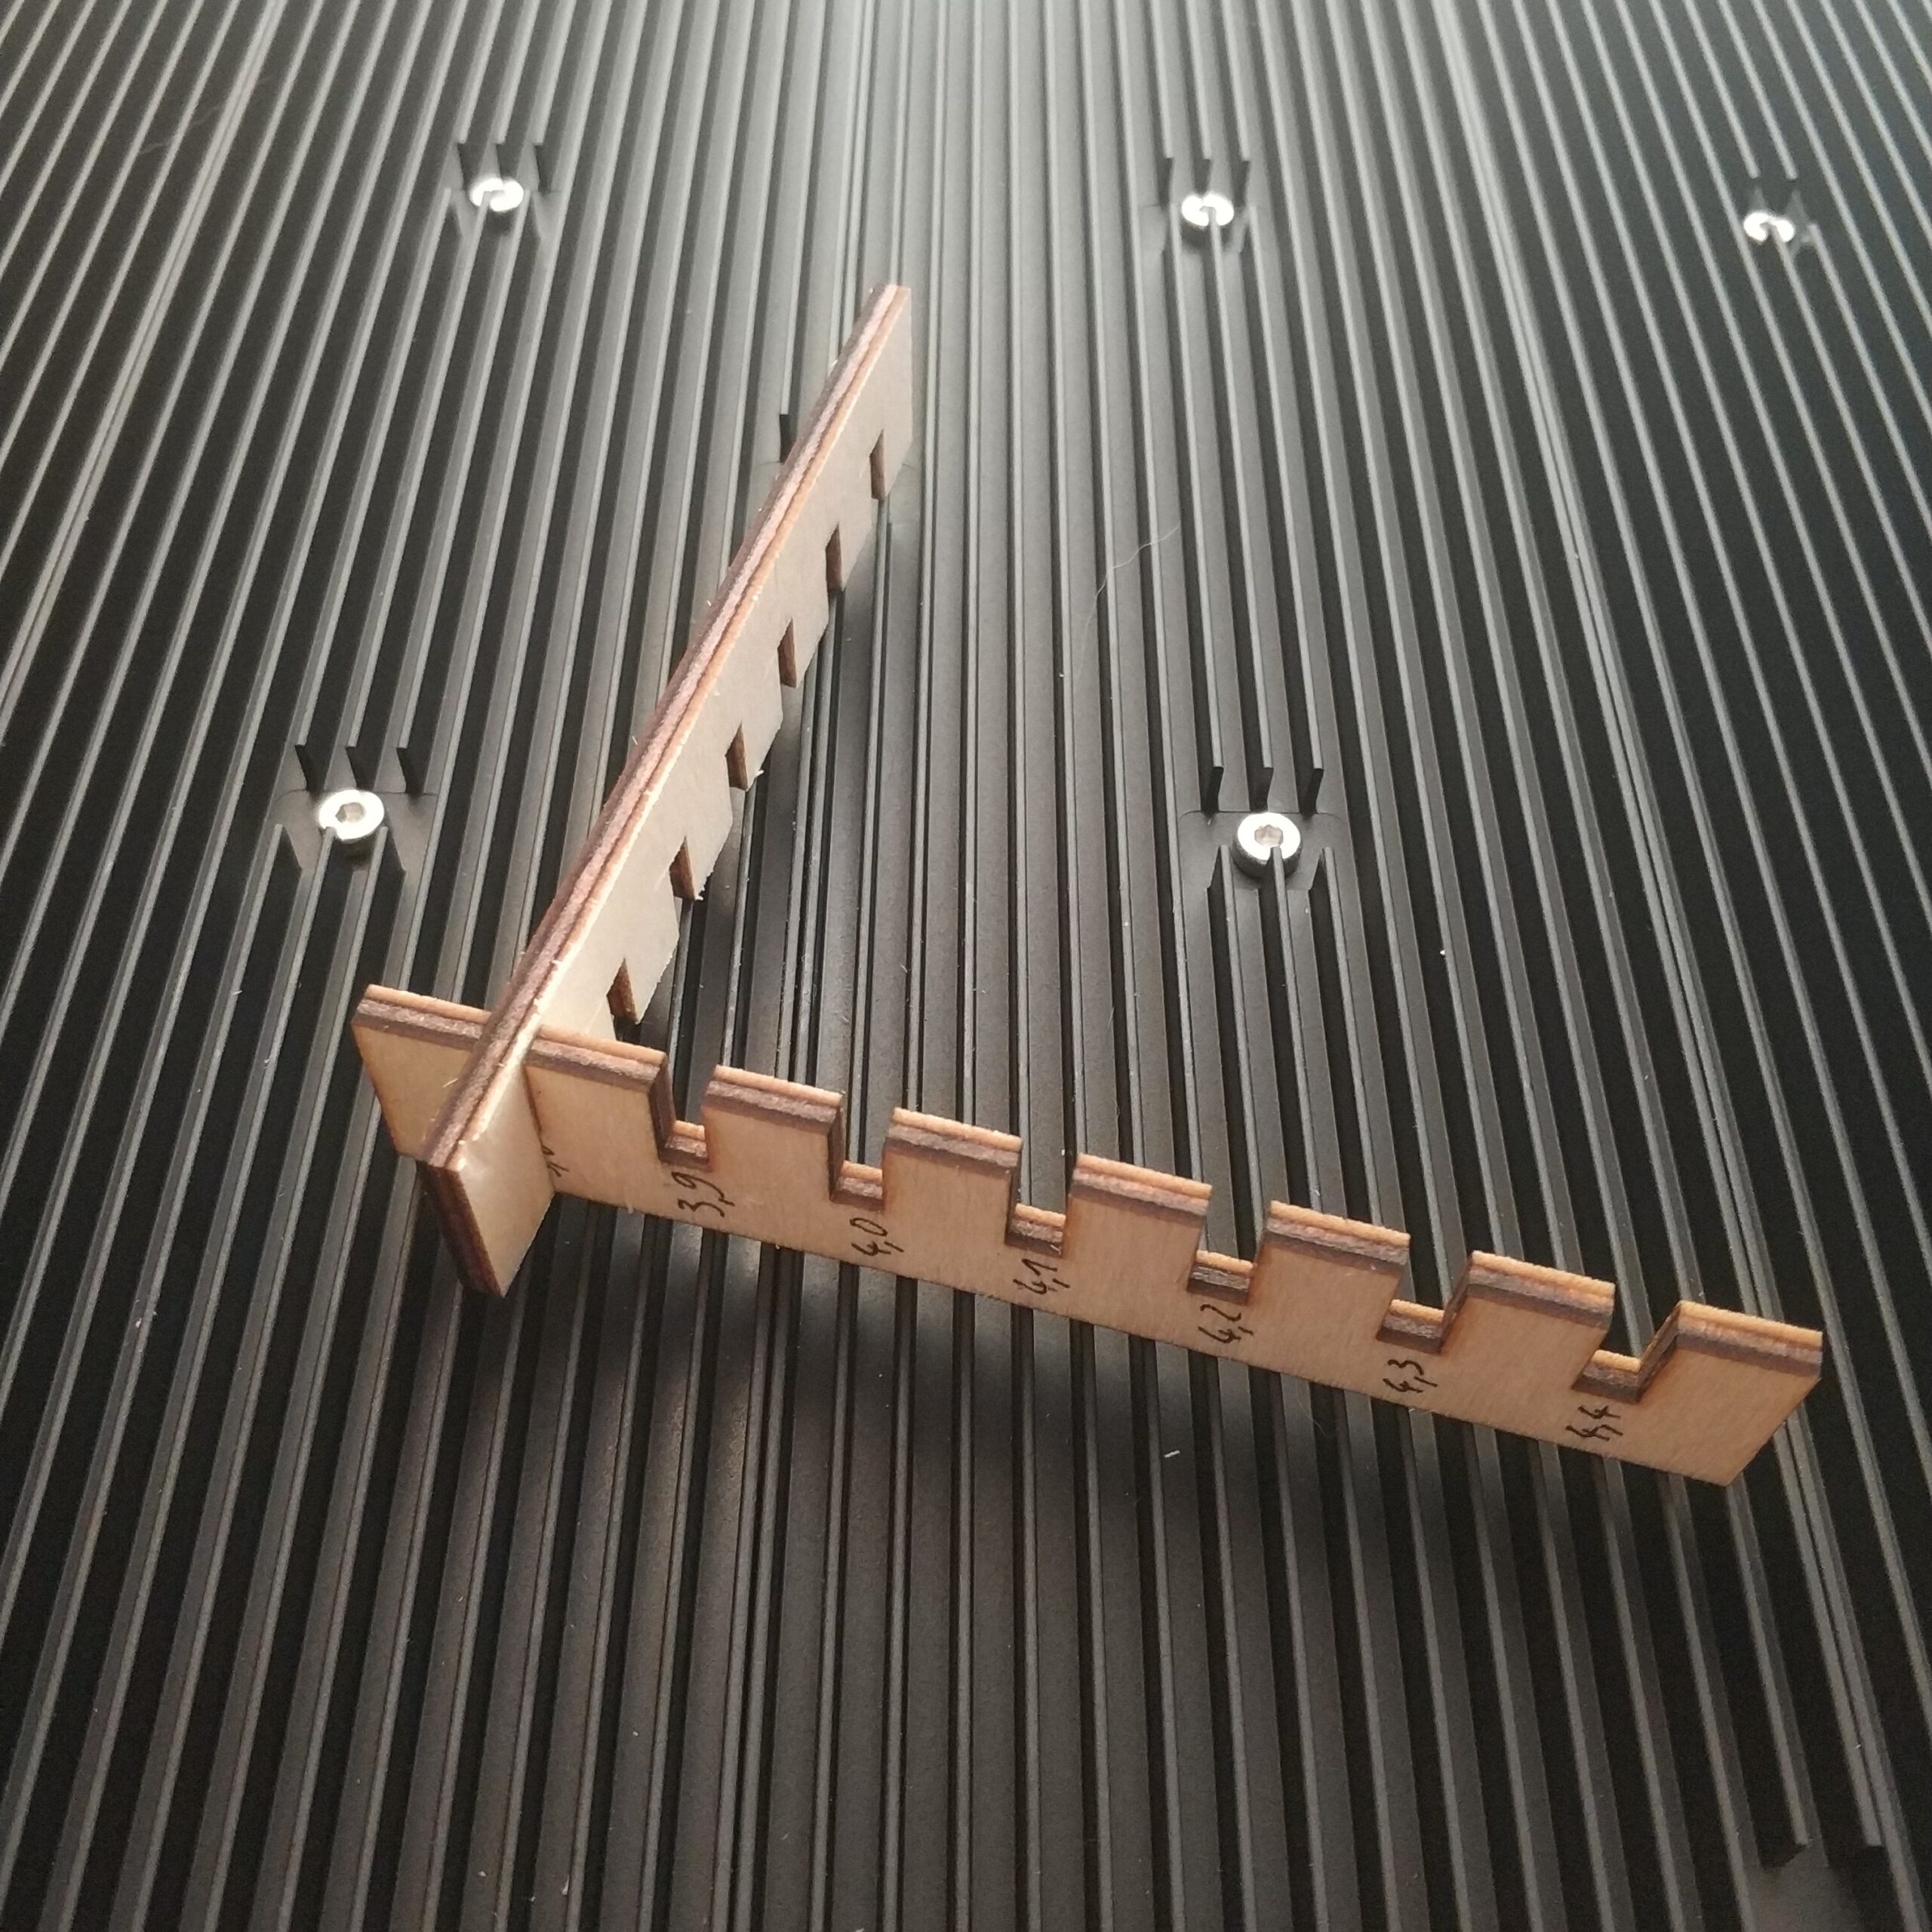
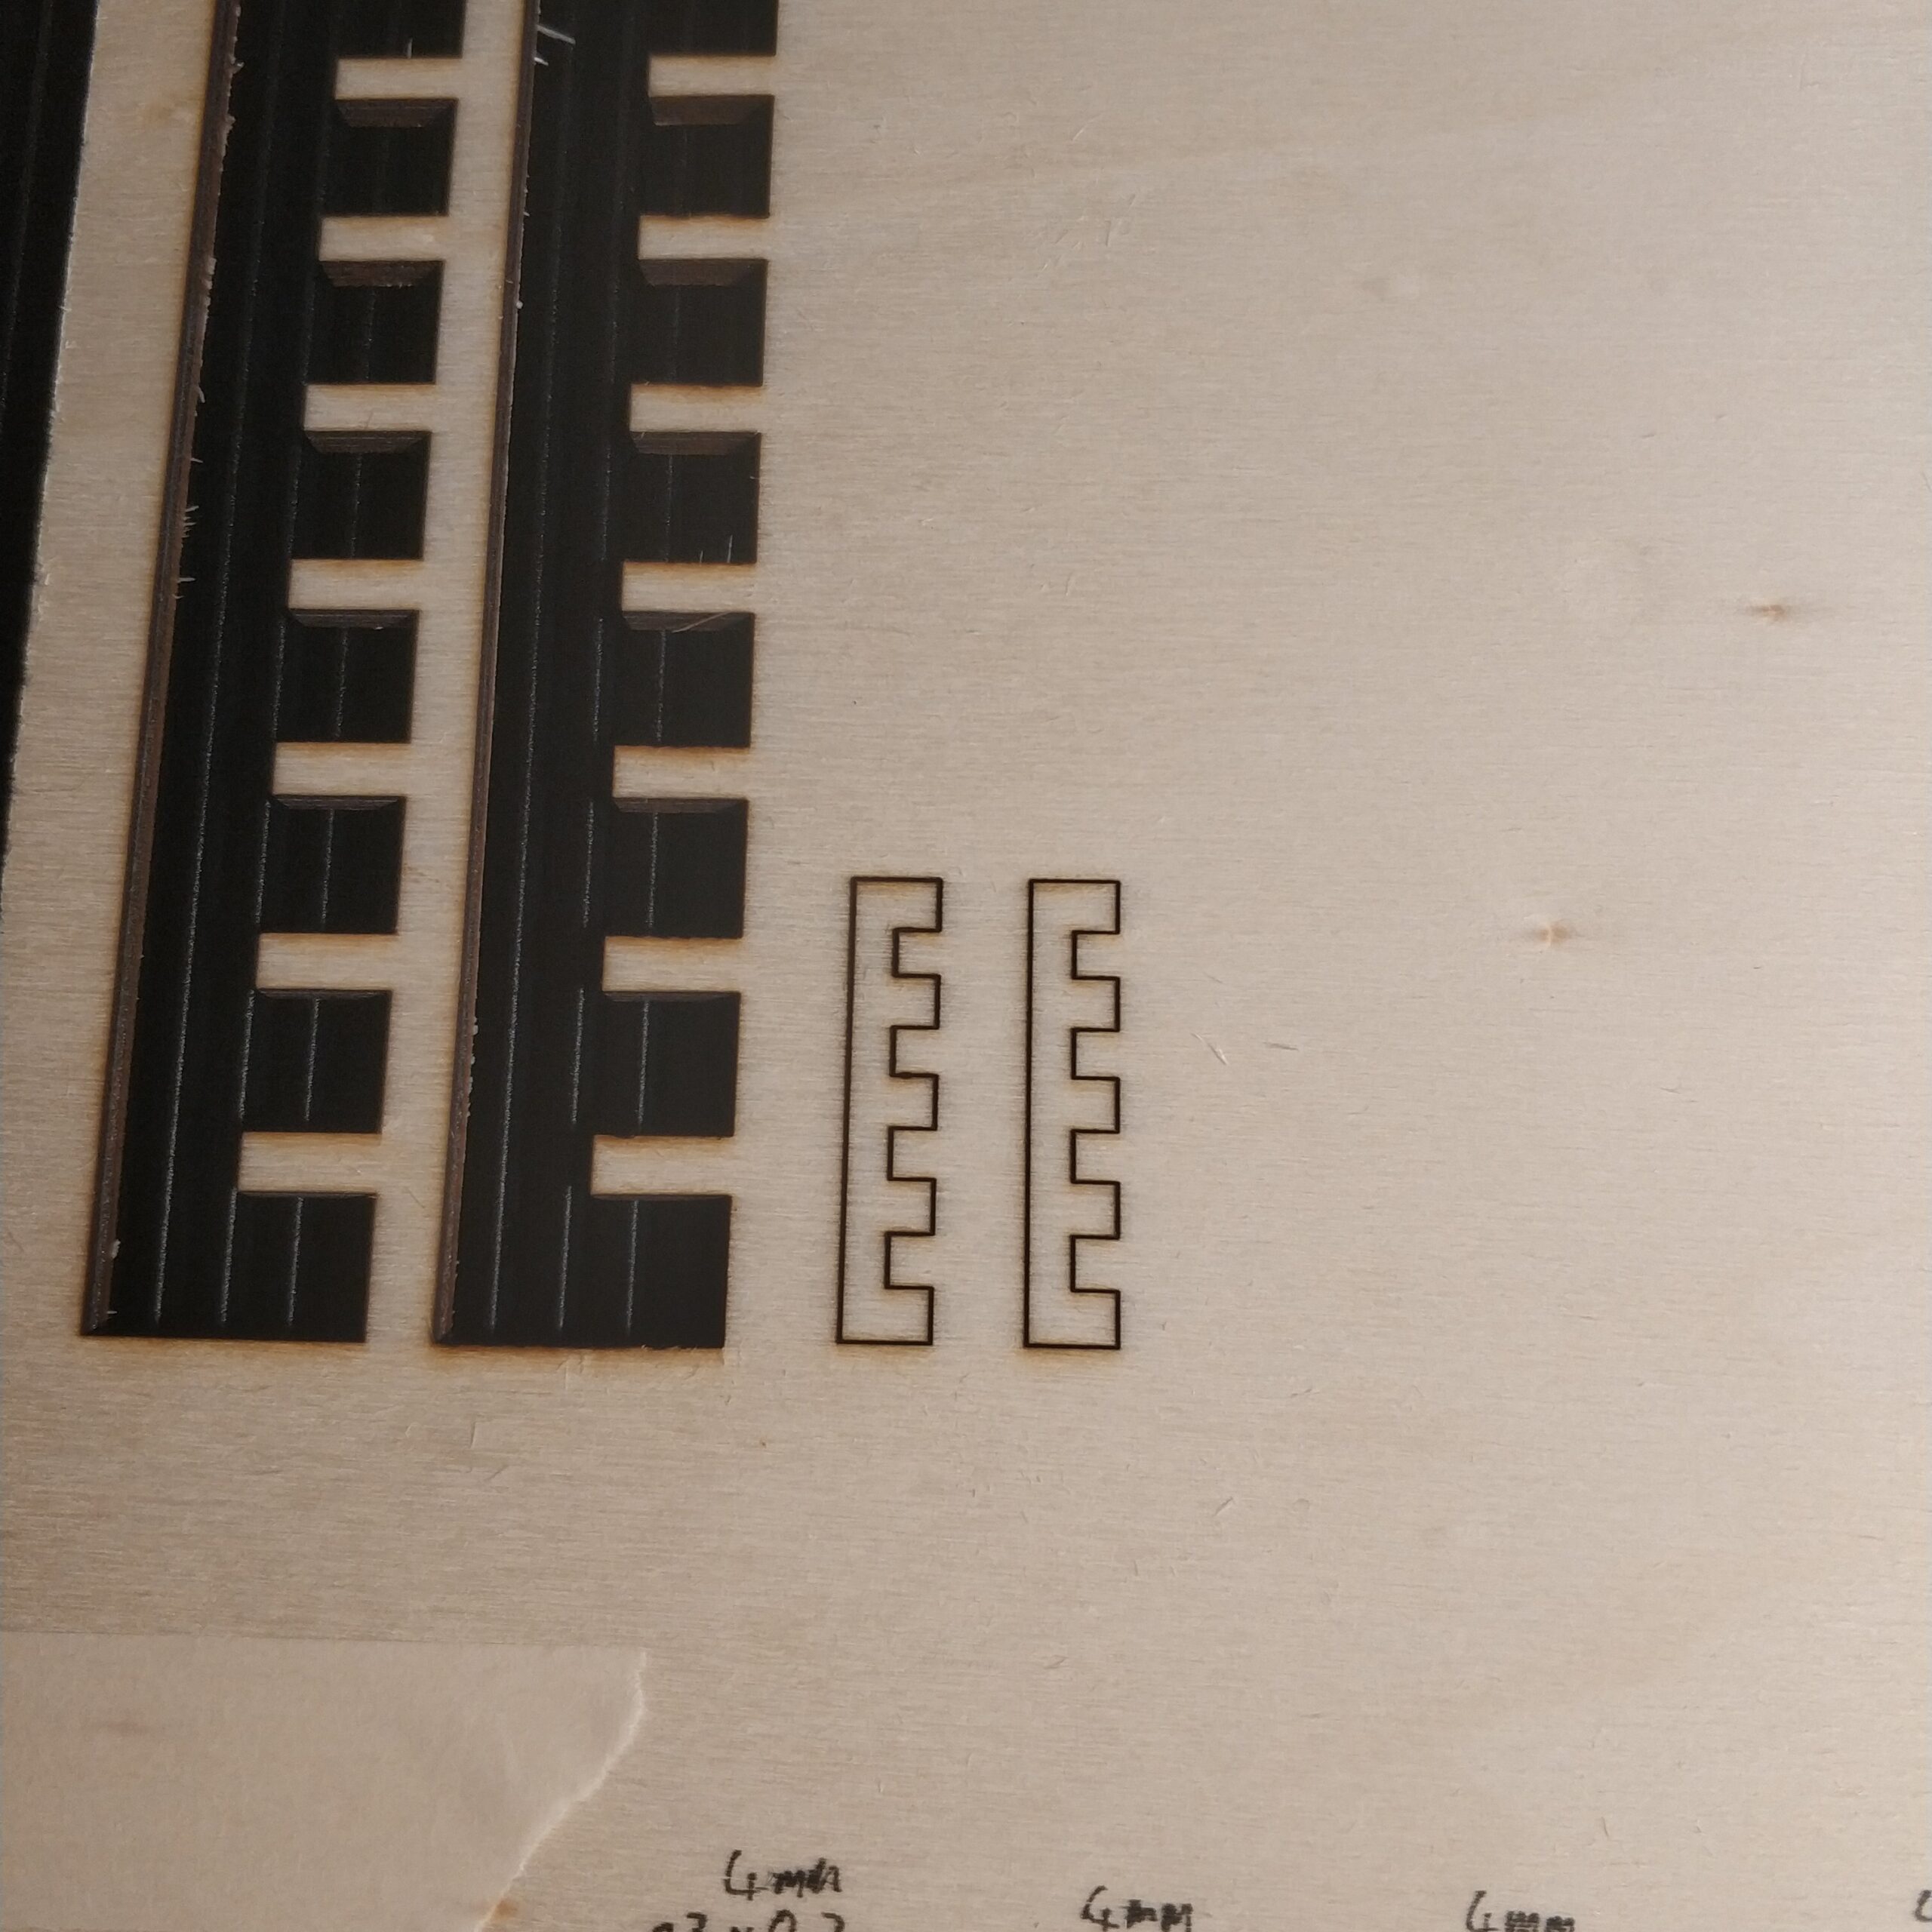
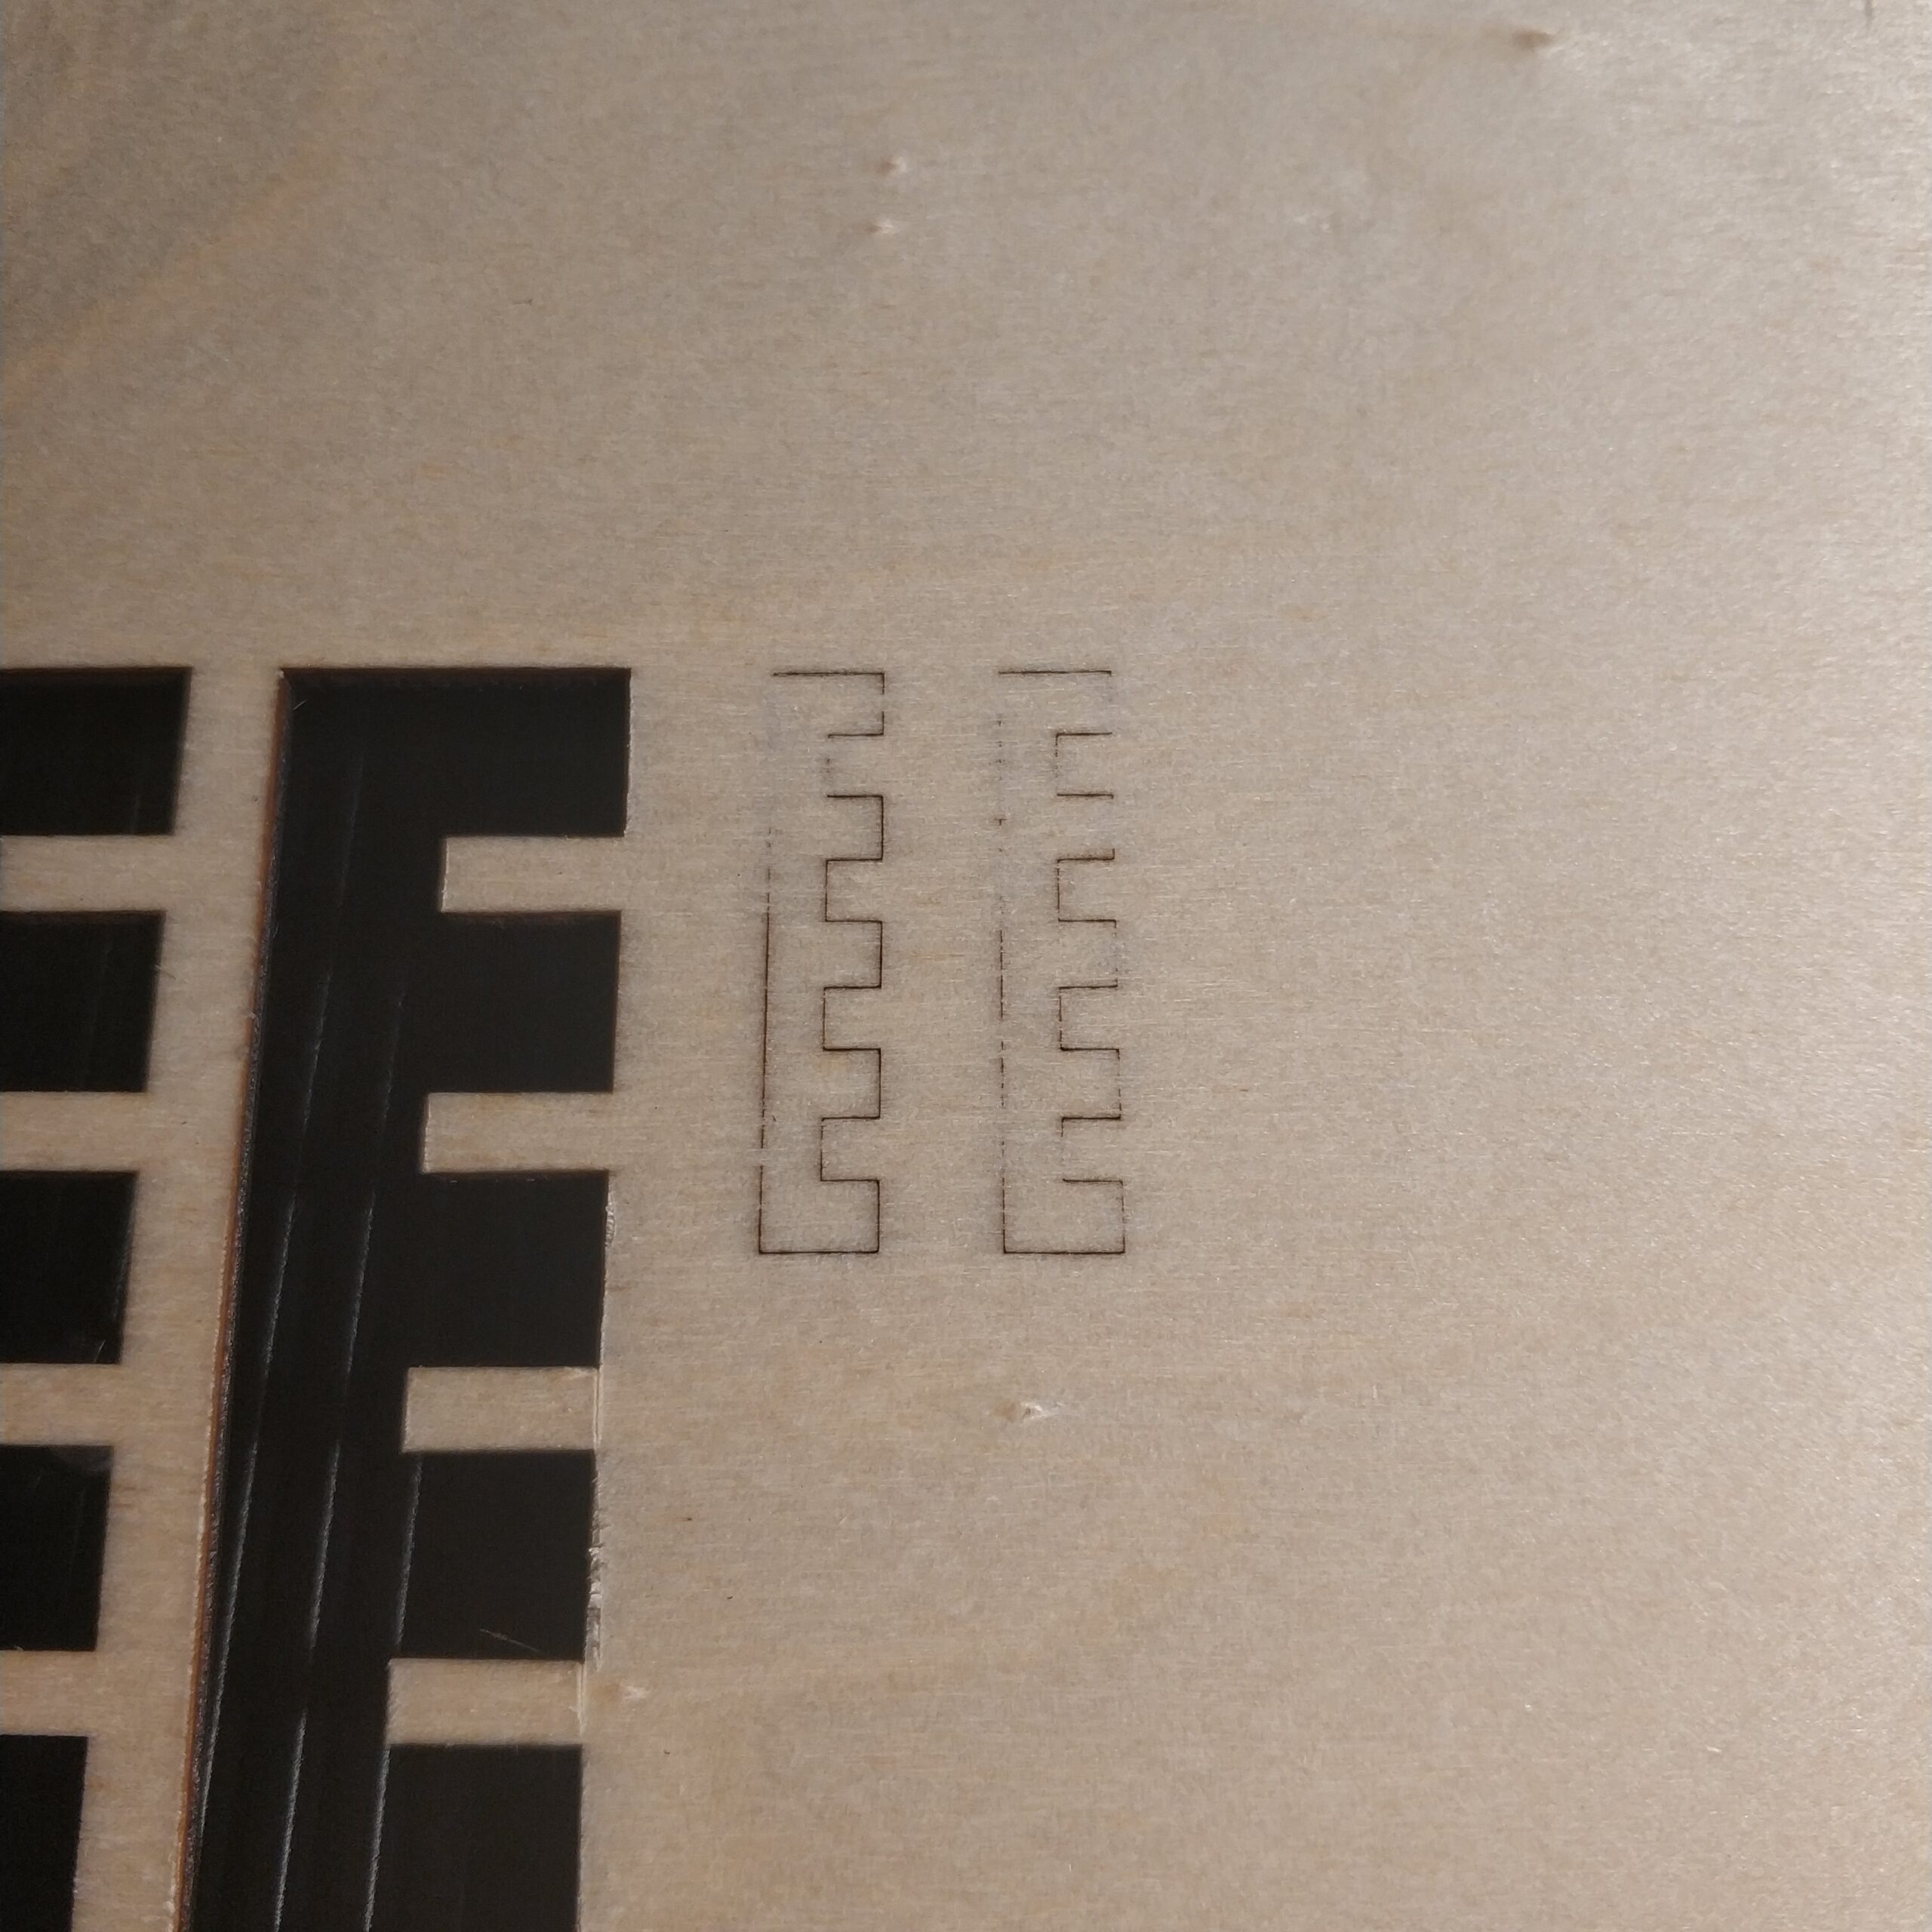
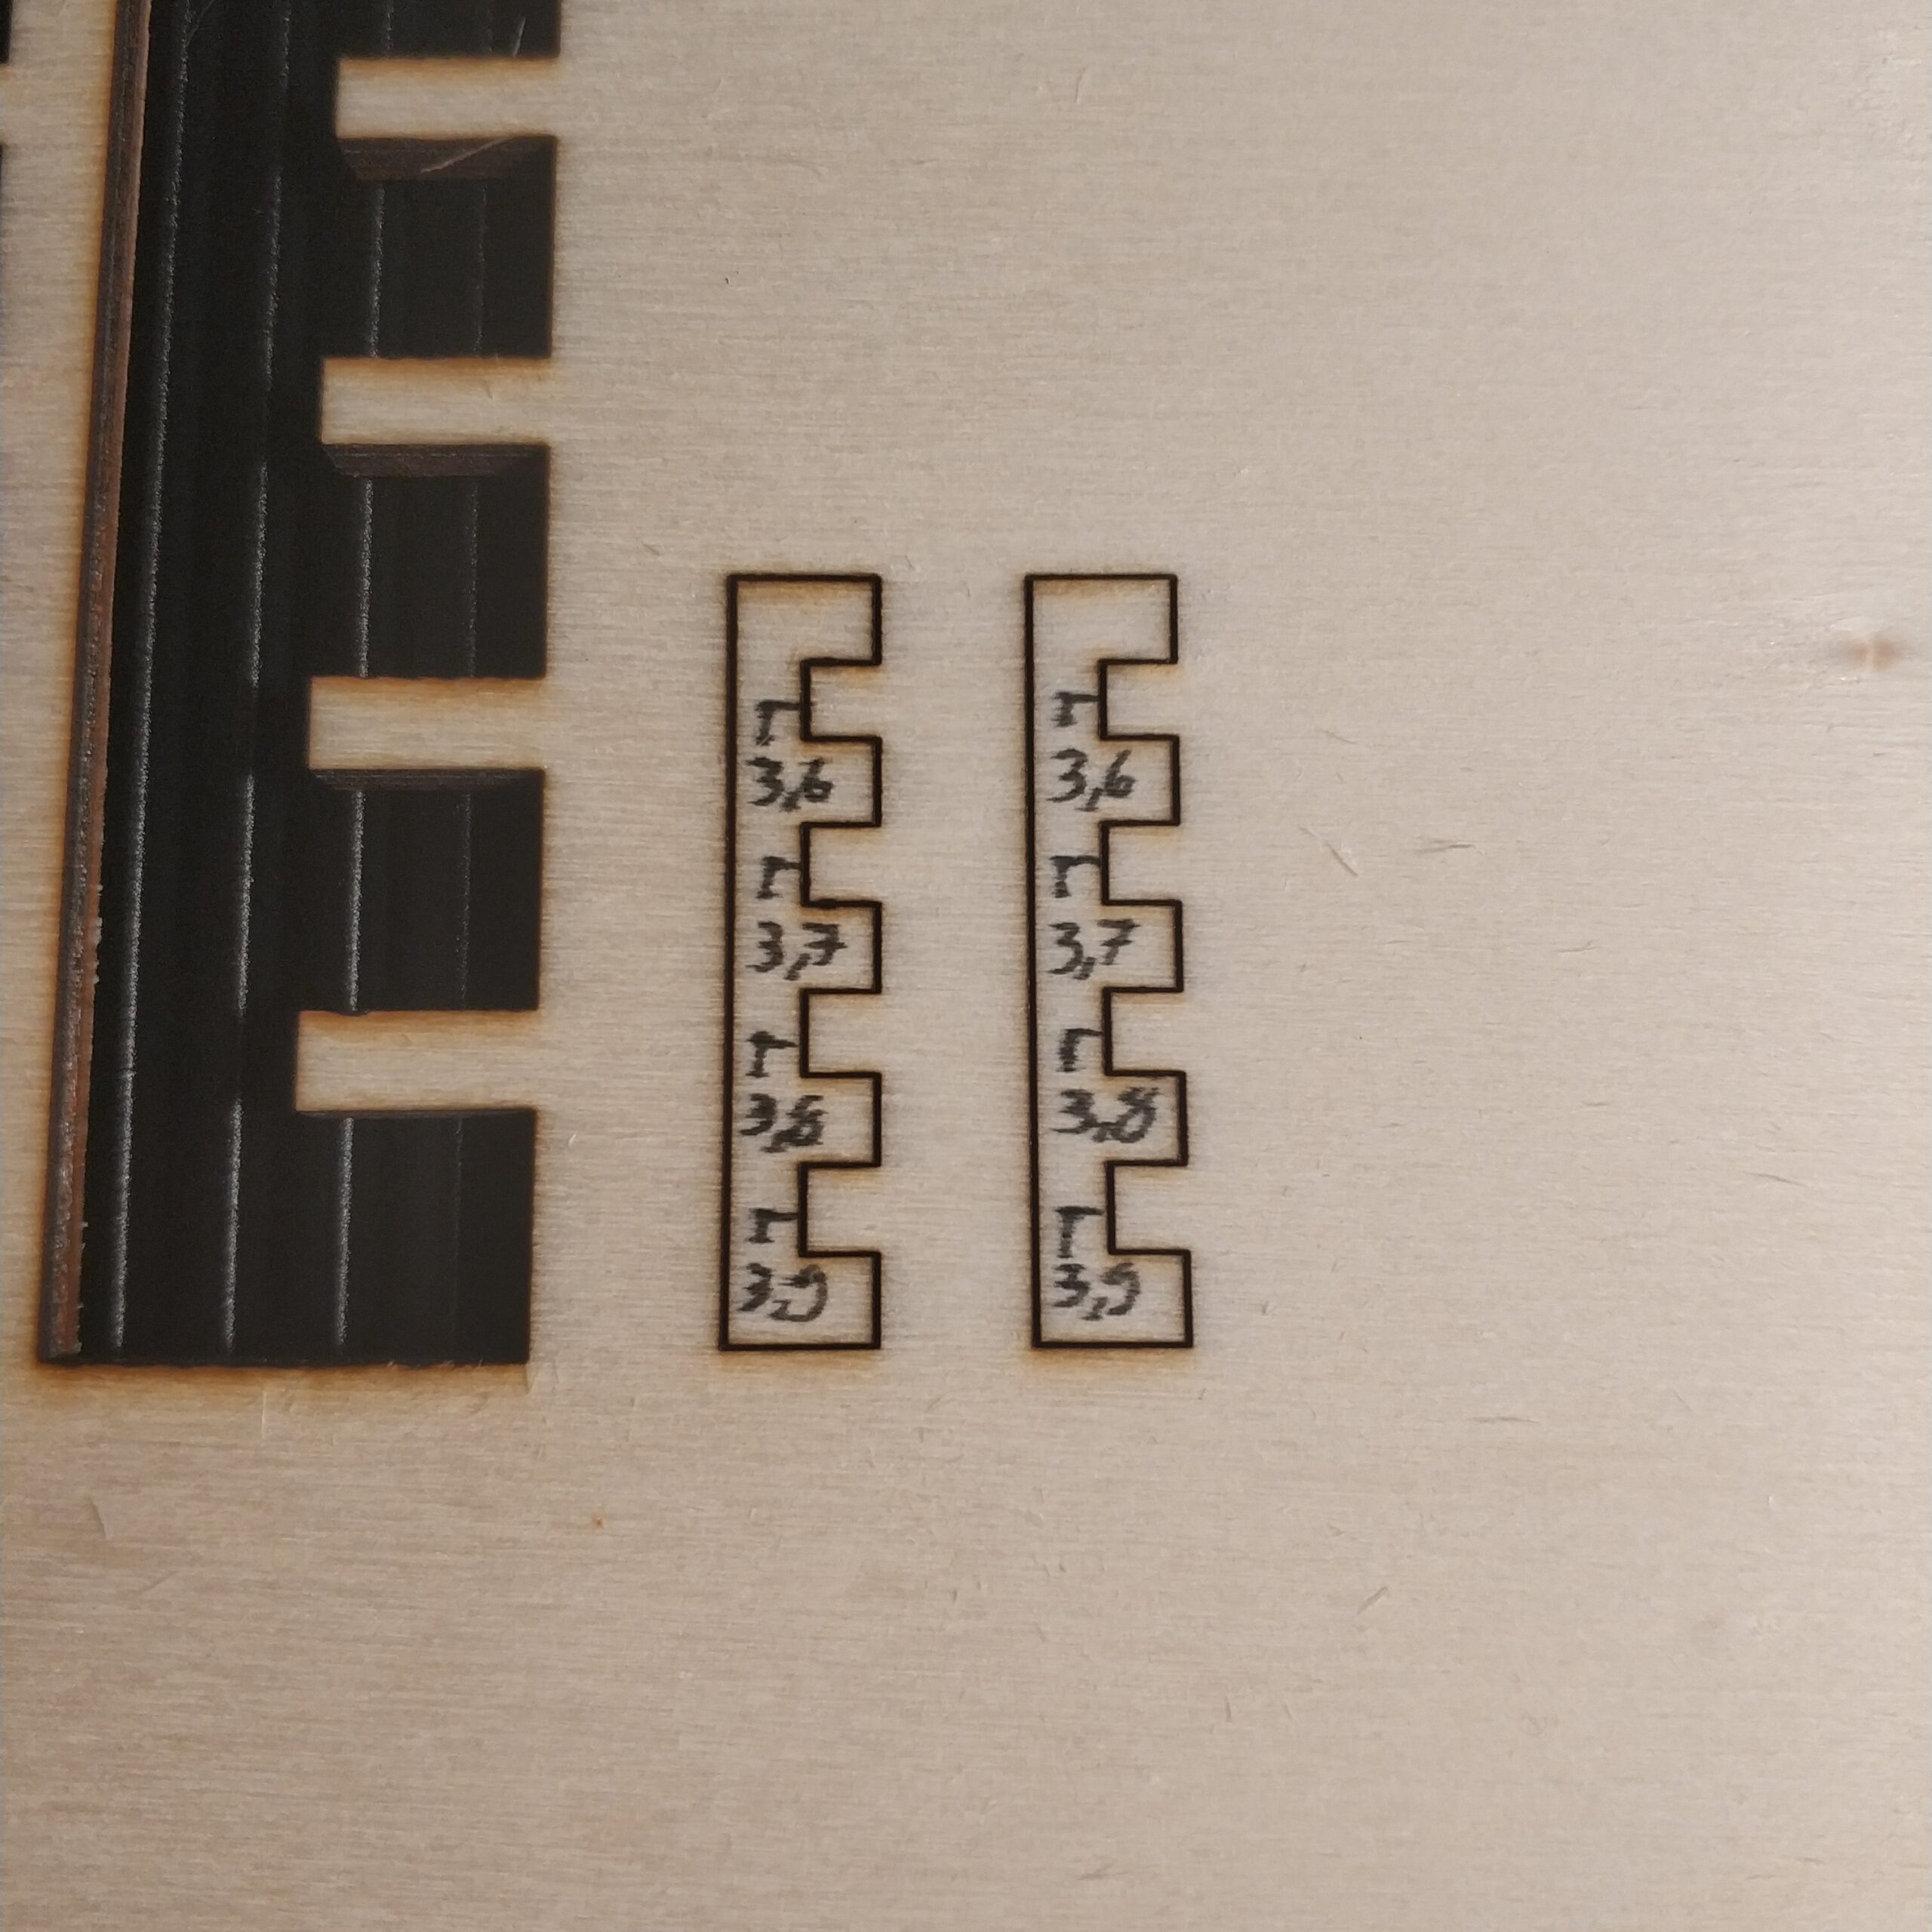
For the tolerance test I lasered out two rectangular parts with grooves of different widths. I could then put these together and see which one had the best fit. Strictly speaking, the material was only 3.8mm thick and that was exactly the groove width that fitted best. Especially for this purpose, I will design my own gauge in order to determine the correct groove widths for any plug-in constructions right after the determined cutting parameters. But this will be a later project.

When it comes to the groove tolerance, it should always be remembered that the laser beam has a conical shape, with the power being maximum at the tip. Nevertheless, the other areas of the laser beam also have the potential to vaporize material. Therefore, the lasered gap on the top is always wider than on the bottom. This can lead to problems, especially with thicker materials.

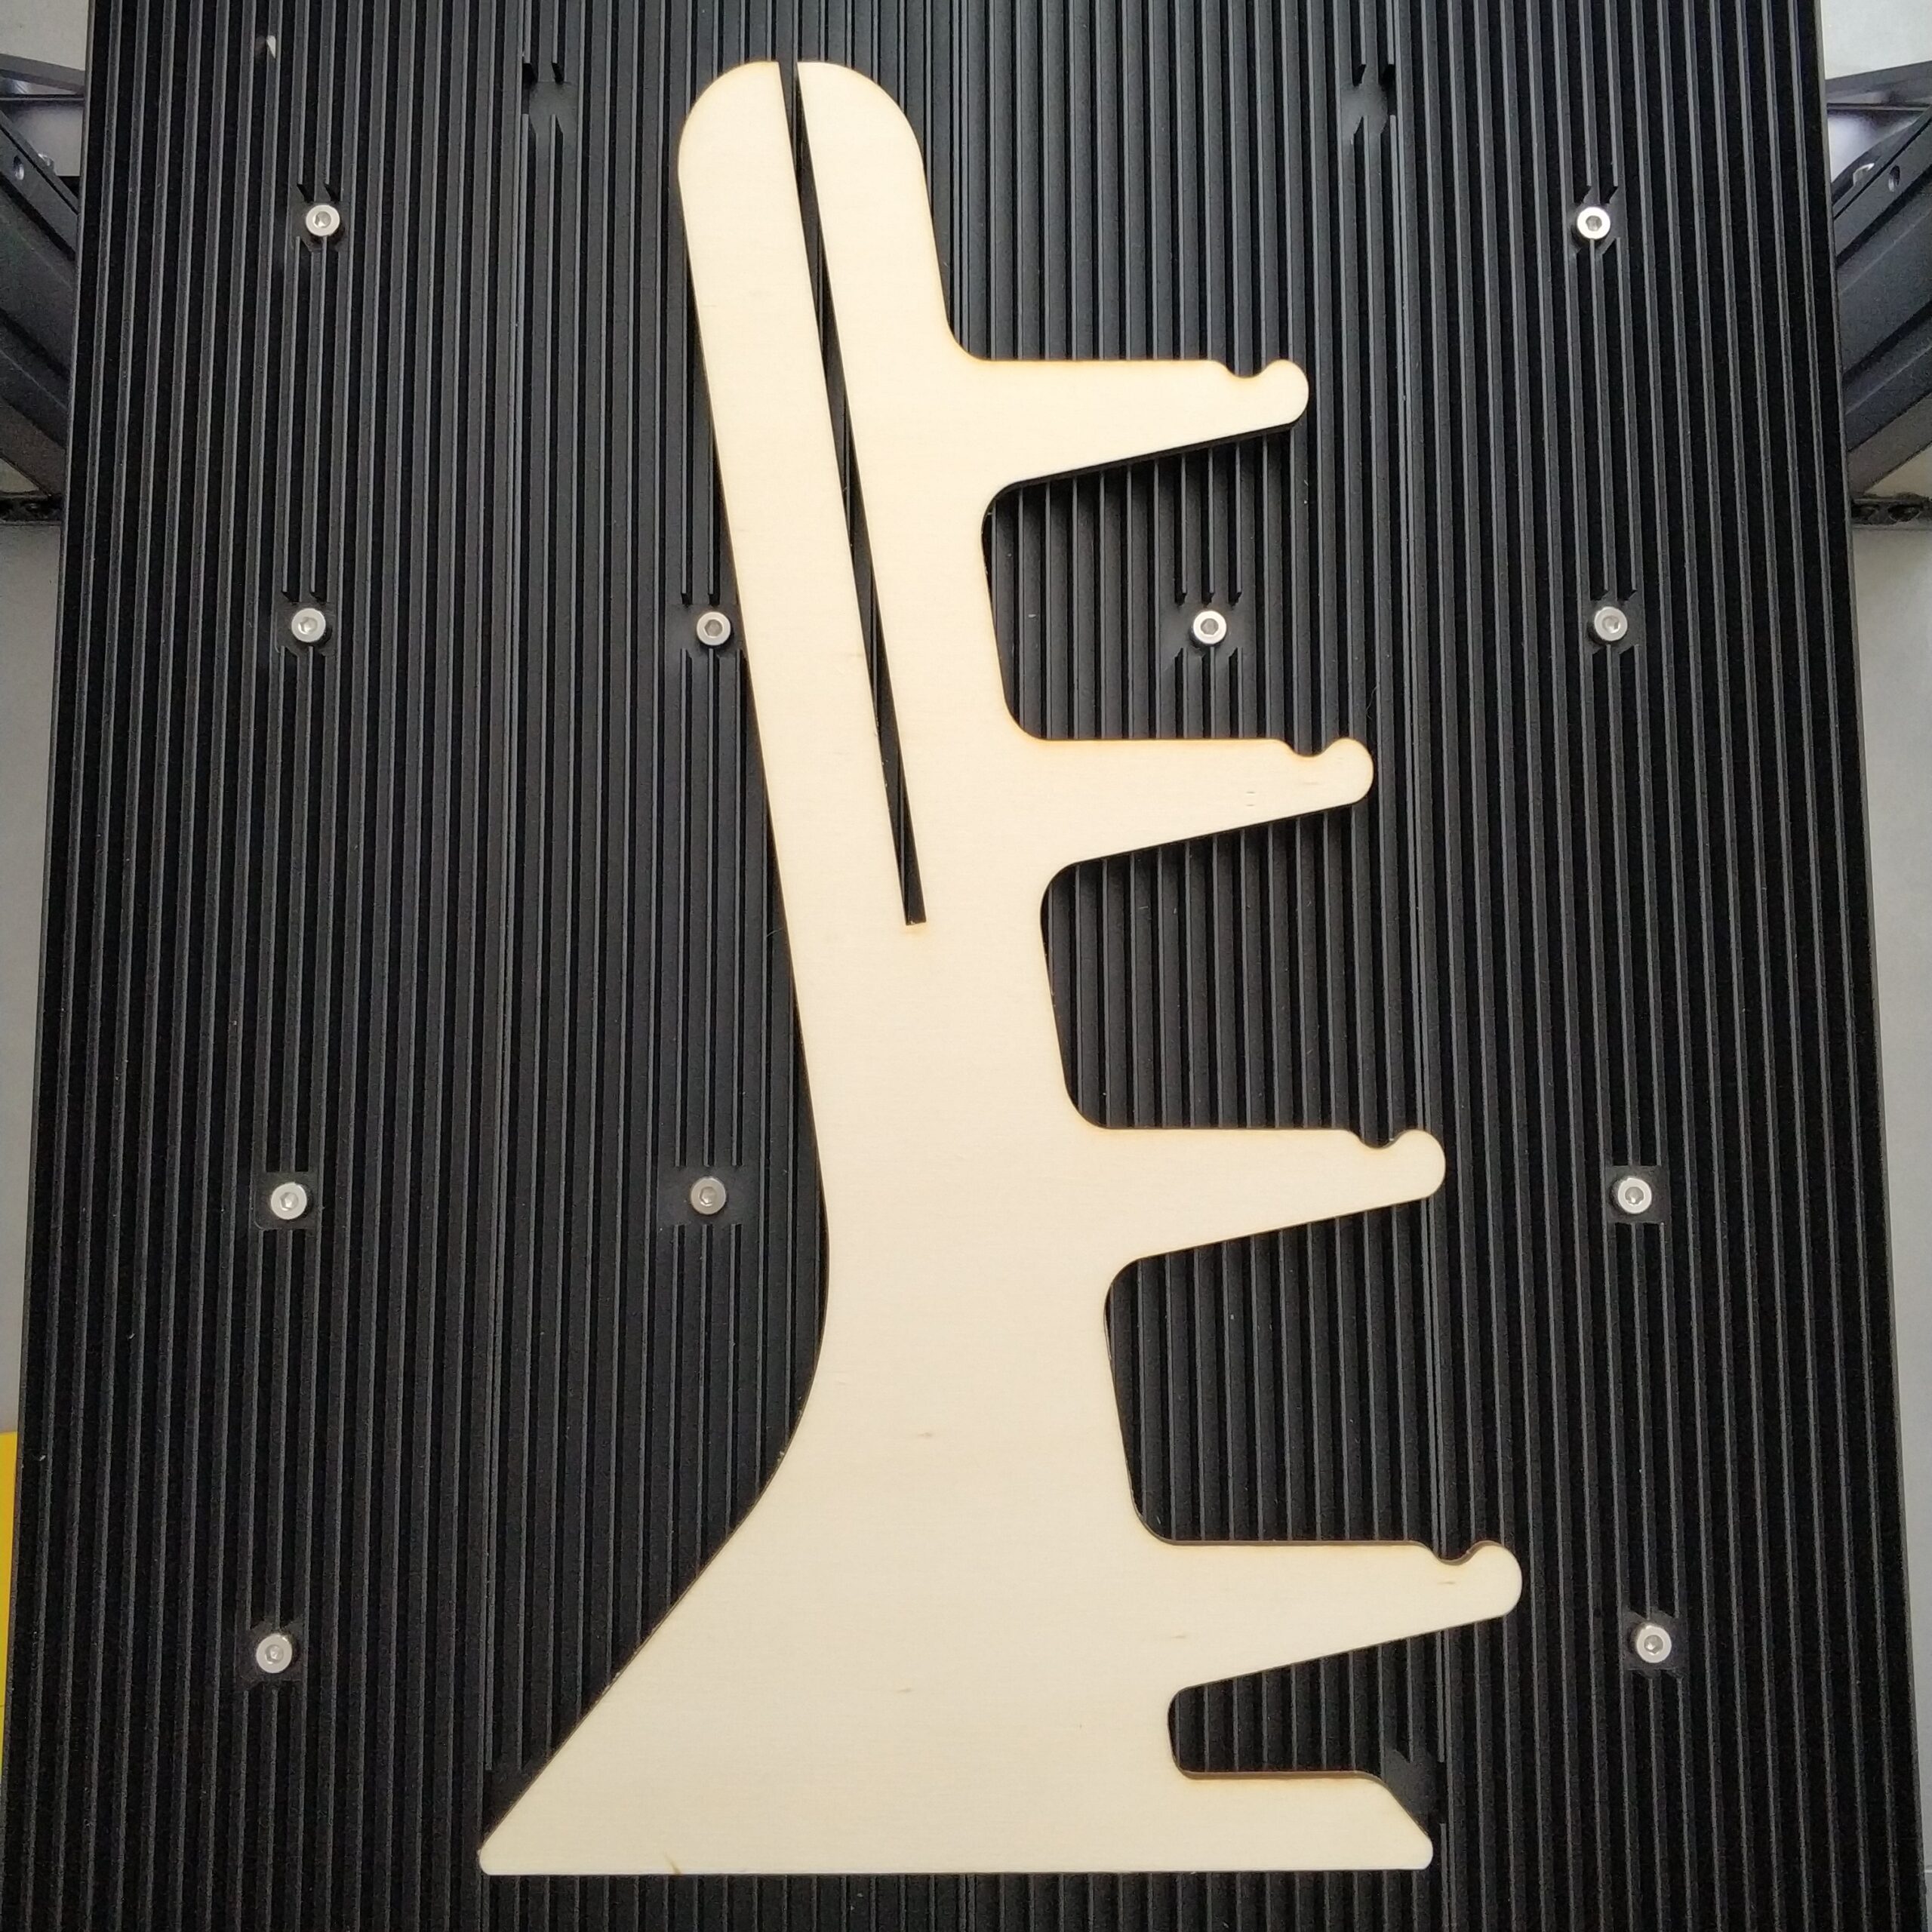
For the nosepiece I used the following cutting values:

350mm/min, 2x 11x -0.35mm in Z

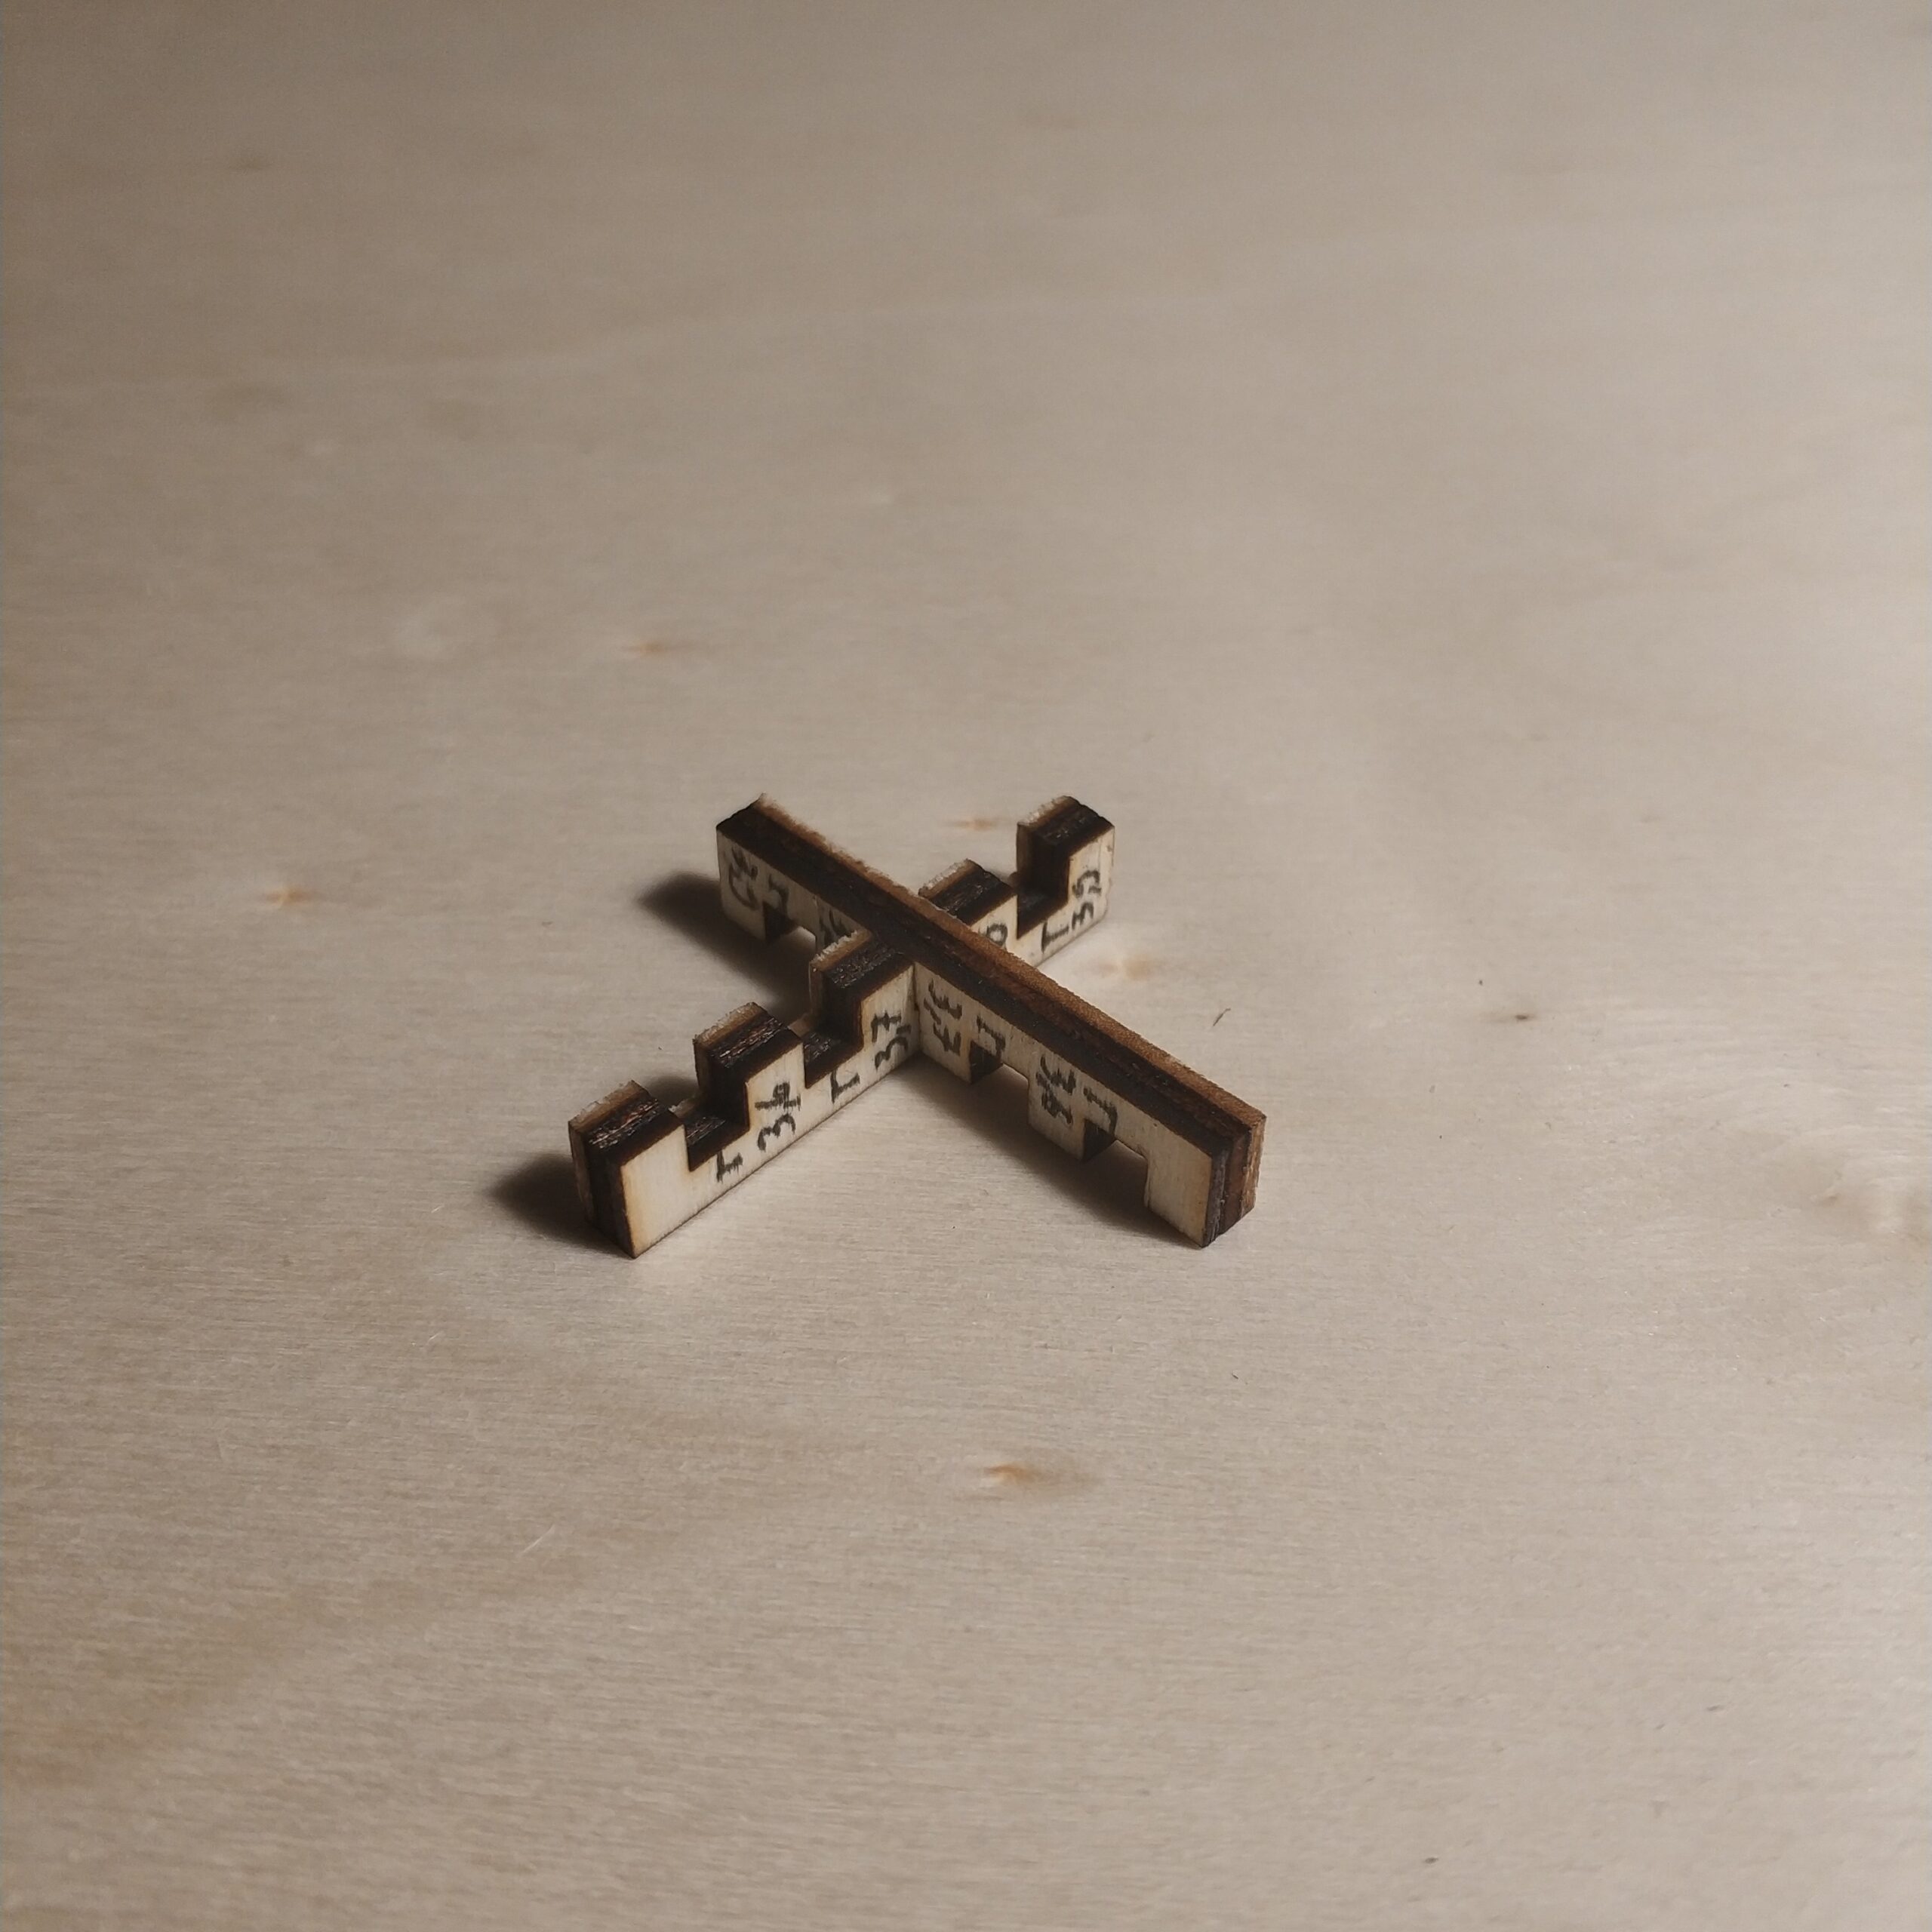
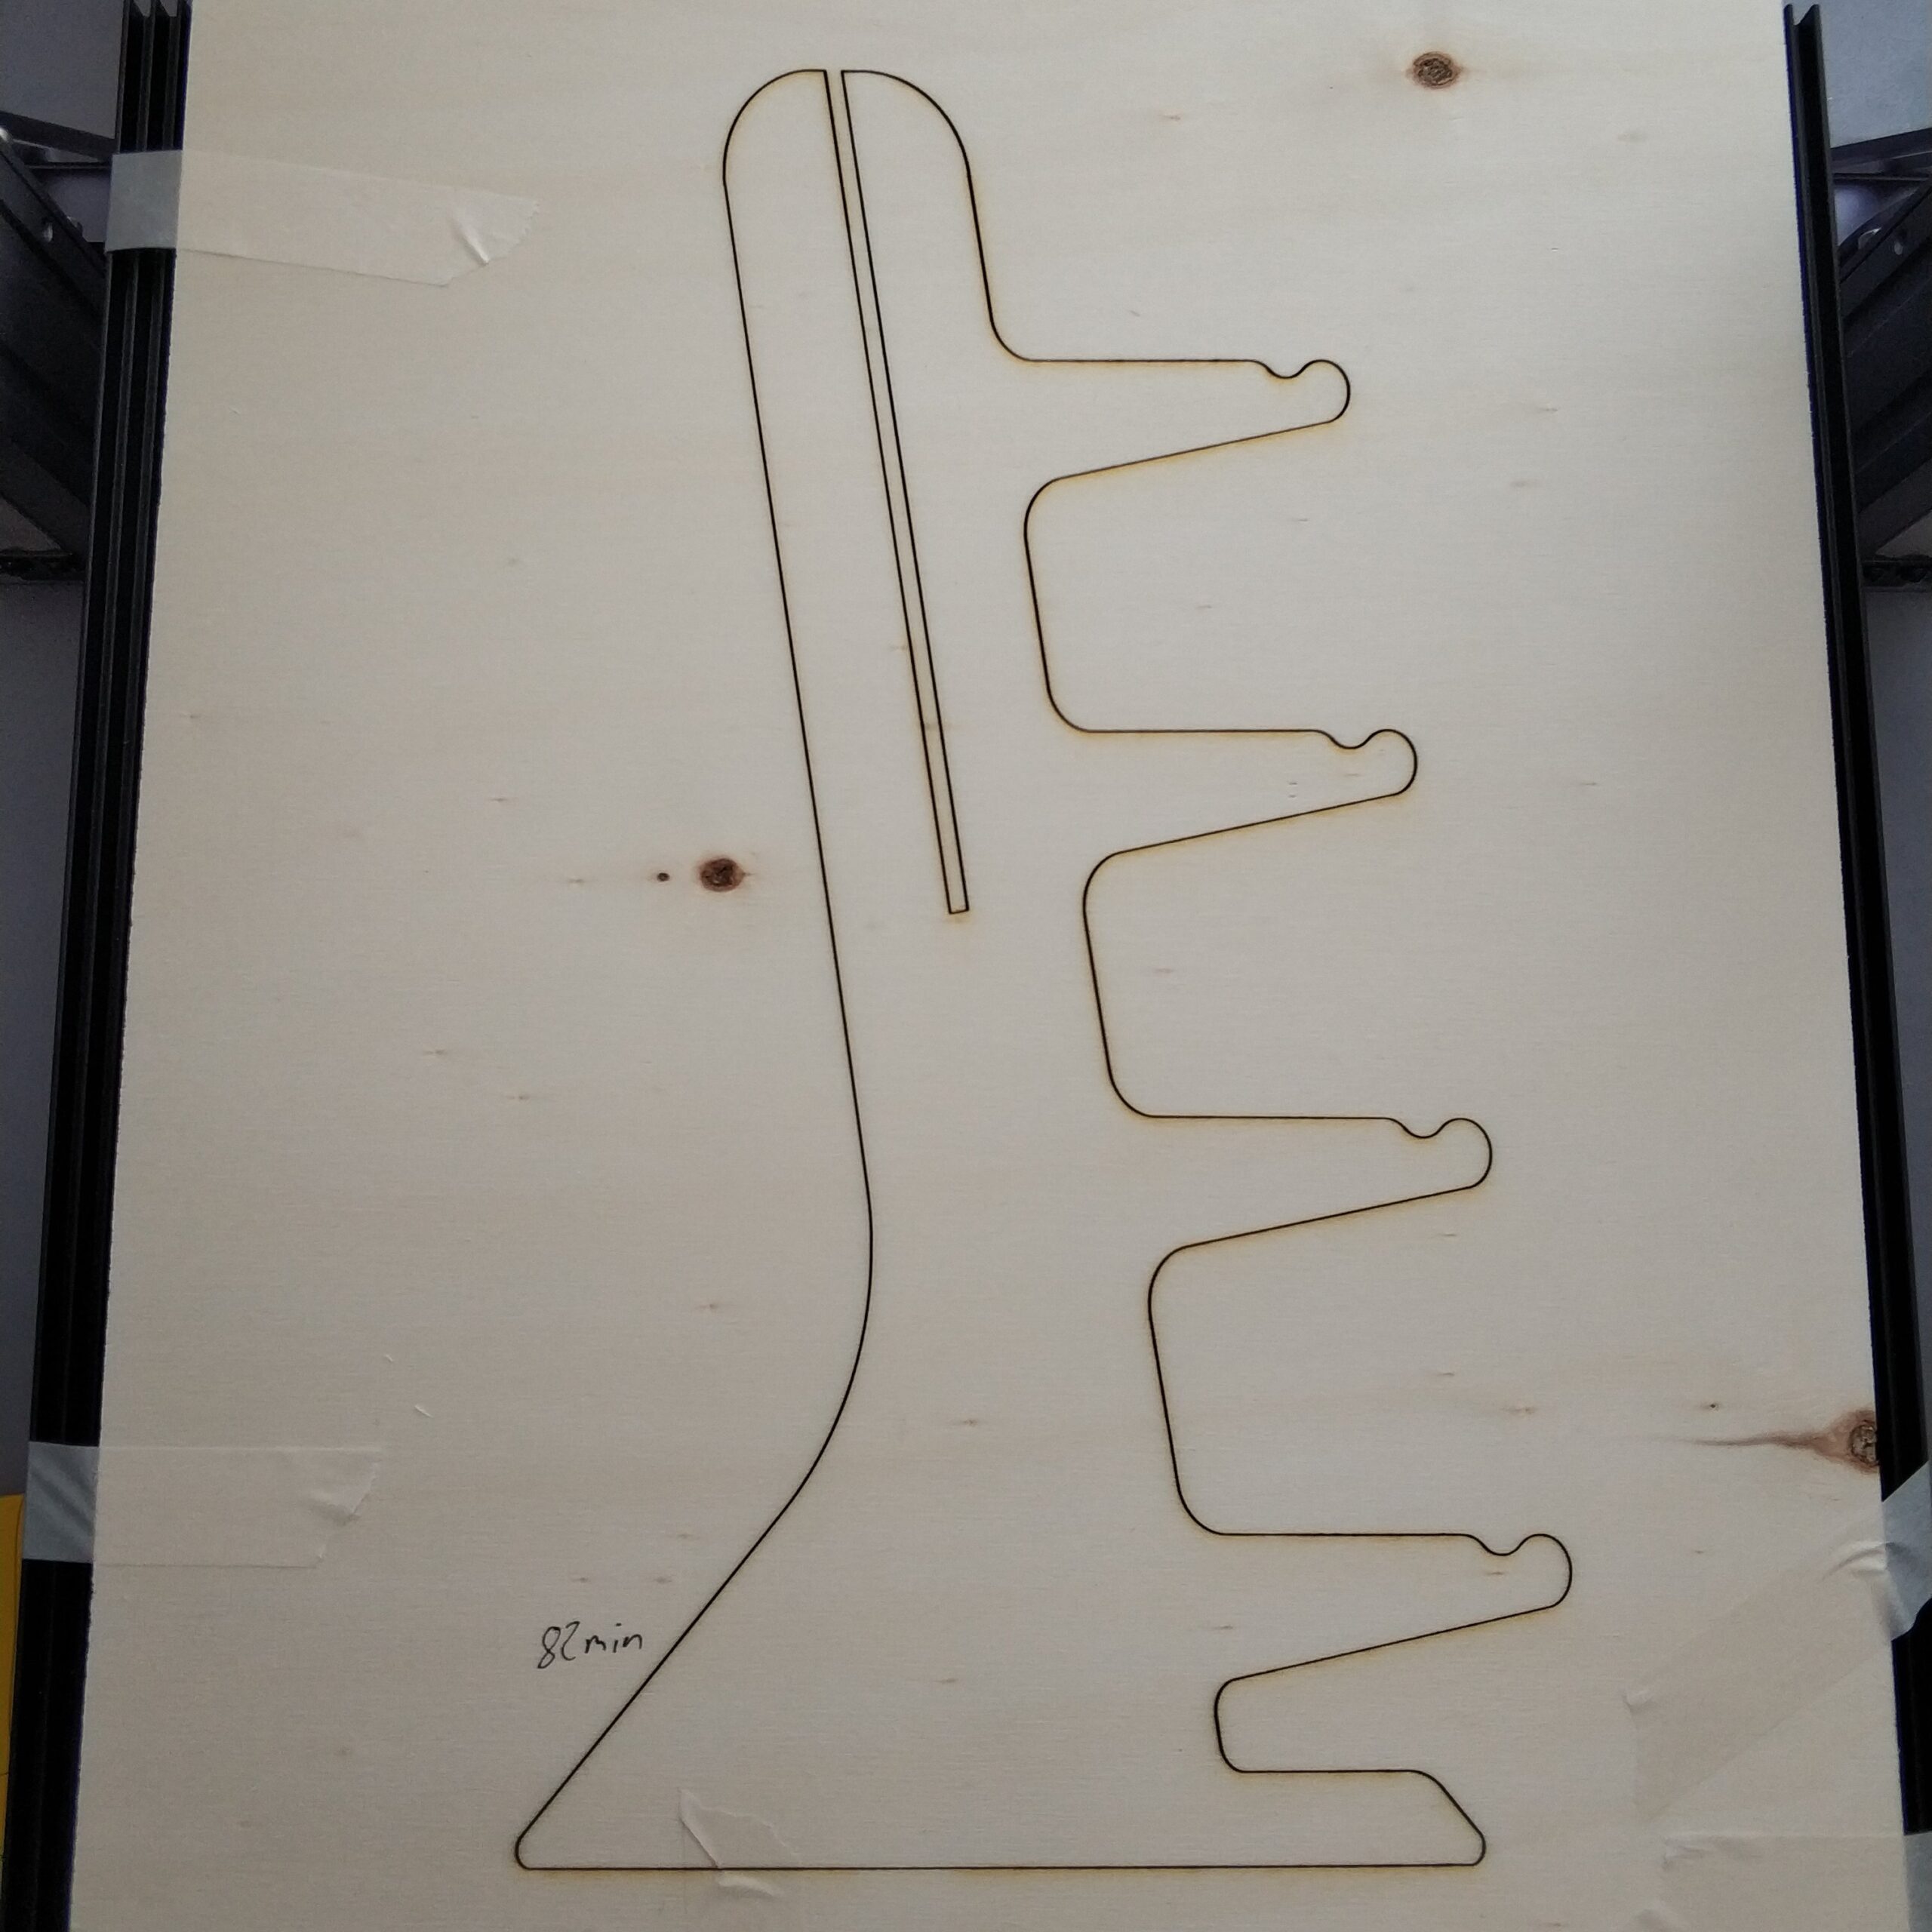
The lasering took 1h 18min for this. In the tests, I was able to cleanly cut out a square. However, this did not work with the nose clip part (see photos). Especially on the last 1/10 mm there were big problems with fibers lying across the wood. The nature of the material through the material also seems to have an influence on whether the laser can cut through the material completely. So I had to cut the contour from the back with a knife and partially break out the part. Since I wanted to avoid that in the next part, I did new tests again. I also wanted to try to save time, since 2 times 11 runs took a long time. This has led to the following cutting values:

200mm/min, 10x -0.4mm in Z

What worked well in the test was again a failure in practice. Where the sum of the completely cut paths is a little more. Although the parts are only partially comparable, the time savings I hoped for were practically non-existent. This is probably due to the halved cutting speed. A 1600mW laser is just not a laser sword.

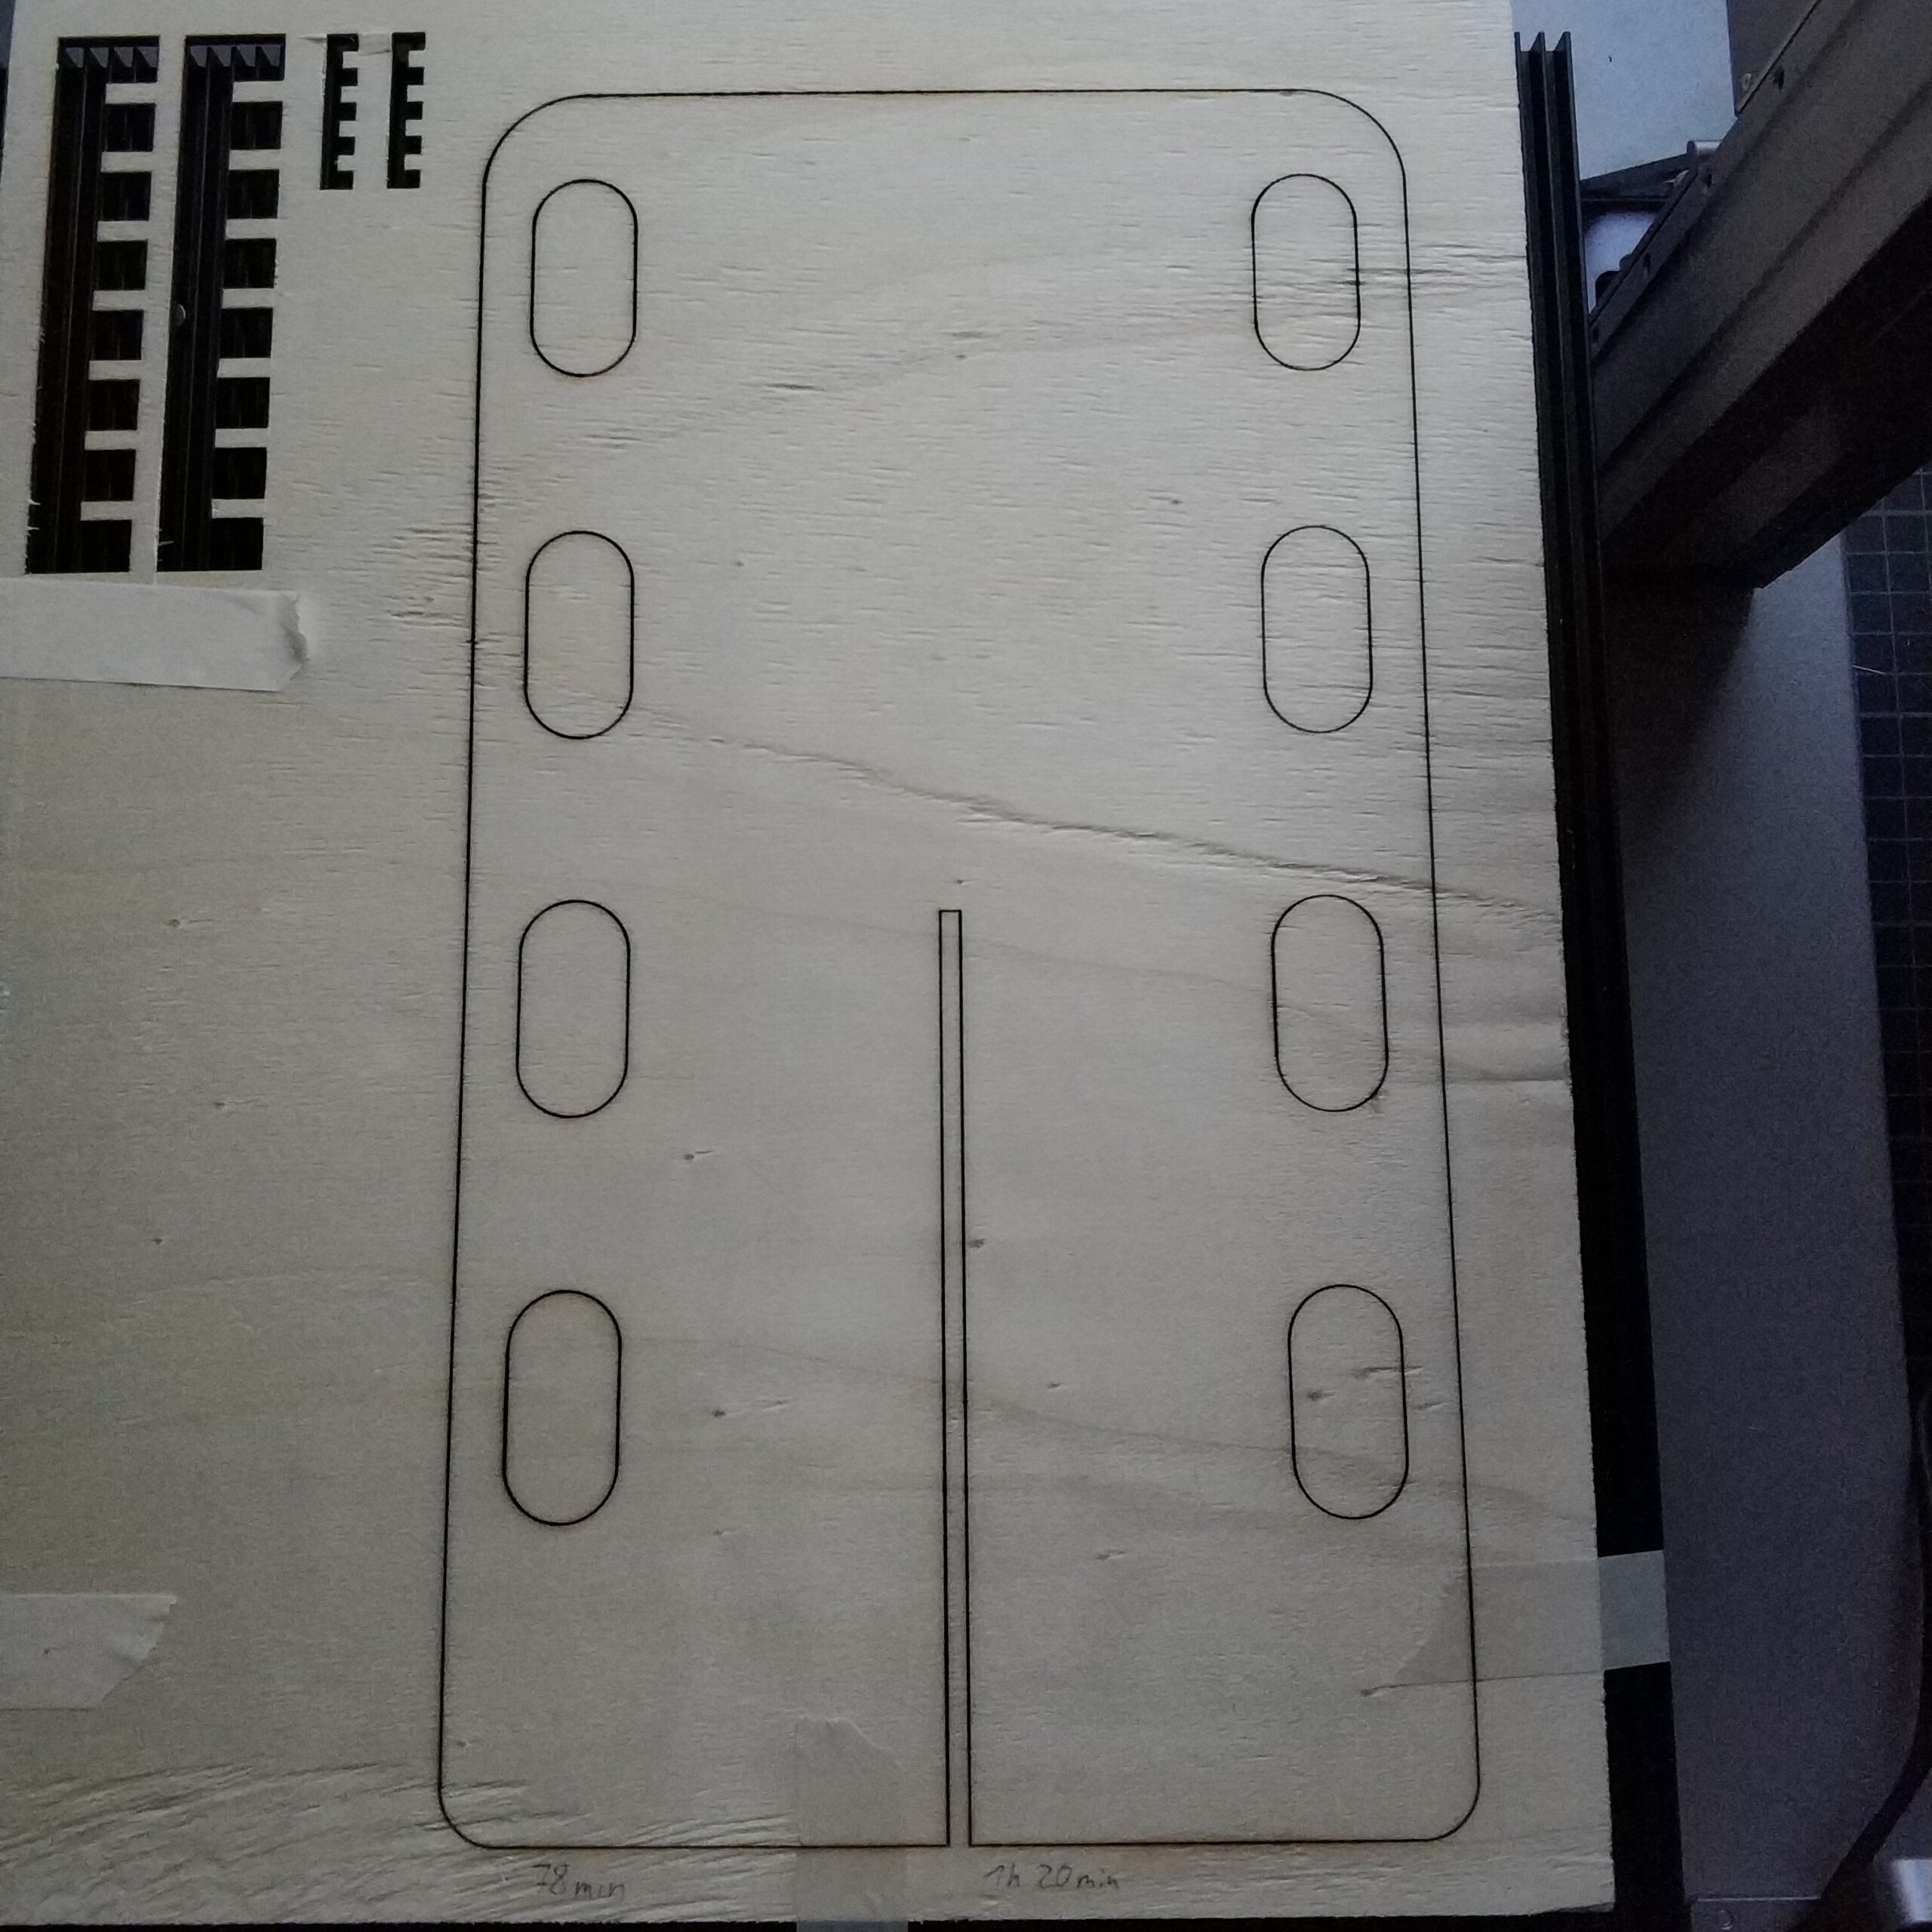
After putting them together, I was concerned that, on the one hand, the slots were not long enough and the top and bottom edge were not aligned with each other. The latter also regardless of the slot length. I then decided to have the top edge aligned and to align one part of the bottom by sawing off. A circular saw attachment for the multitool was very helpful for this.

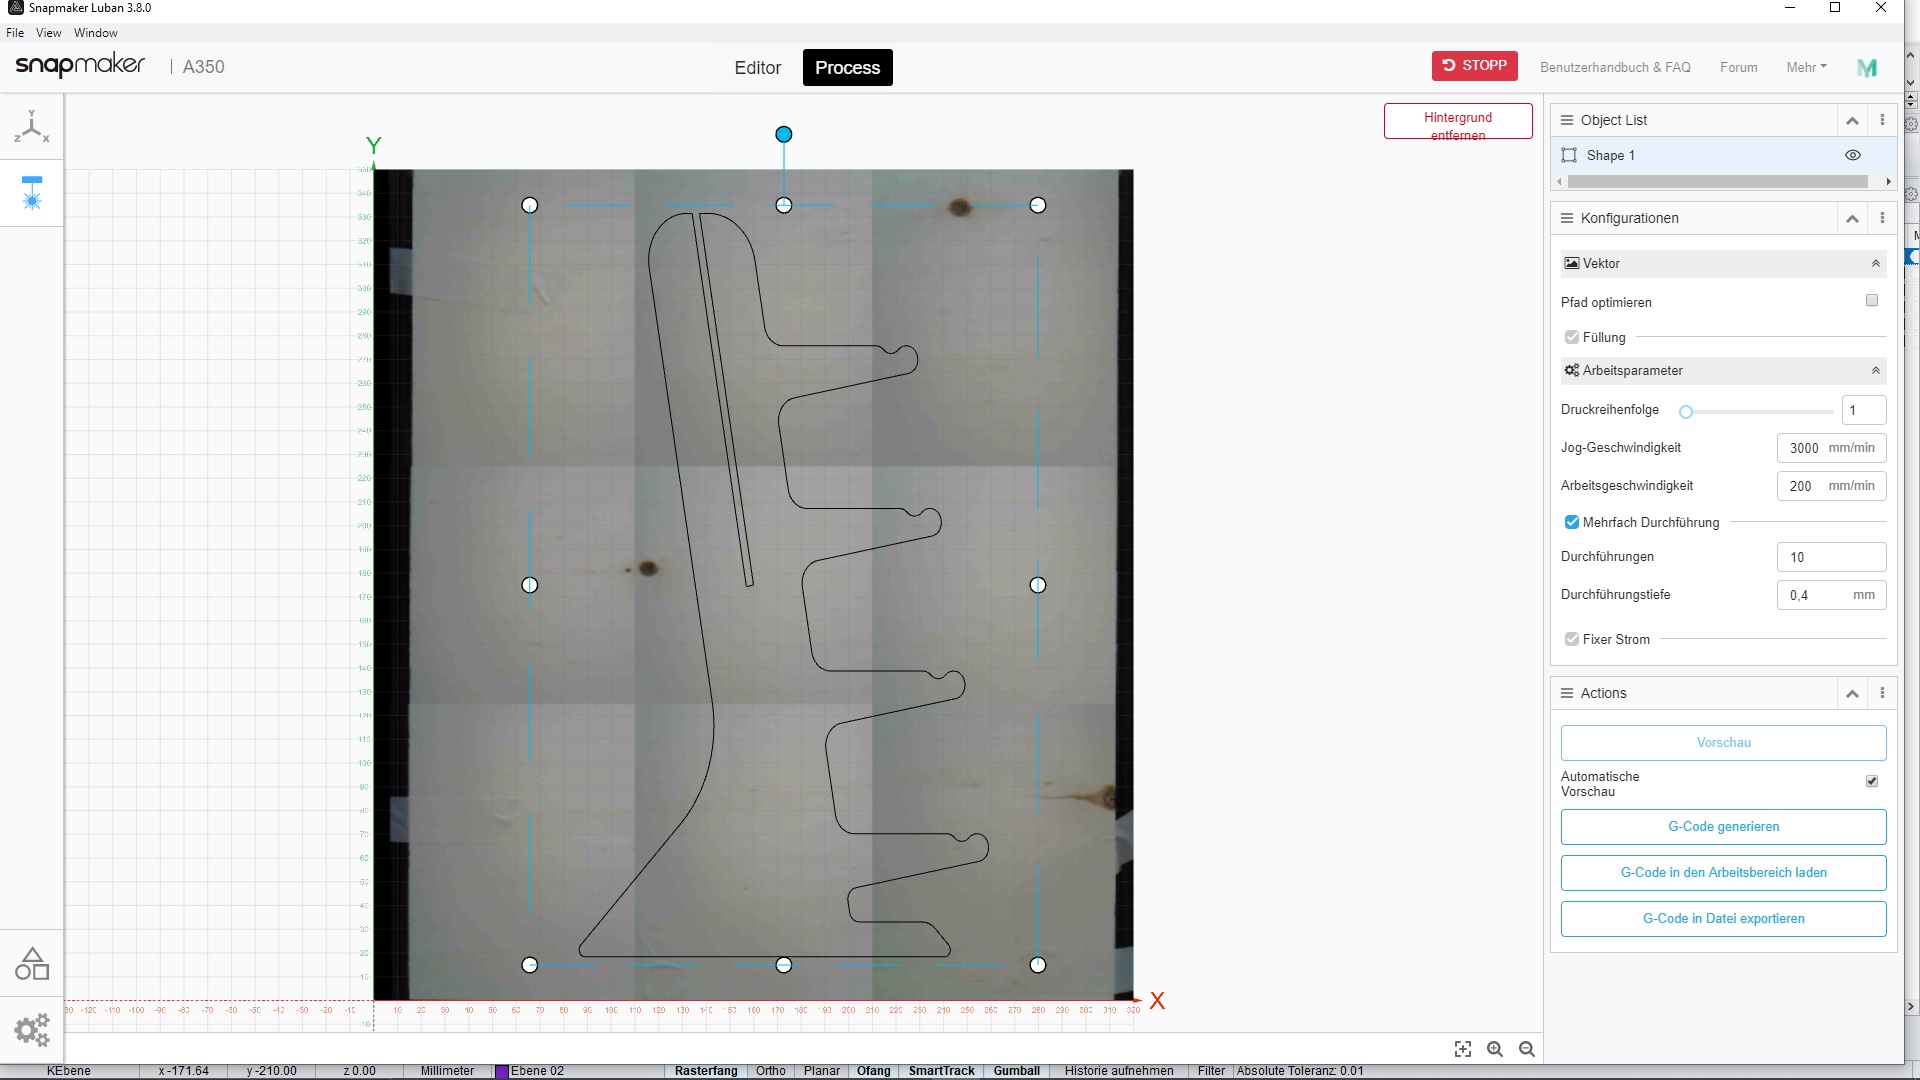
The DXF files in the download area have not yet been corrected. At this point I would like to investigate, as the final dimensions of the parts differ from those in CAD and the imported ones in Luban. The DXF files exported from Rhino are 1: 1 but when they are imported into Luban the size is also different. I then adjusted / balanced these to those in CAD using the editor in Luban. Despite the different end dimensions, this did not affect the gap width. The machine may have a minimal tolerance deviation, which is noticeable by adding up for large parts.

2D Models

3d model 3d model,blender,obj,3ds,maya,dxf,dae,stl,vrml,x3d,file by z9z1rc
Shopping Basket