Projekte
Projects
Kupfer Filament 3D Druck
Copper filament 3D printing
11.2021
Überblick
Overview
Geplantes Budget
planed budget
Fortschritt
progress
Design
Prepare
Build
Test
Done!
Maschienen und Werkzeuge
Machines and tools
Druckzeit ca. 4h / benutztes Filament:
~30g Formfutura MetalFil - Classic Copper <=> ~2€
Als ersten Druck nach dem Neuaufbau auf dem neuen 3D Druck Tisch habe ich das Kupferfilamt von Formfutura gewählt. Welches ich bei filamentworld gekauft habe. Es ist deutlich schwerer als normales Kunststoffilament und lässt sich durch Säuren künstlich altern um einen besonderes Aussehen zu erzeugen.
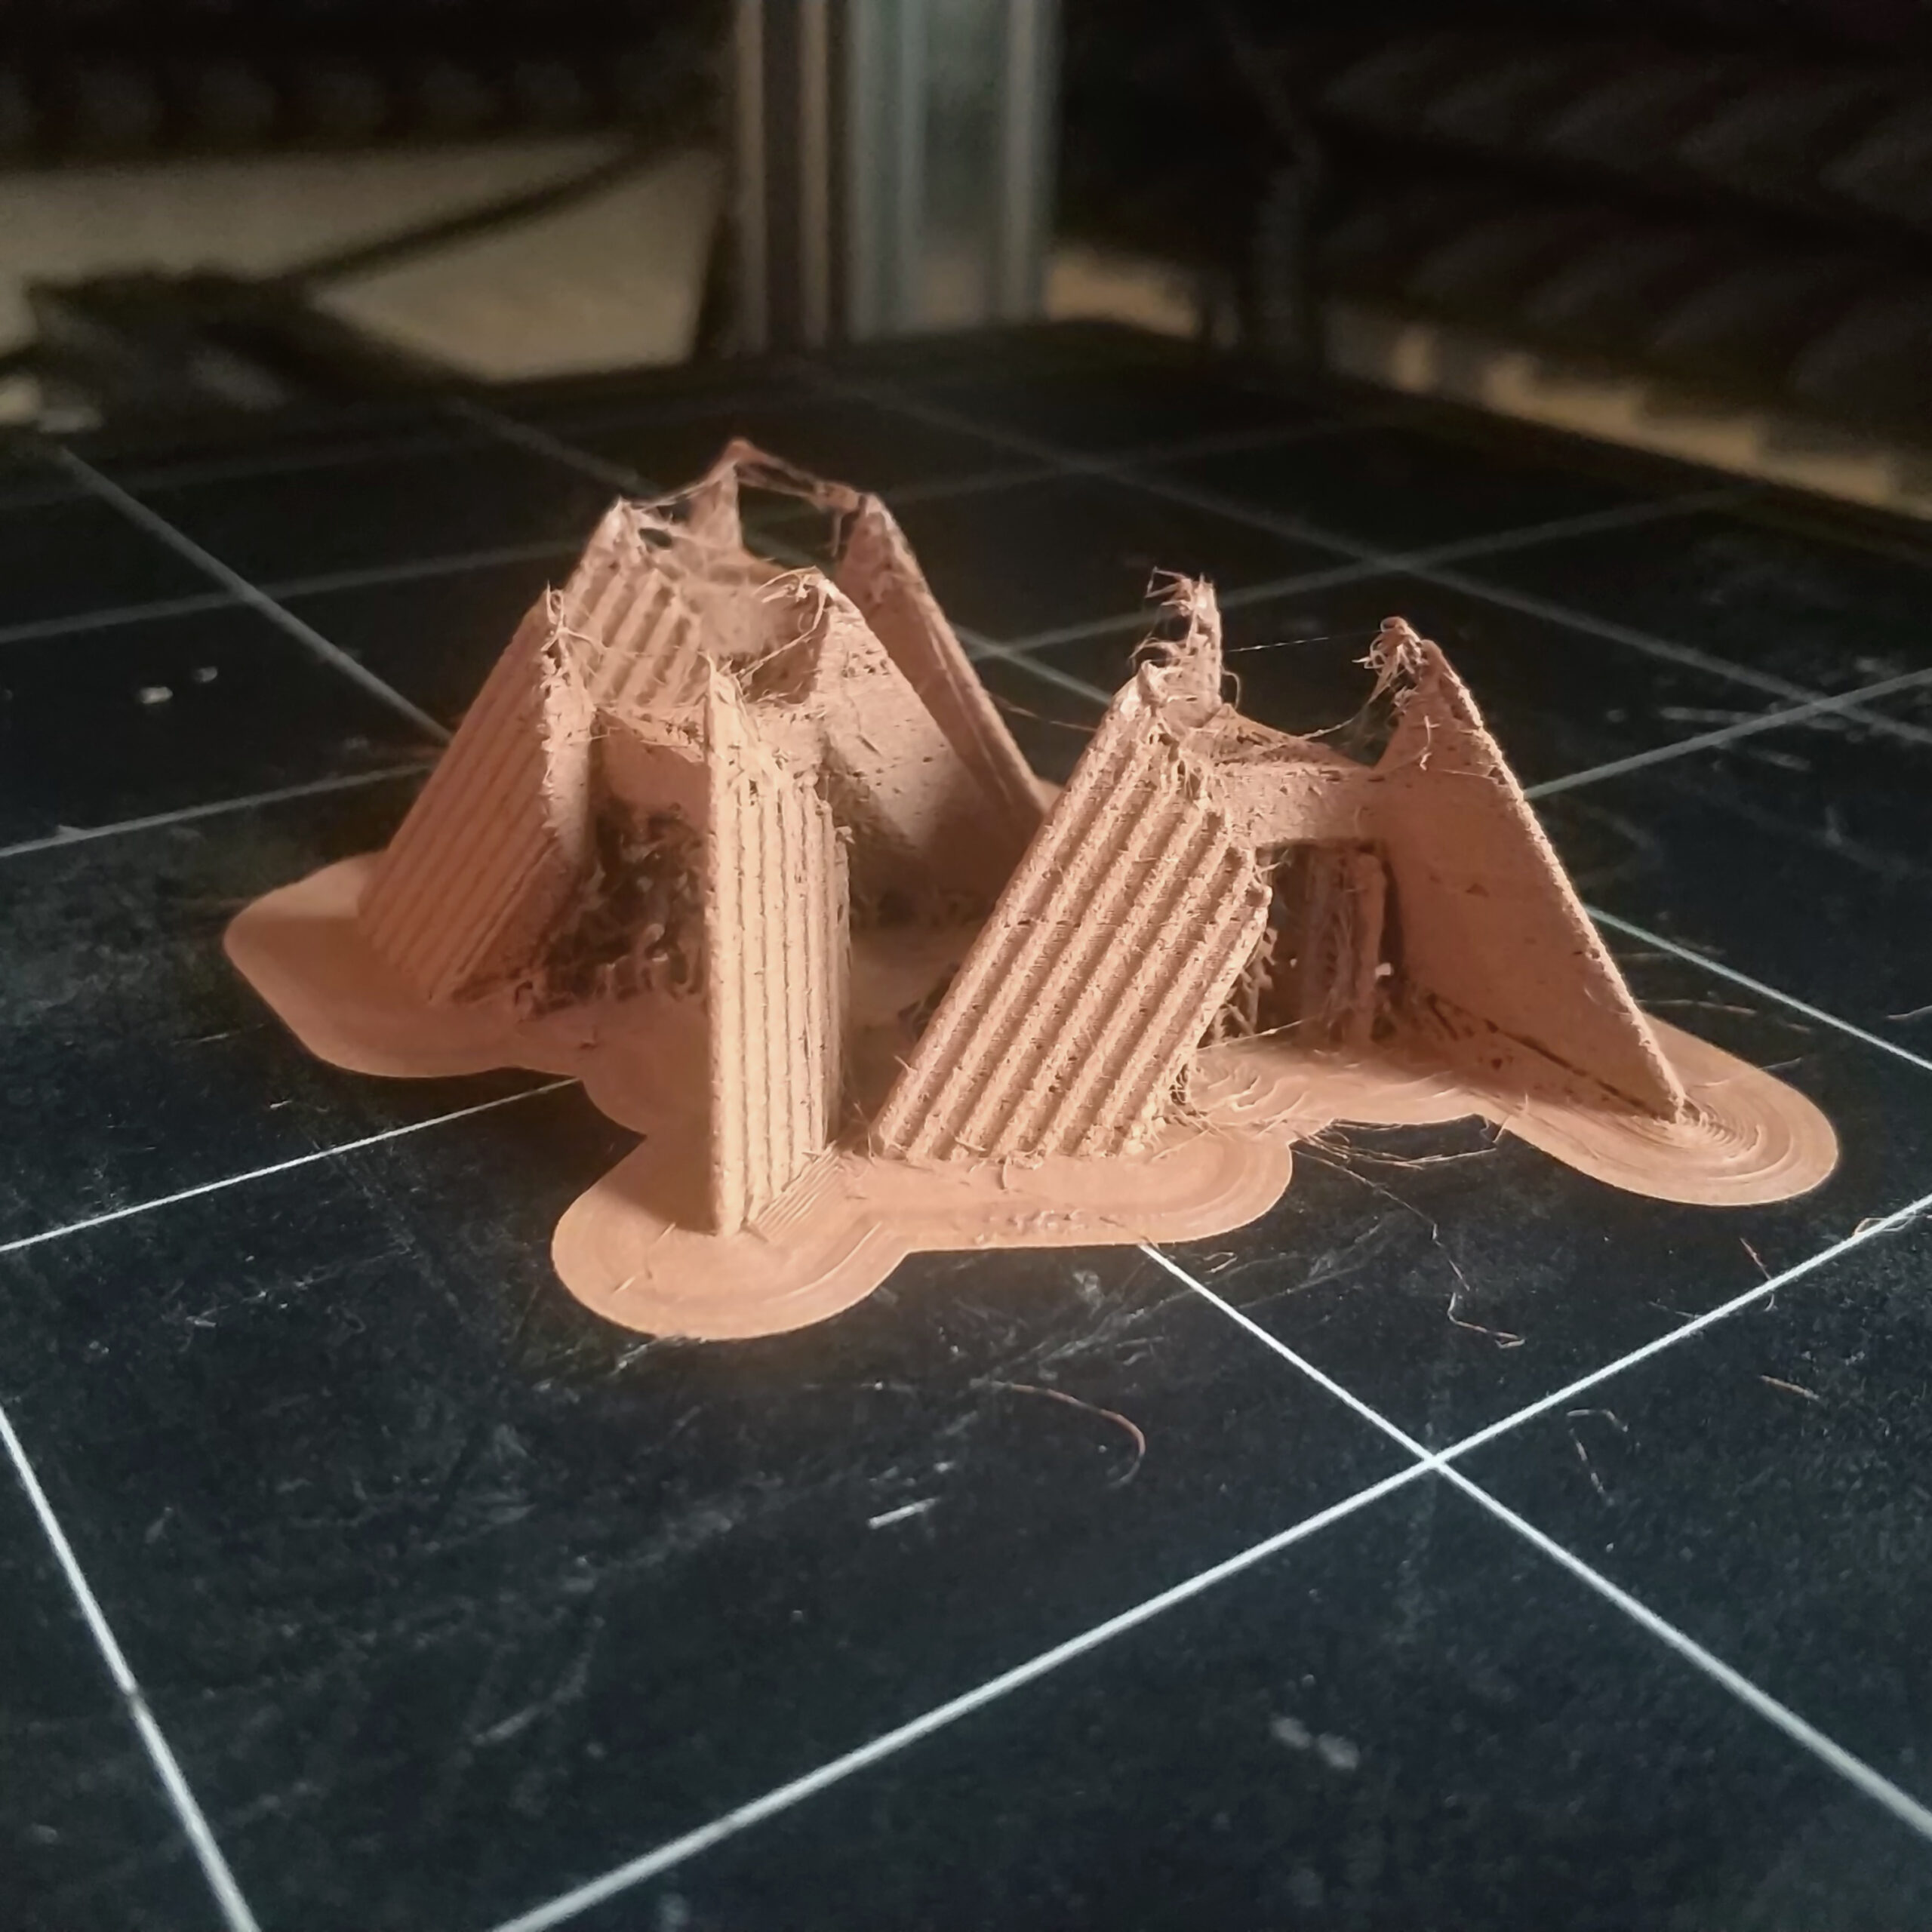
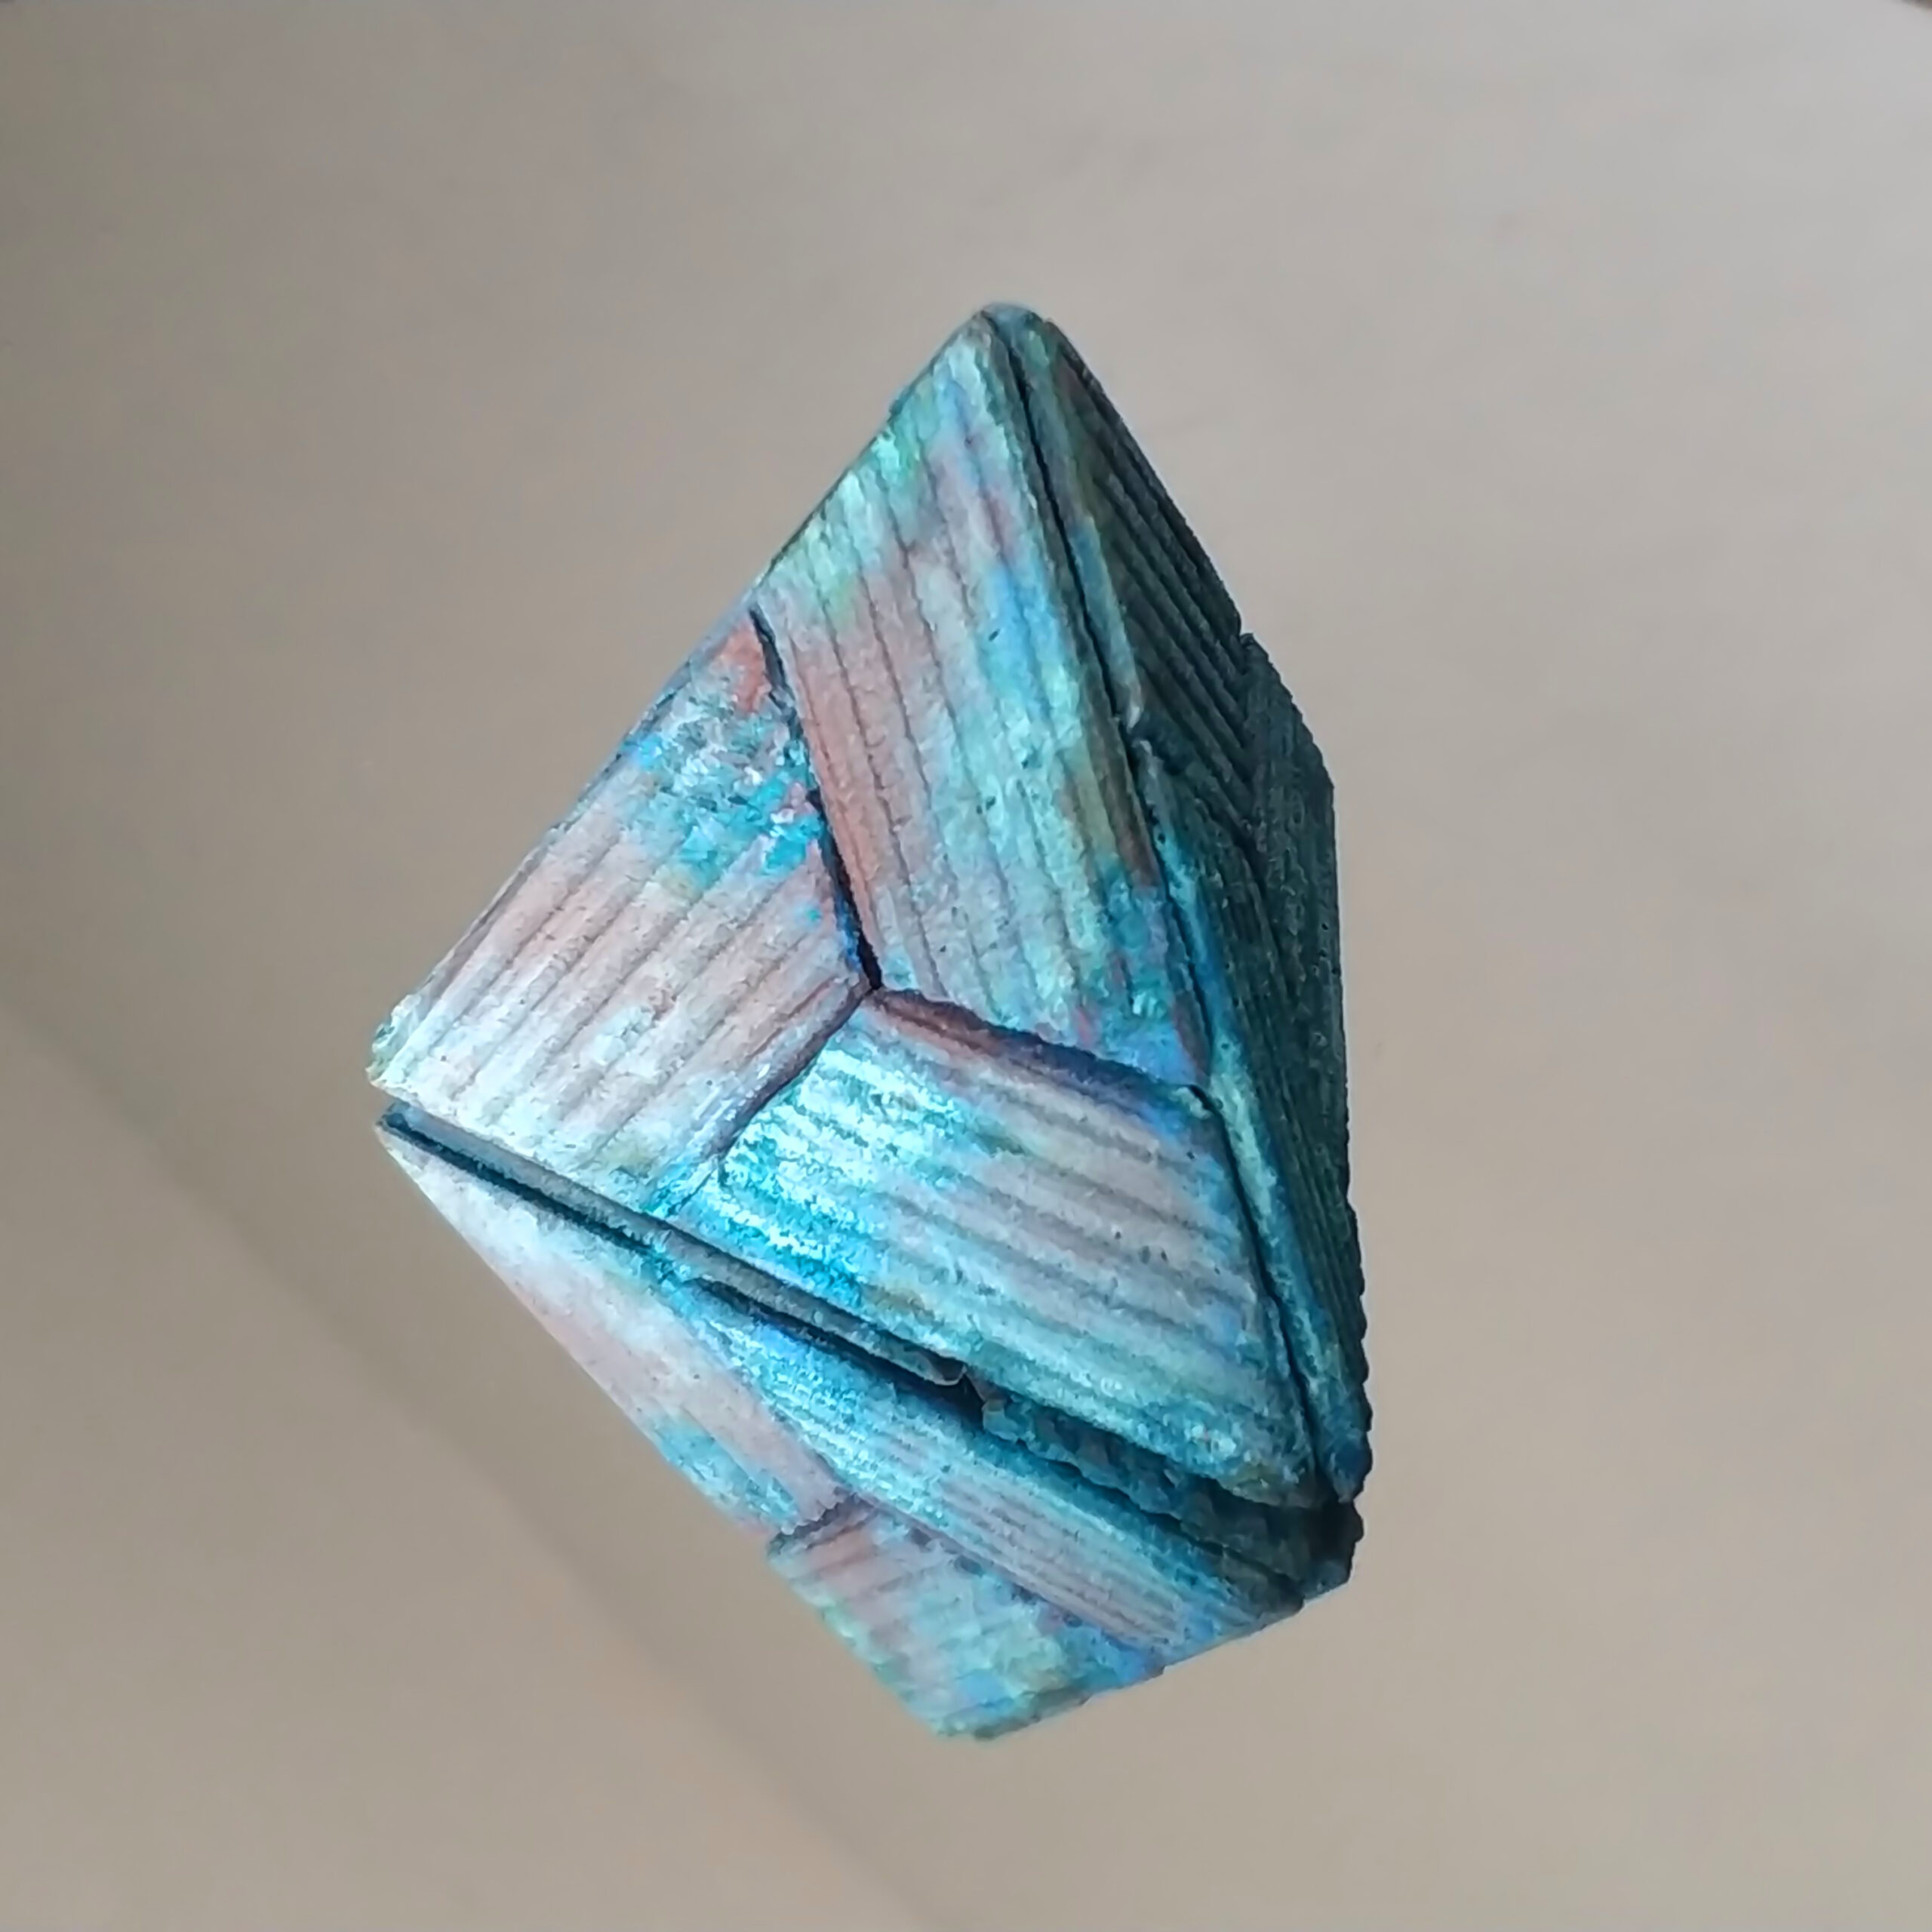
Bei der Modellsuche habe ich mich schwer getan, da ich ein Objekt gesucht habe was nach dem Künstlichen altern wie ein Artefakt wirken sollte durch die Grünspan-Patina. Dann bin ich auf der Plattform thingiverse.com auf das Tetrahedronpuzzle des Nutzers Nihlton gestoßen.
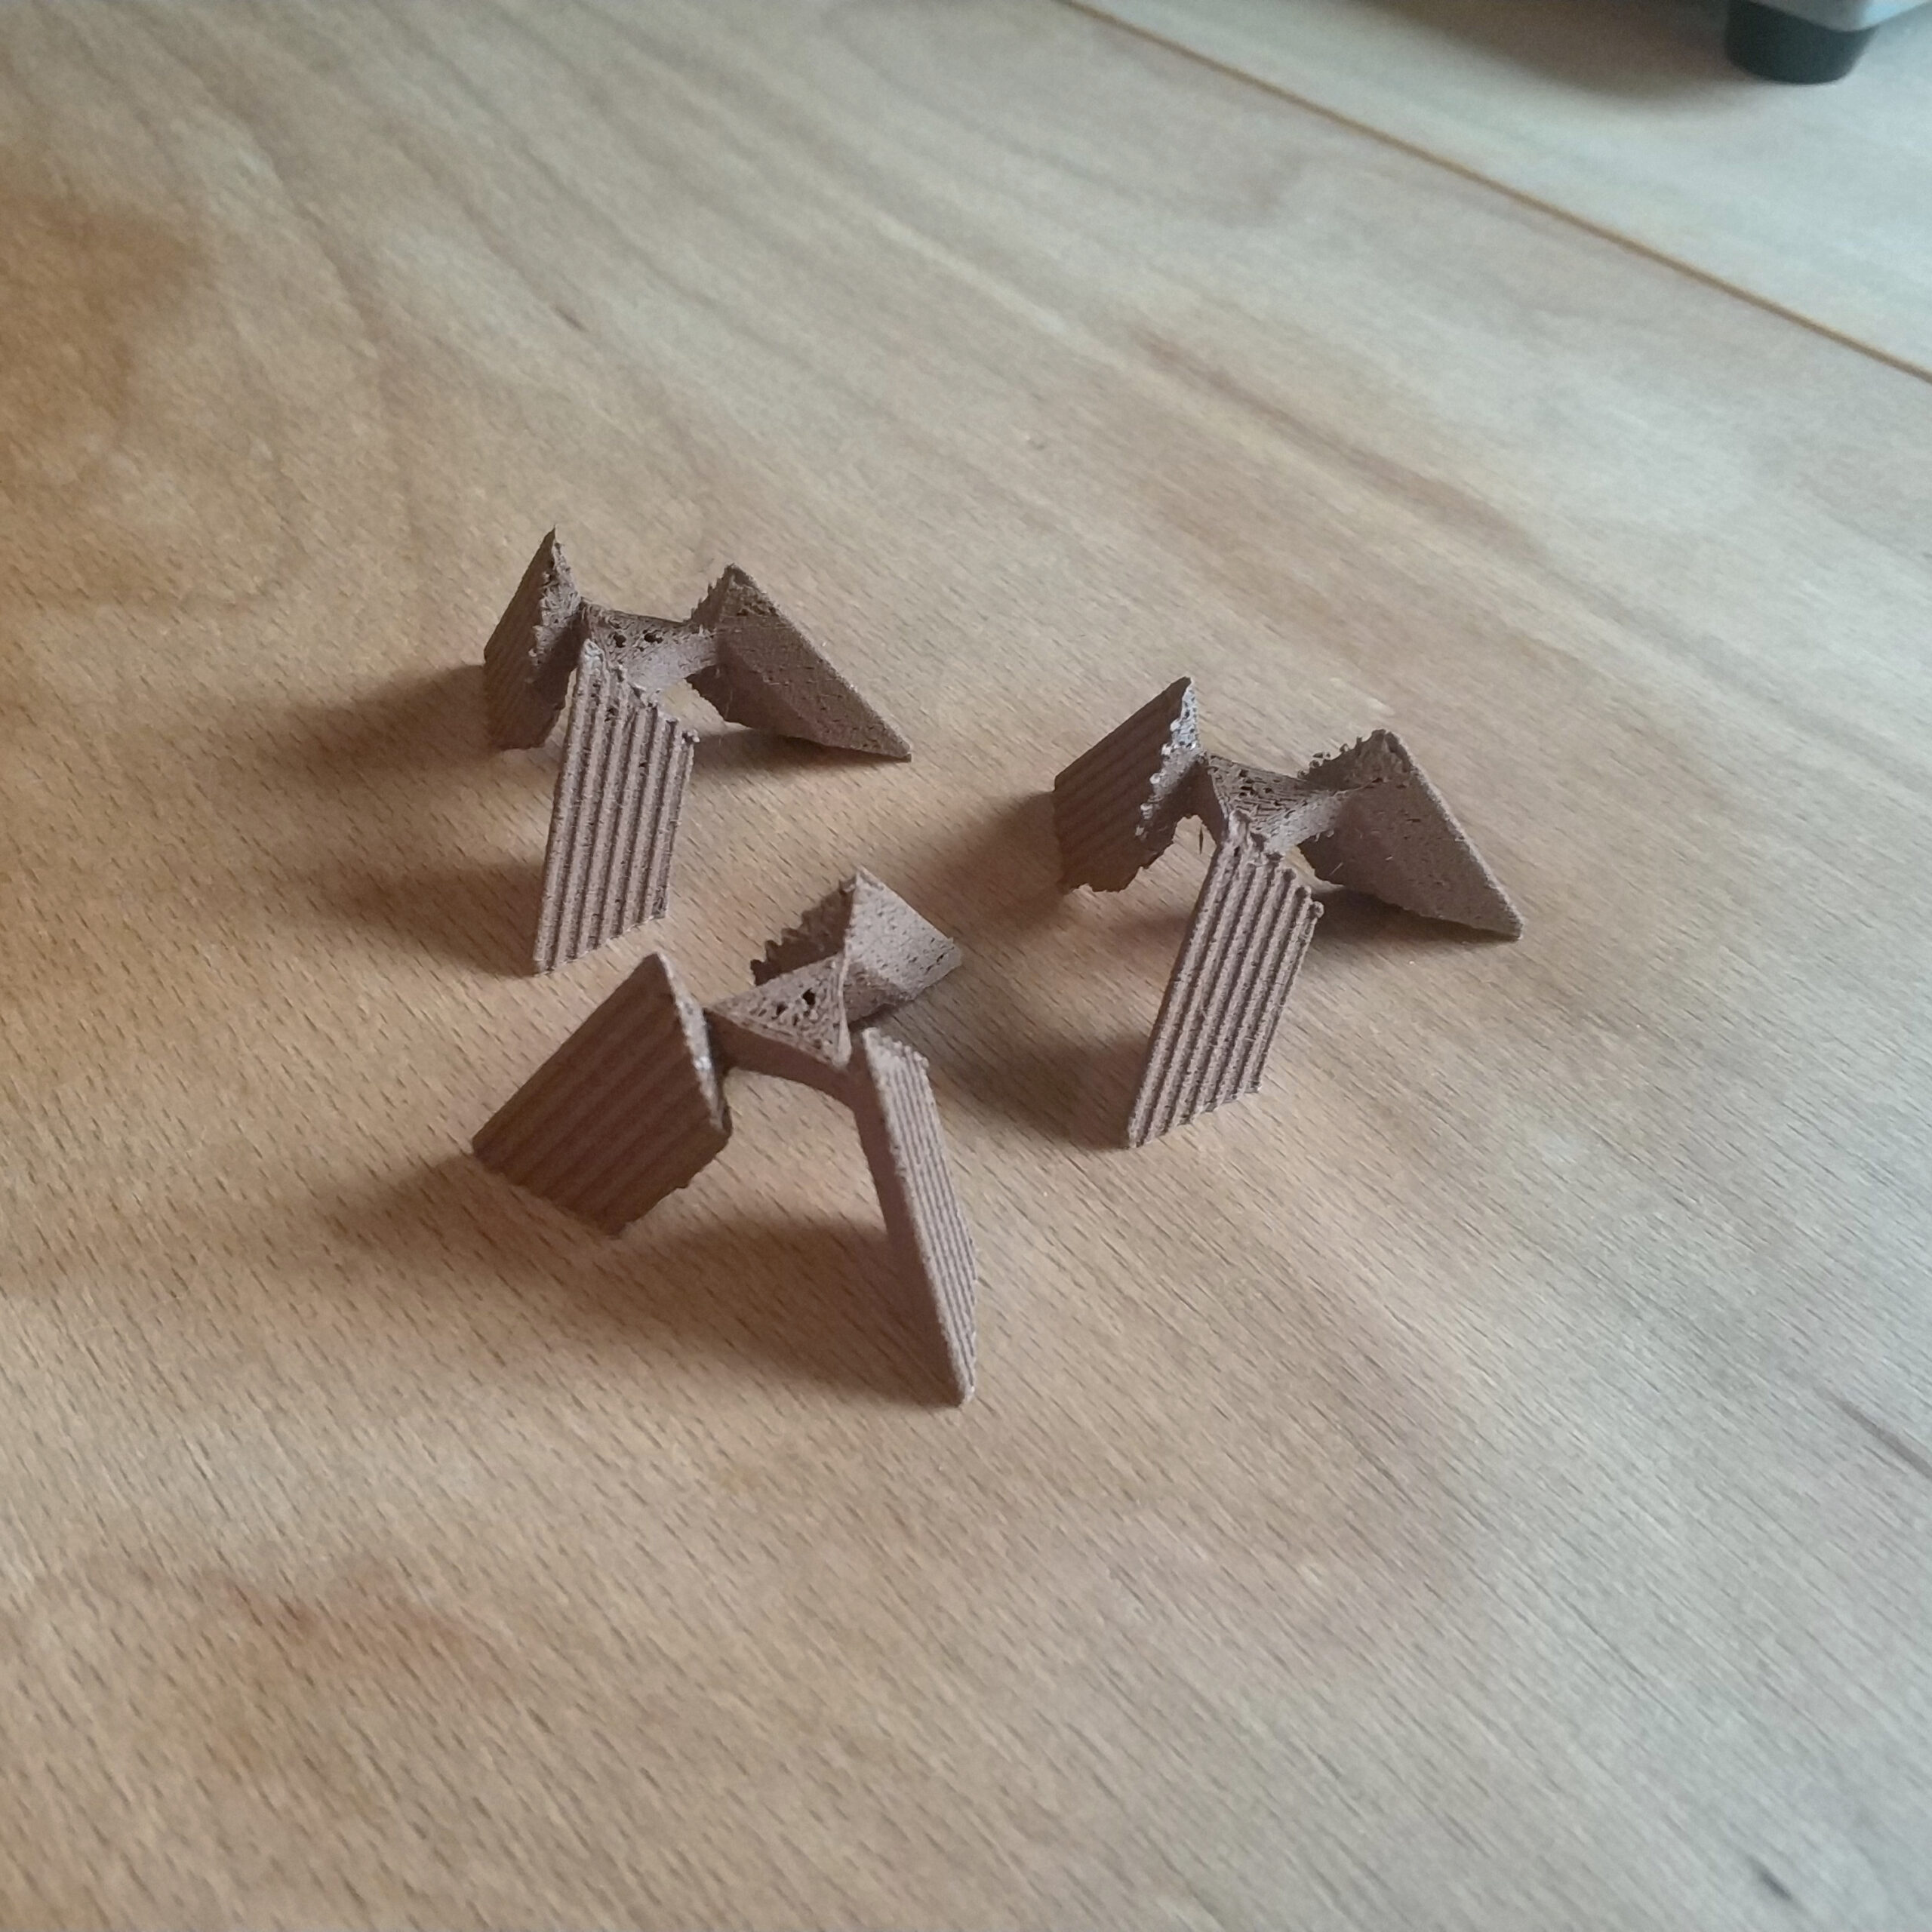
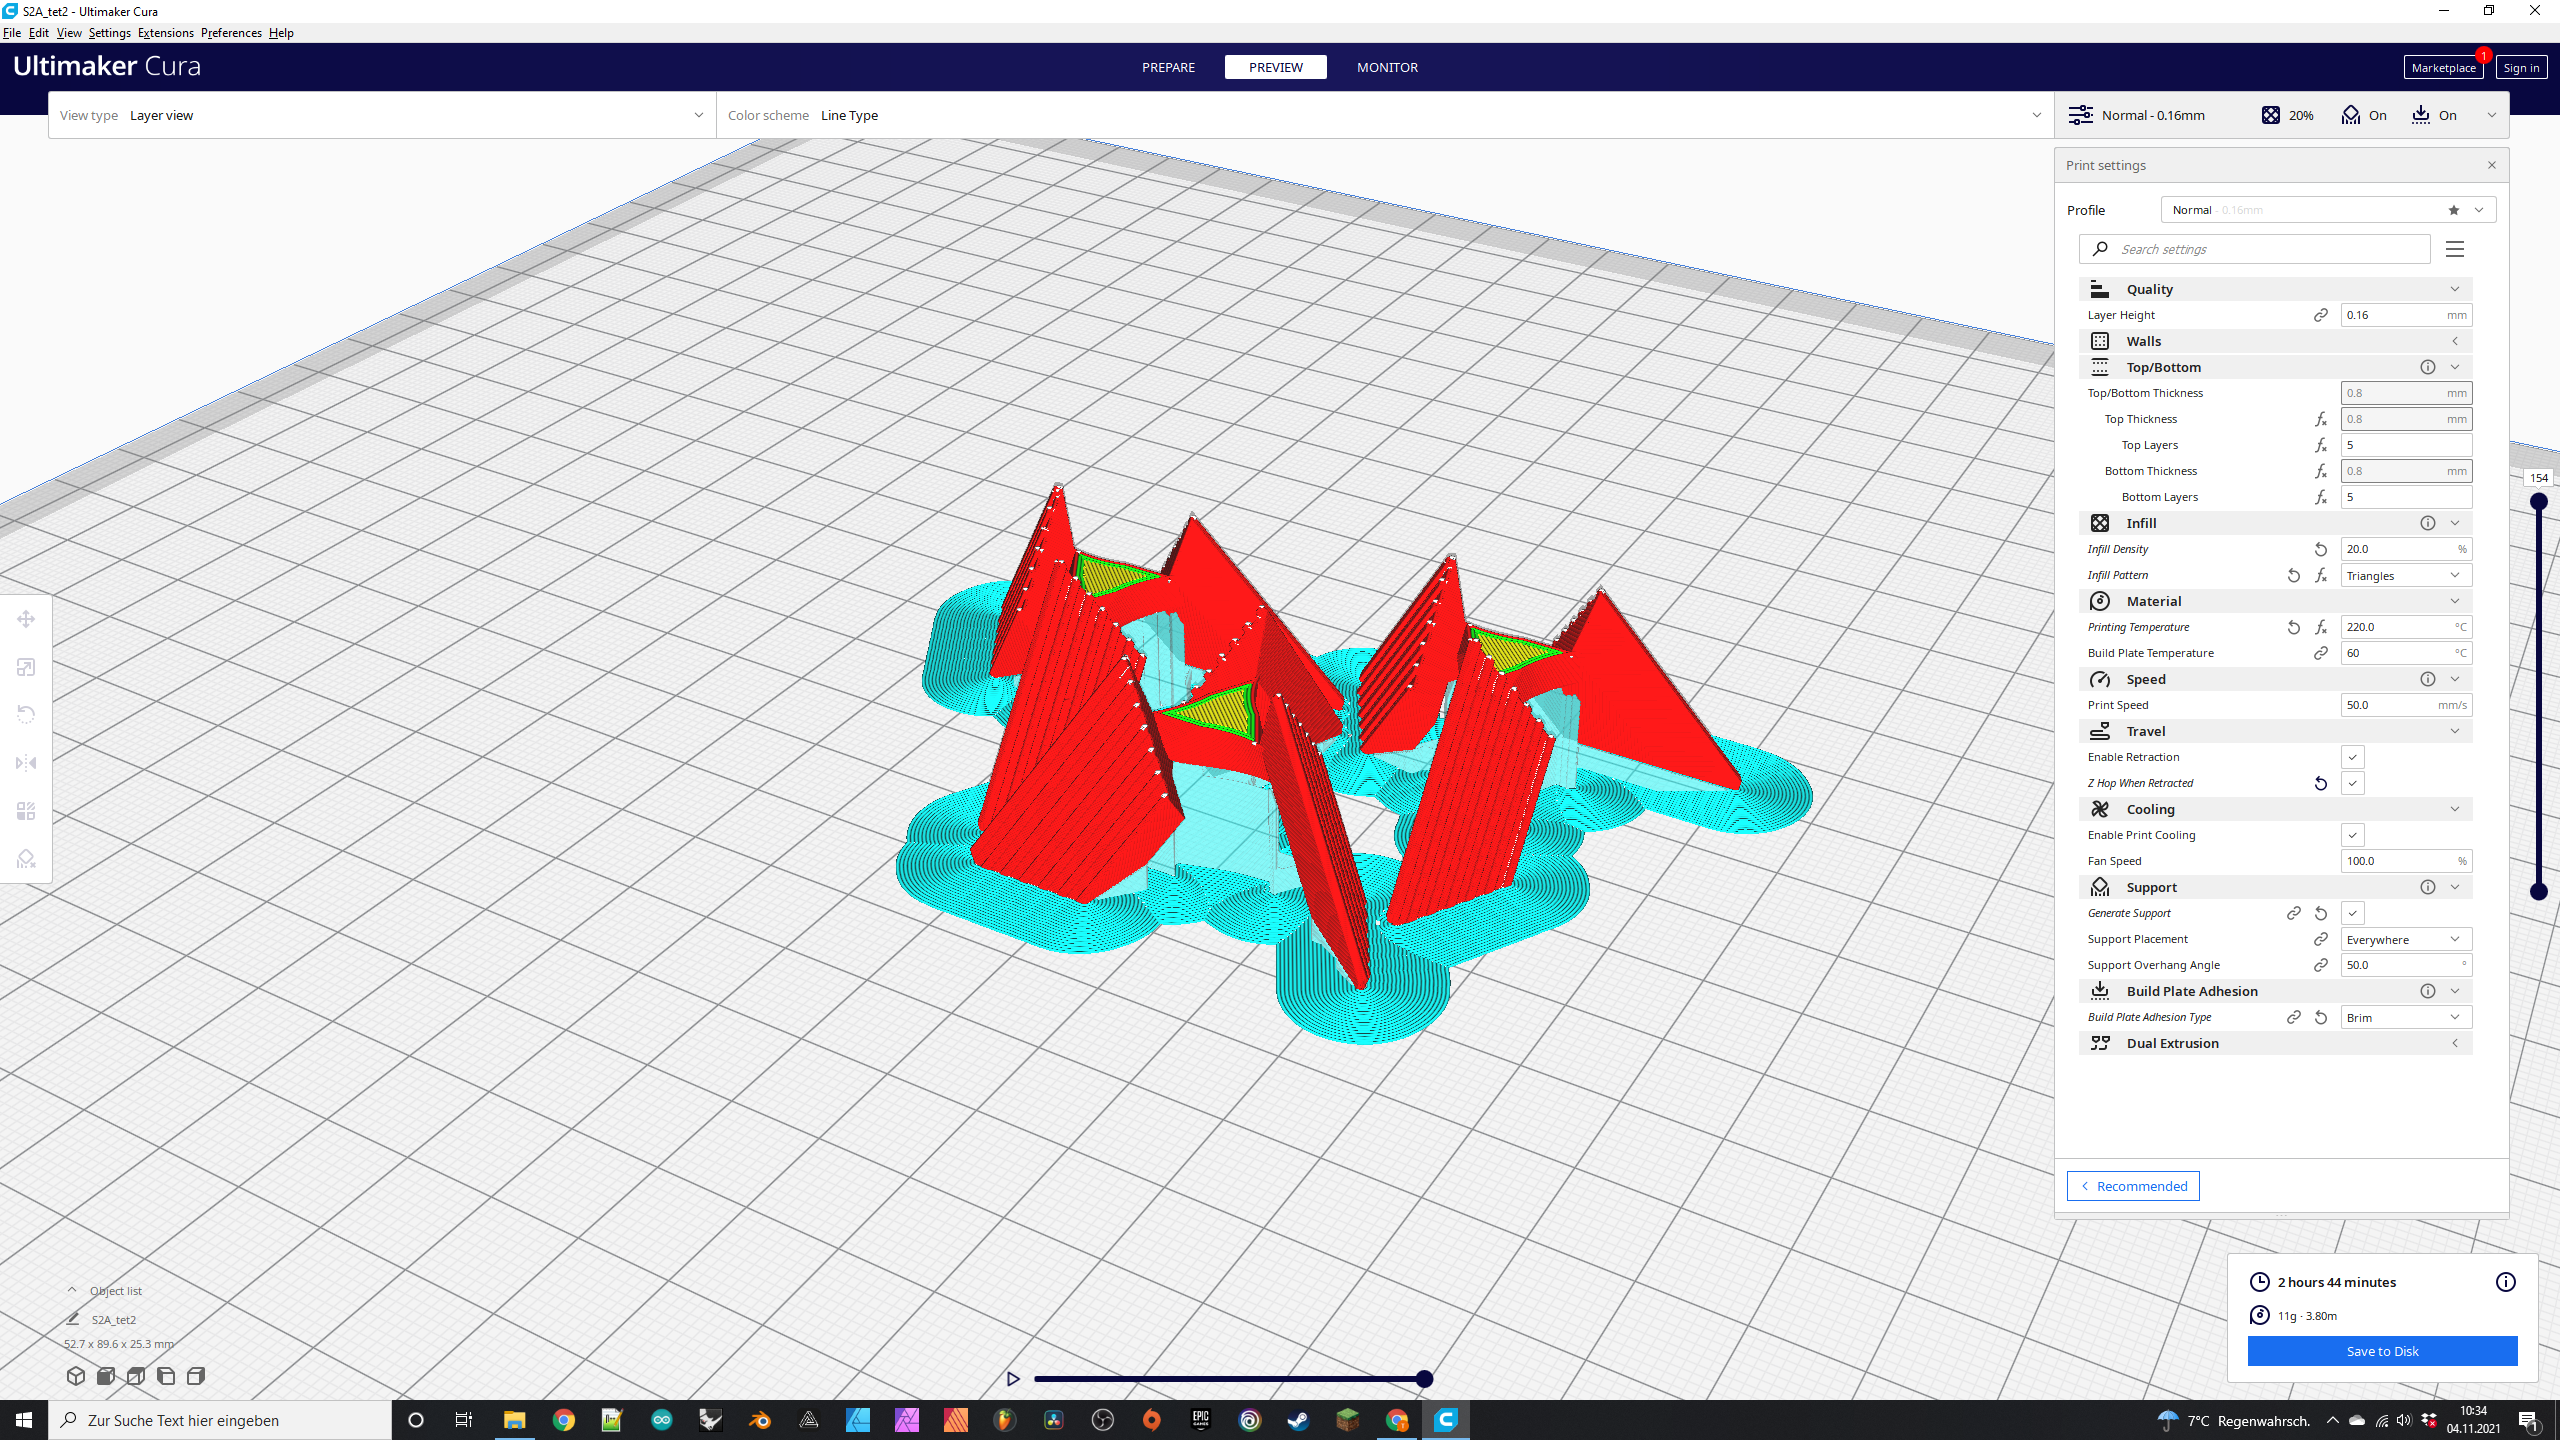
Für das Modell muss 4x das gleiche Teil gedruckt werden. Ich habe natürlich nicht genau geguckt und habe erst 3 gedruckt. Das drucken der 3 Teile hat ca. 3h gedauert und für das danach eine weitere Stunde. Also insgesamt ca. 4h Druckzeit.
Für das Slicen habe ich die Software Cura benutzt da man hier besser Einstellungen vornehmen kann, insbesondere im Hinblick auf Stützmaterialen und Füllmuster. Nach dem Slicen in Cura kann der gespeicherte G-Code in Luban eingefügt werden und der Druck über das Programm gestartet werden. Mittlerweile ist der Snapmaker 2.0 A350 auch als Drucker in Cura zu finden was das Setup deutlich erleichtert. Die Software vom Snapmaker 2.0 „Snapmaker Luban“ ist durch ständige Updates mittlerweile aber auch recht brauchbar geworden.
Für die Schichtdicke habe ich eine Höhe von 0,16mm gewählt um mehr Details zu bekommen und die Schichten nicht so deutlich sichtbar zu haben. Als Drucktemperatur habe ich 220°C gewählt da ich Grundsätzlich einen Edelstahl Düse (Nozzle) verwende und dort die Wärmeleiteigenschaften nicht so gut sind. Generell wir aber eh für dieses Filament ein Edelstahldruckkopf empfohlen da das Filament durch seine Kupferzusätze die Düse schneller verschleißen lässt. Die Empfohlene Drucktemperatur für das Material beträgt 190 – 220°C, womit ich mich am oberen Ende befinde. Beim nächsten Druck mit diesem Material werde ich mit einer Temperatur von 215°C Drucken, da ich recht viel „stringing“ und Bläschen hatte, was auch auf eine zu hohe Drucktemperatur schließen lässt.
Beim einführen des Filaments in das „Hot End“ hat das Vorschubgetriebe das Material aufgerieben und es wurde kein Material durch die Düse gedrückt. Dies konnte ich aber dadurch beheben das ich gute 10cm des Endes abgeschnitten habe, da das abgeschnittene Stück durch das Fixieren an der Rolle vorgeschädigt war. Das Material hat nämlich eine Sandige Struktur und ist recht brüchig was das Zuführen erschwert. Allerdings hatte ich danach keinerlei Probleme mehr.
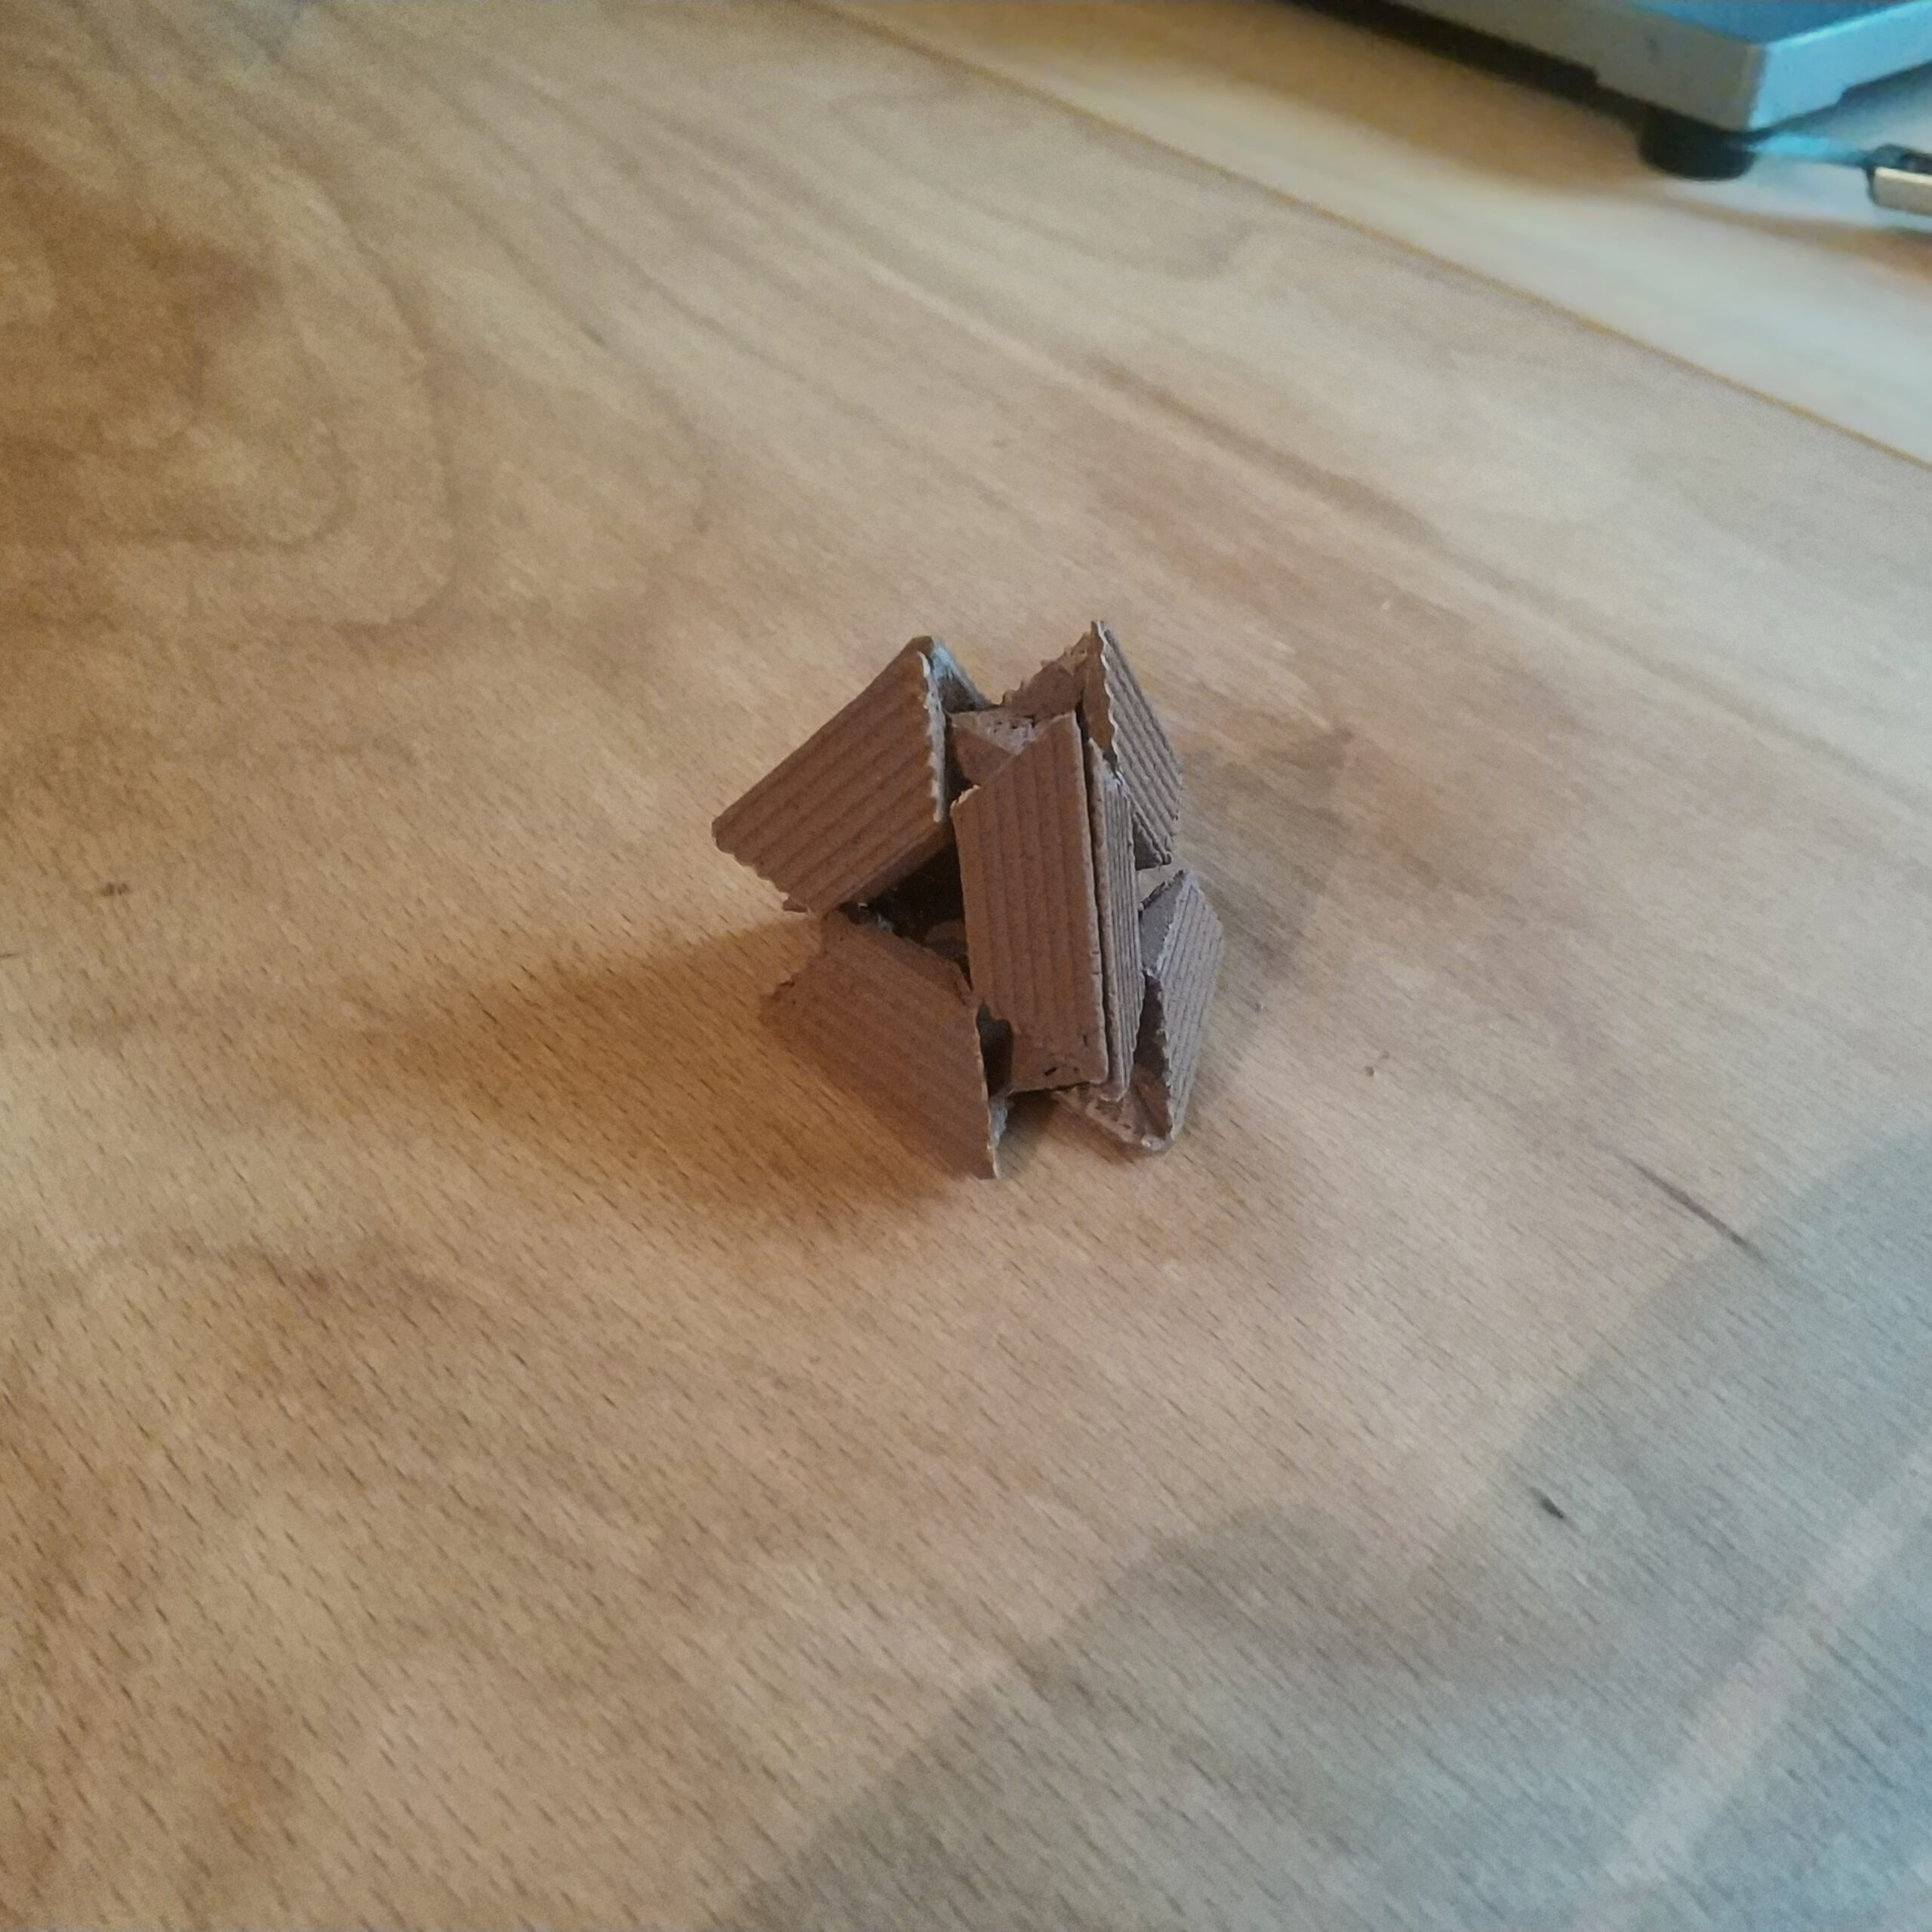
Nach dem Drucken habe ich alle Stützstrukturen entfernt und die Kanten entgratet. Beim Zusammenbau ist mir ein Teil heruntergefallen und Zerbrochen, was Zeigt wie zerbrechlich die Teile sein können. Dies liegt vermutlich an dem Kupfer das als Pulver oder Staub beigefügt ist und sich nicht wie normaler Kunststoff verhält, der lange und Stabile Ketten bildet. Durch Kleben mit zähflüssigem Sekundenkleber konnte das Teil gerettet werden allerdings wir es vermutlich nicht zusammenhalten beim Versuch das Puzzle auseinander zu bauen, was normal schon recht schwer war. Das Teil kann gerne ein Rätsel für Archäologen der Zukunft werden die es beim Versuch es auseinander zu nehmen Kaput machen werden ohne zu wissen das es schon mal kaputt war. Aber so ist das leben. 😀
Im Netz wird zum Künstlichen Altern eine Mischung aus Essig und Salz Empfohlen. Ich habe nach einigen Stunden im Bad und anschließendem Trocknen konnte ich keine große Veränderung feststellen. Nur die entgrateten Kanten hatten einen leichten Grünspan-Stich. Daraus habe ich geschlossen das die meisten Kupferpartikel trotz des hohen Anteils von 80% beim Drucken vom isolierendem Kunststoff umschlossen sind. Daher habe ich alle Außenflächen mit einer Messing Drahtbürste gründlich bearbeitet und den Prozess wiederholt. dabei habe ich aber immer nur einen Teil der Pyramide in die Mischung gelegt und nach einigen Minuten gedreht um Sauerstoff an das Teil zu lassen. Allerdings hat sich erst nach einigen Stunden nach dem Trocknen auf der warmen Heizung zu meiner Freude ein eine deutliche Patina ausgebildet. Das Ergebnis ist im Video zu sehen.
Als nächstes möchte ich eine Lampe mit antikem Muster, einen Oktopus oder ein anderes nautisches Objekt drucken, was dem Material als Verwendung vielleicht am besten gerecht wird.
Auch möchte ich Testen ob der hohe Kupferanteil auch das Leiten von Strom ermöglicht.
Print time approx. 4h / used filament:
~30g Formfutura MetalFil - Classic Copper <=> ~2€
As the first print after rebuilding on the new 3D printing table, I chose the copper filament from Formfutura. Which I bought at filamentworld. It is significantly heavier than normal synthetic filament and can be artificially aged using acids to create a special look.
When looking for a model, I found it difficult because I was looking for an object that, after the artificial, should look like an artifact due to the verdigris patina. Then I came across the tetrahedron puzzle from user Nihlton on the thingiverse.com platform.
The same part must be printed four times for the model. Of course, I didn’t look carefully and only printed 3. The printing of the 3 parts took about 3 hours and then another hour. So a total of approx. 4 hours of printing time.
I used the Cura software for slicing because you can make better settings here, especially with regard to support materials and fill patterns. After slicing in Cura, the saved G-Code can be inserted in Luban and printing can be started via the program. In the meantime, the Snapmaker 2.0 A350 can also be found as a printer in Cura, which makes setup much easier. The software from Snapmaker 2.0 „Snapmaker Luban“ has become quite usable due to constant updates.
For the layer thickness I chose a height of 0.16mm in order to get more details and not have the layers so clearly visible. I chose 220 ° C as the printing temperature because I basically use a stainless steel nozzle and the thermal conductivity properties are not so good there. In general, however, we recommend a stainless steel printhead for this filament because the filament causes the nozzle to wear out faster due to its copper additives. The recommended printing temperature for the material is 190-220 ° C, which puts me at the top end. The next time I print with this material, I will print with a temperature of 215 ° C, because I had a lot of stringing and bubbles, which also suggests that the printing temperature was too high.
When inserting the filament into the „hot end“, the feed gear rubbed the material and no material was pushed through the nozzle. But I was able to fix this by cutting off a good 10cm of the end, because the cut piece was damaged by fixing it to the roll. The material has a sandy structure and is quite brittle, which makes it difficult to feed. However, I didn’t have any more problems afterwards.
After printing, I removed all support structures and deburred the edges. During assembly, a part fell and broke, which shows how fragile the parts can be. This is probably due to the copper that is added as powder or dust and does not behave like normal plastic, which forms long and stable chains. The part could be saved by gluing with viscous superglue, but we probably won’t hold it together when trying to disassemble the puzzle, which was normally quite difficult. The part can easily become a puzzle for archaeologists of the future who will break it trying to take it apart without knowing that it has already been broken. But that’s life. : D
A mixture of vinegar and salt is recommended for artificial aging on the internet. After a few hours in the mixture and then drying, I couldn’t notice any major change. Only the deburred edges had a slight verdigris tinge. From this I concluded that most of the copper particles are surrounded by the insulating plastic during printing, despite the high proportion of 80%. So I worked all the outside surfaces thoroughly with a brass wire brush and repeated the process. I only put part of the pyramid into the mixture and after a few minutes turned it to let oxygen reach the part. However, to my delight, a noticeable patina has only developed after a few hours after drying on the warm heater. The result can be seen in the video.
Next, I want to print an antique pattern lamp, octopus, or other nautical object, which may best suit the material as a use.
I would also like to test whether the high copper content also enables electricity to be conducted.