Projekte

Projects

Snapmaker erster 3D Druck

Snapmaker first 3D Print

08.2020

Überblick

Overview
Geplantes Budget
planed budget
~ 0
Fortschritt
progress

Design

Prepare

Build

Test

Done!

Maschienen und Werkzeuge
Machines and tools
Druckzeit ca. 3h / benutztes Filament: 29,8g PLA  <=> ~0,75€

Als erstes 3D gedrucktes Teil wollte ich etwas flaches drucken was schnell geht. Dummerweise hat es dann am Ende doch 3 Stunden gedauert.

Das Modell ist von der Plattform thingiverse.com wo es für alles Mögliche 3D druckbare Modelle gibt. Das Model ist von dem User Bribro12.

Nach dem Umbau des Snapmakers wurde über das Panel, das „Auto Leveling“ ausgeführt um Unebenheiten im Druckbed digital auszugleichen. Um zu verhindern das sich das Model während des Druckens vom Druckbett löst, muss manuell ein Z Offset eingestellt werden sodass die erste gedruckte Schicht  optimal auf dem Druckbett haftet. Dazu wir normalerweise ein Blatt Papier unter die Düse gelegt und der Druckkopf soweit abgesengt, dass das Papier mit etwas Kraft zwischen Druckbett und Düse weggezogen werden kann.

Nun kann das Filament in den Druckkopf eingeführt werden. Dazu wird das „Hot End“ auf 200°C erhitzt und das Filament von oben zugeführt. Über die „load“ Funktion im Panel wird das Filament über Zahnräder zum „Hot End“ transportiert und geschmolzen.

Zuvor habe ich ein Stückchen aus einem Schwamm ausgeschnitten und durchstochen. Dann habe ich das Filament durch den Schwamm gesteckt, der verhindern soll, dass Staub und Schmutz die Düse verstopft.

Der G-Code für das Model wurde in Luban mit der Option „Schnelldruck“ erstellt. Dabei beträgt die Schichtdicke 0,24mm. Laut Luban soll der Druck 3 Stunden und 44 min dauern. In echt waren es soweit ich weiß nur etwas mehr als 3 Stunden. Es wurden für den Druck ca. 30g PLA Filament verbraucht was umgerechnet ca. 0,75€ Materialwert entspricht.

Nach dem Druck habe ich versucht über die biegsame Druckplatte den Druck abzulösen aber ohne Erfolg. Ich gehe davon aus das es besser klappt bei Dickeren und höheren Drucken, da diese Steifer sind und sich nicht mit der Platte verformen. So habe ich mit dem mitgelieferten Spatel den Druck nach und nach abgelösten. Was nur mit einem Messer ablösen konnte, war der sogenannte „skirt“ der vor dem Drucken um das Model gezogen wird. Er dient dazu erste Verunreinigungen durch degeneriertes Filament zu beseitigen und den Druckbereich optisch einzugrenzen. 

Degenerierter Kunststoff entsteht, wenn dieser zu lange unverarbeitet erhitz wird. Dabei zerfallen die Polymerstrukturen des Kunststoffs, verlieren dadurch ihre Eigenschaften und manche der Moleküle verbrennen in dem Zustand.

Nach dem Herauslösen und Zusammenstecken der Teile habe ich im Baumarkt etwas Schnur gekauft um das Katapult zu spannen. Das waren etwa 30cm. Getestet wurde das Katapult mit Katzen Leckerlies. Leider sind die Leckerlies im hohen bogen geflogen und sind er auf den Köpfen der Katzen gelandet als das sie danach hätten jagen können.

Print time approx. 3h / used filament: 29,8g PLA  <=> ~0,75€

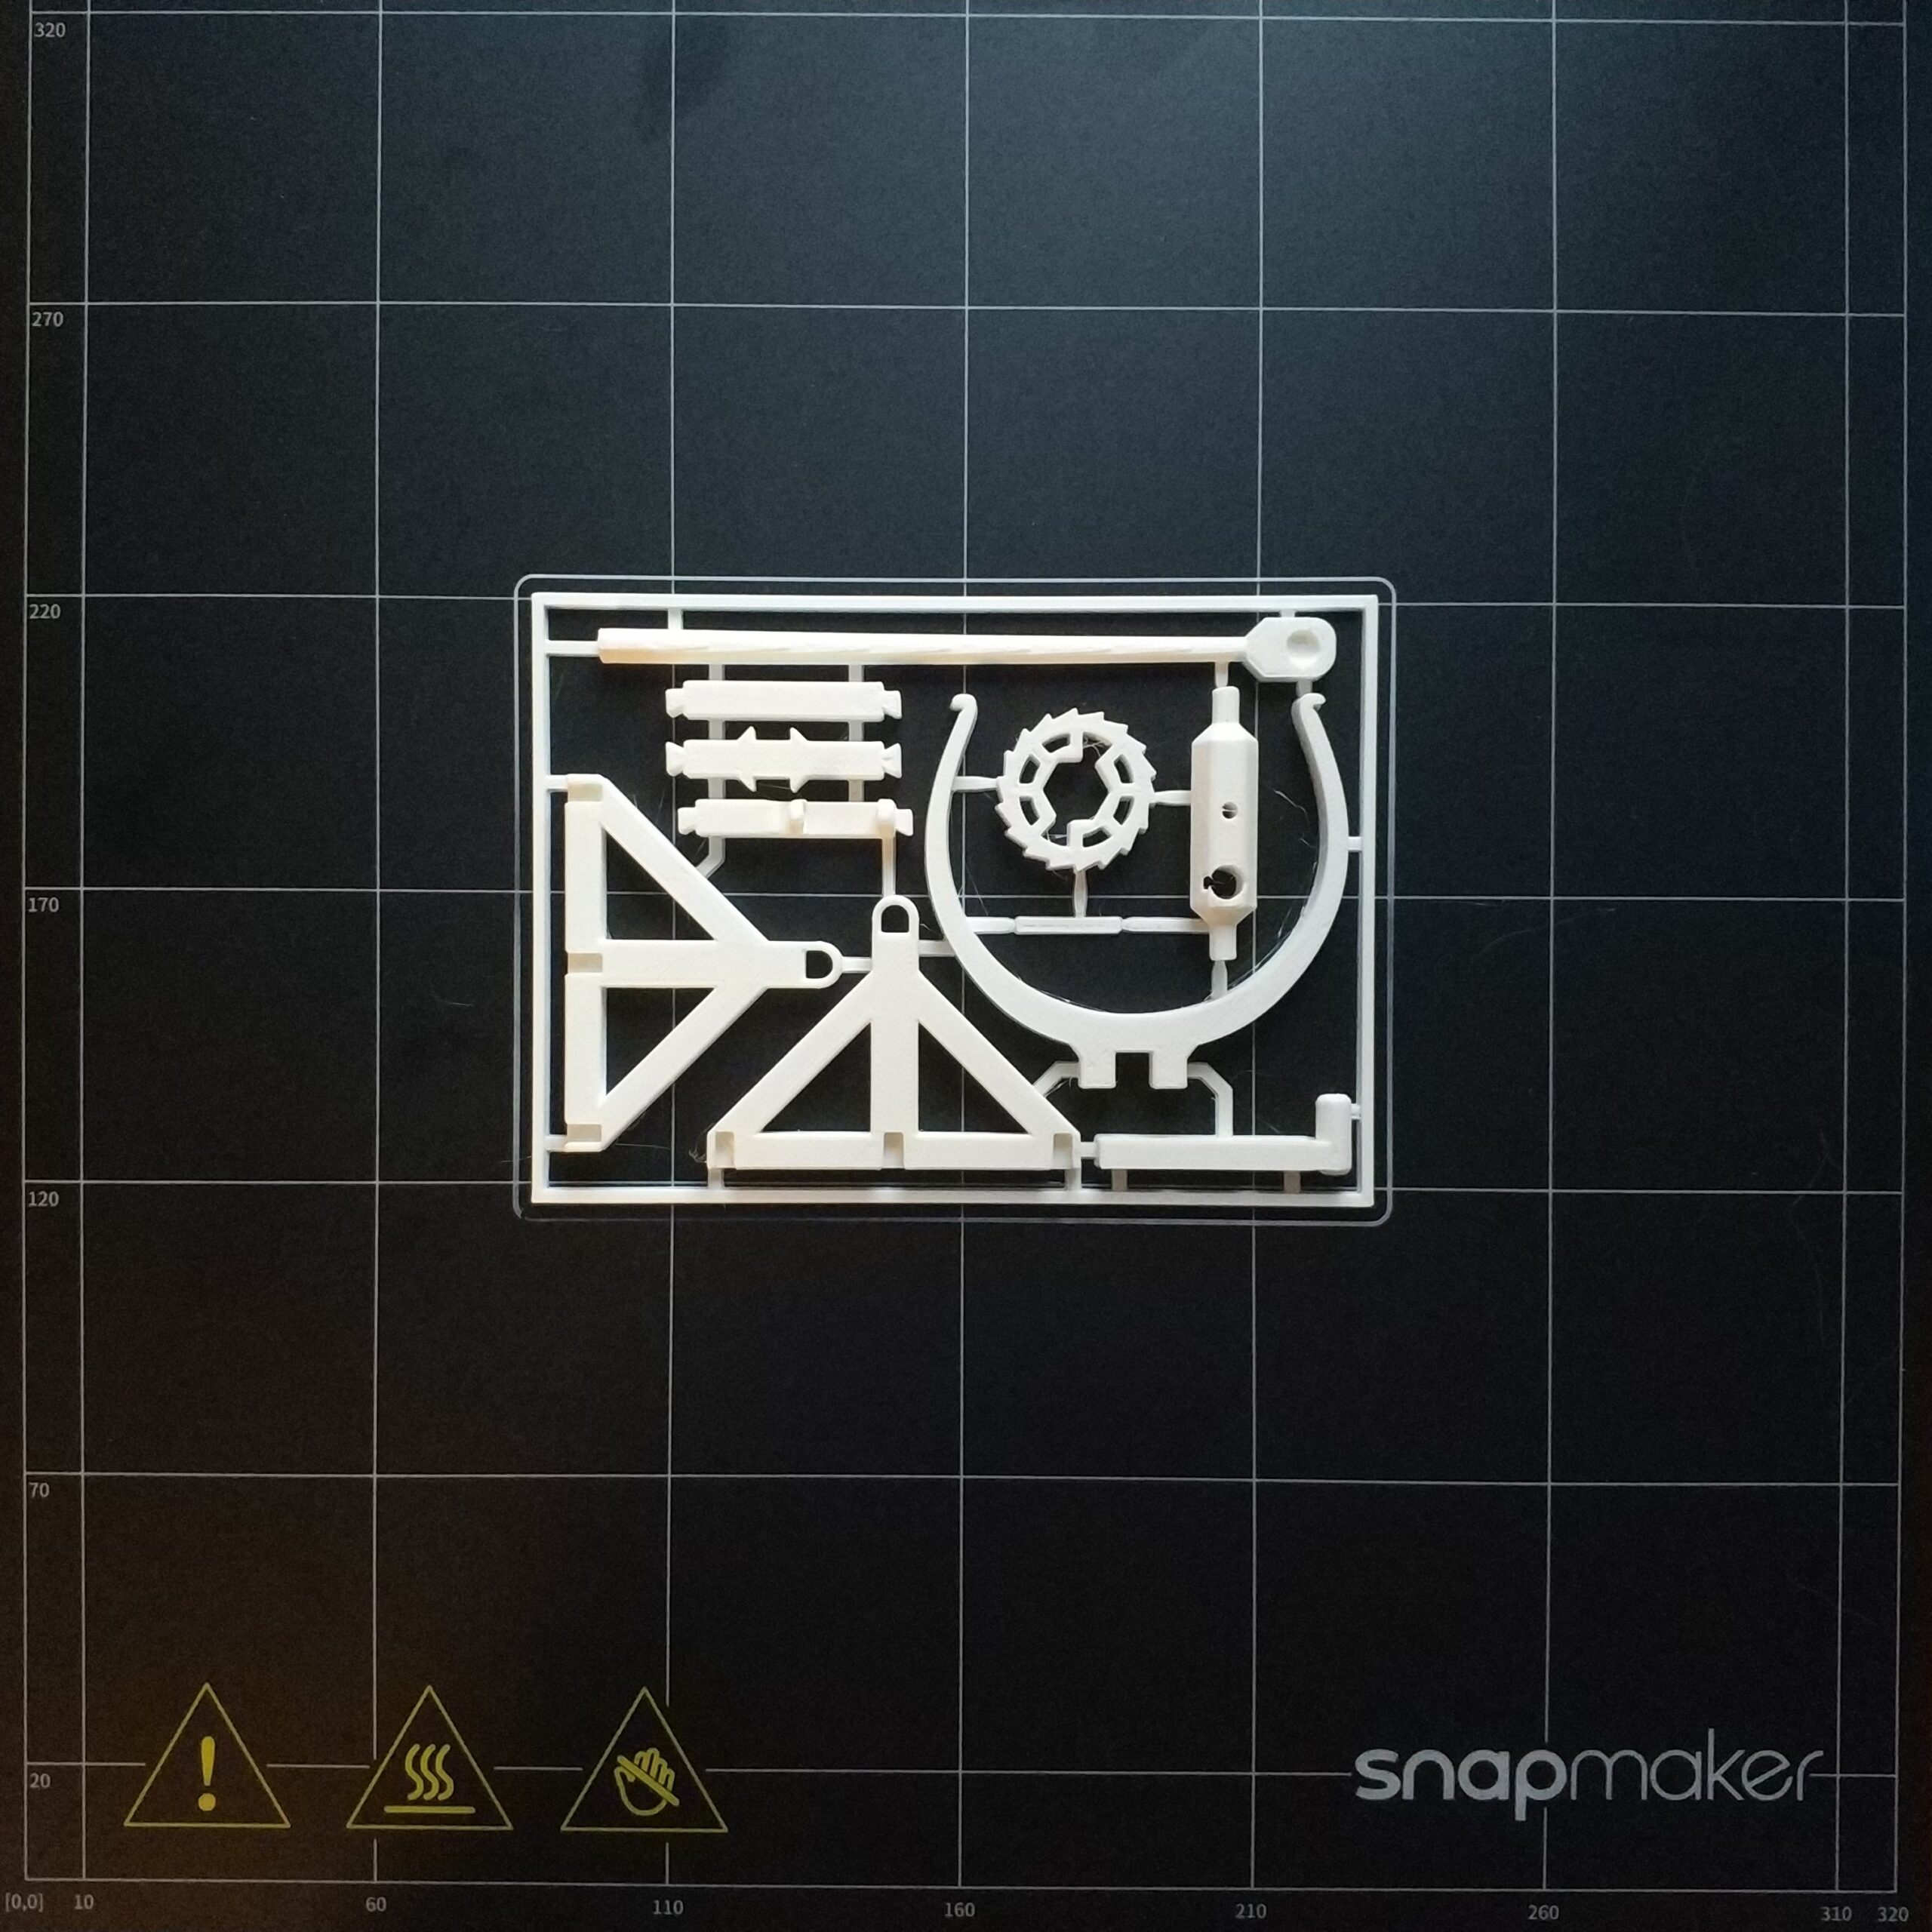
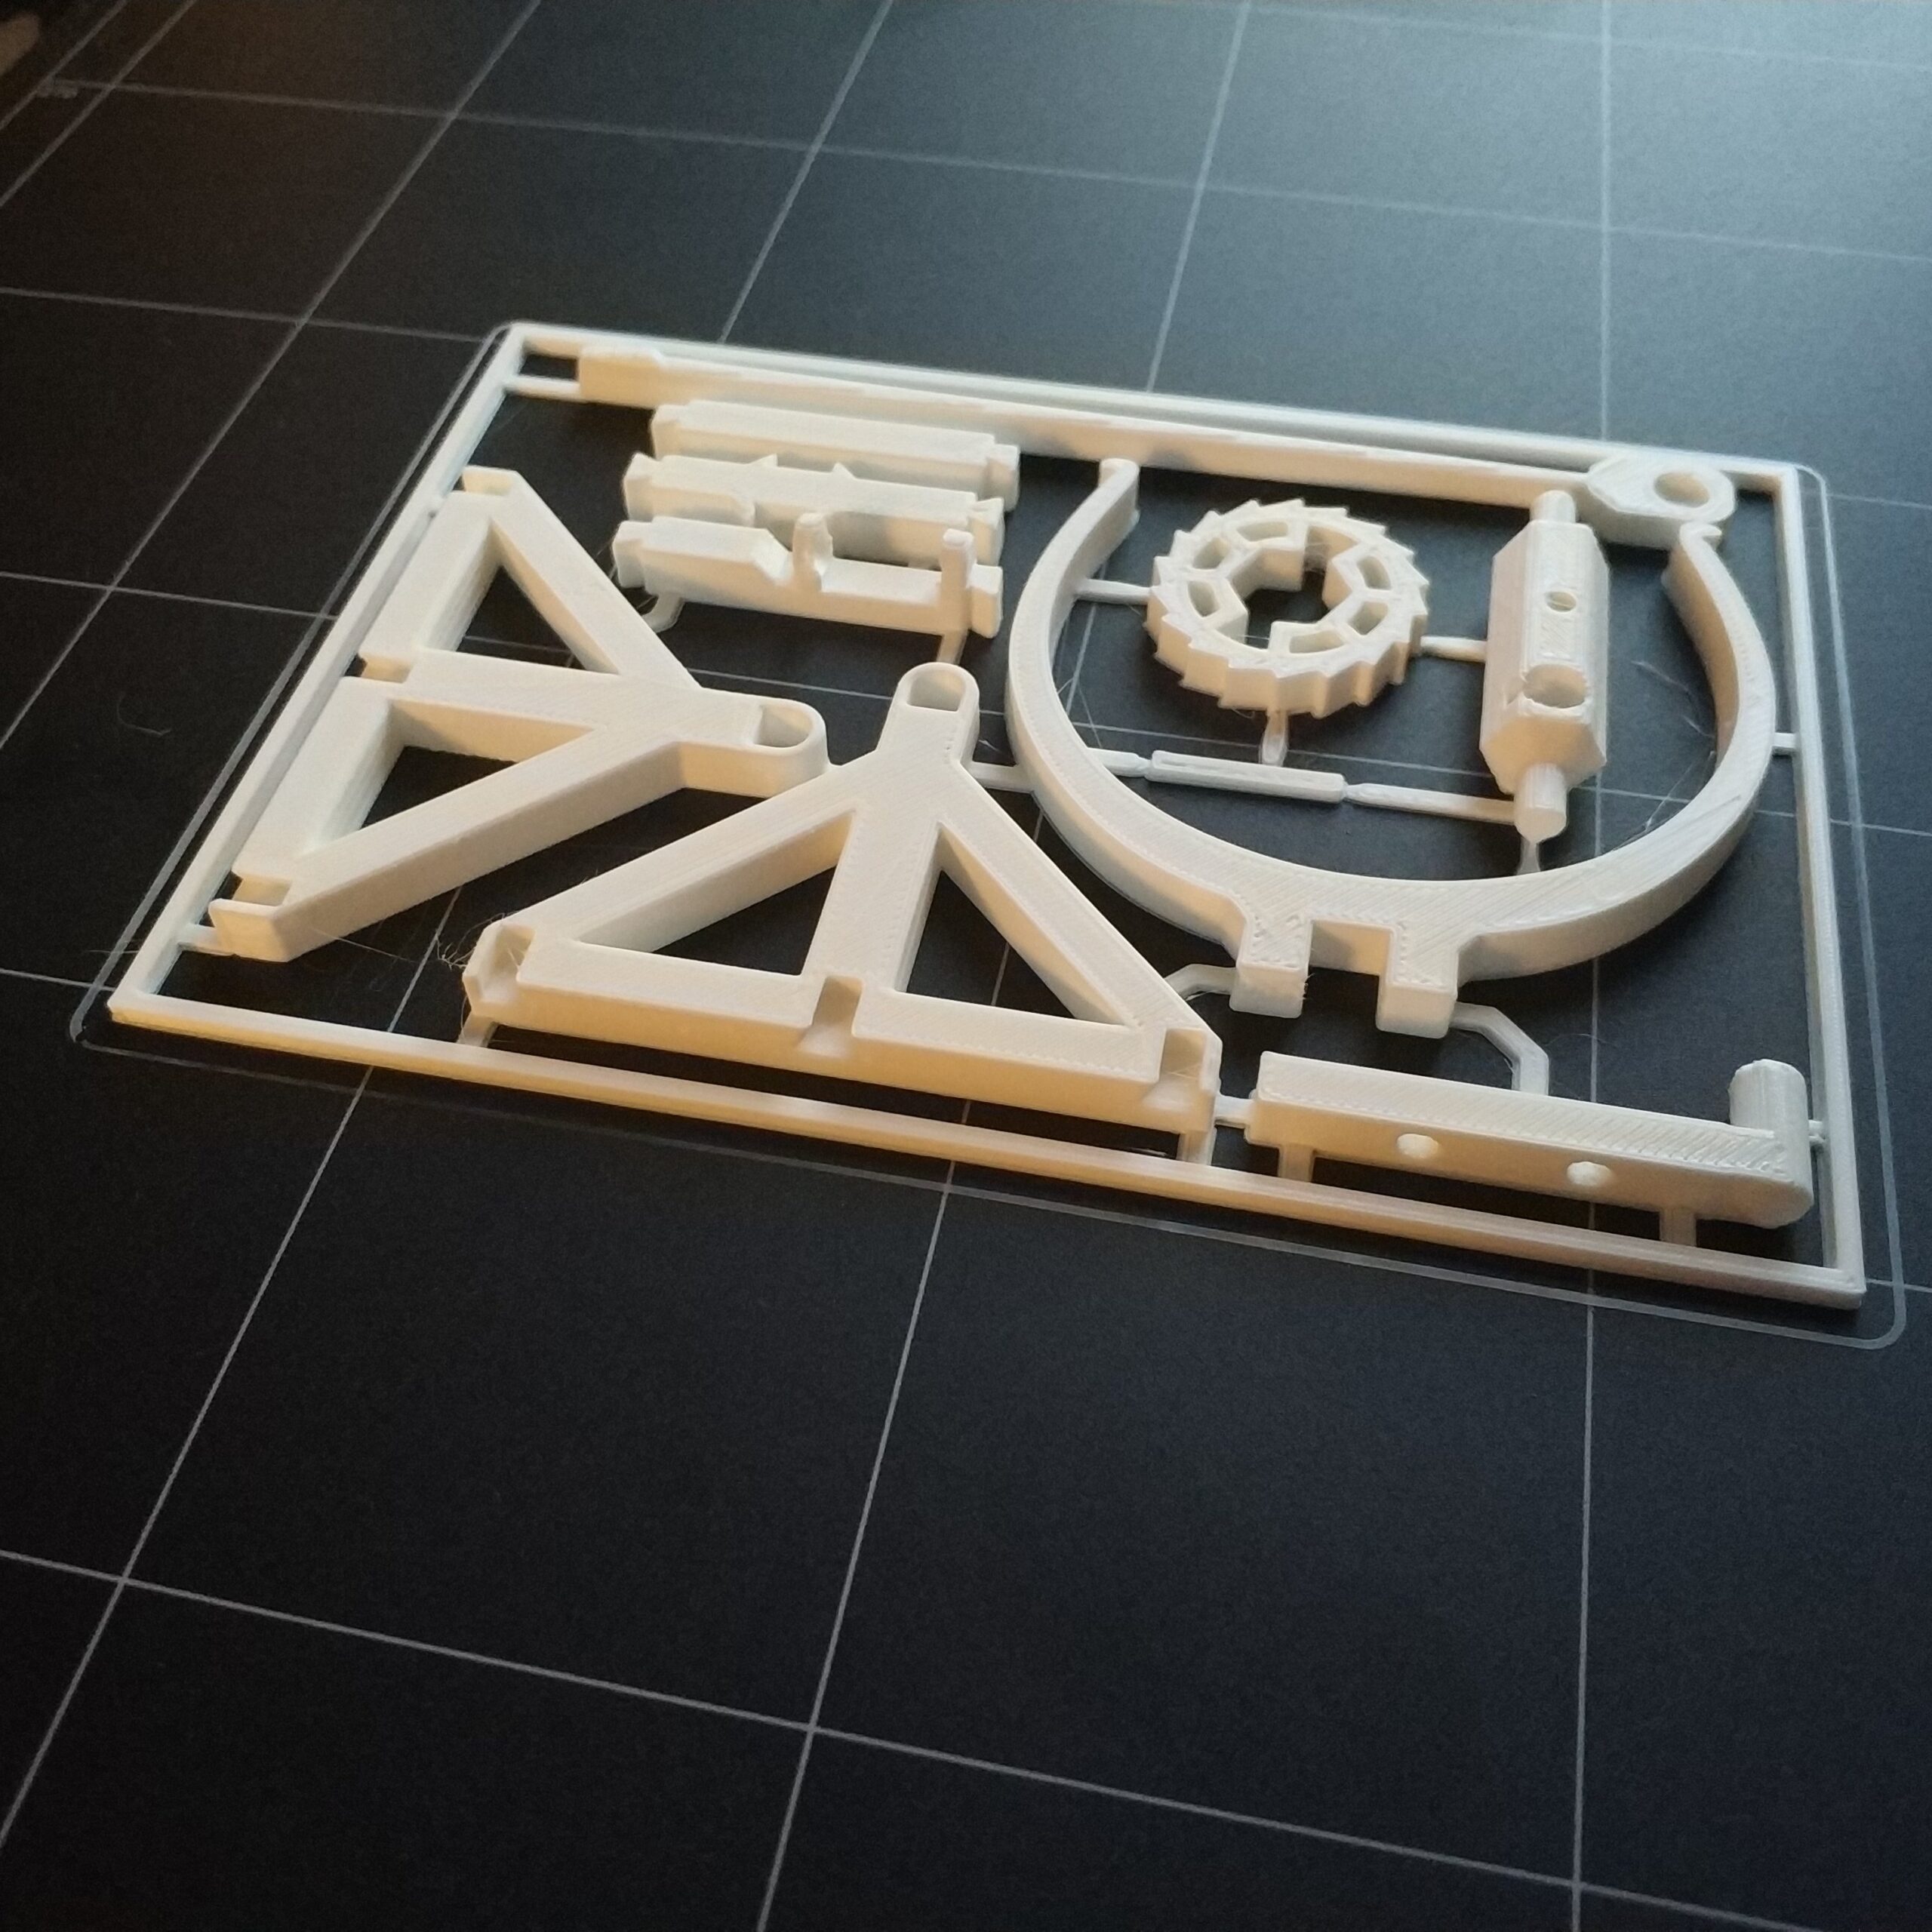
As the first 3D printed part, I wanted to print something flat that could be done quickly. Unfortunately it took 3 hours in the end.

The model is from the platform thingiverse.com where there are 3D printable models for everything. The model is from the user Bribro12.

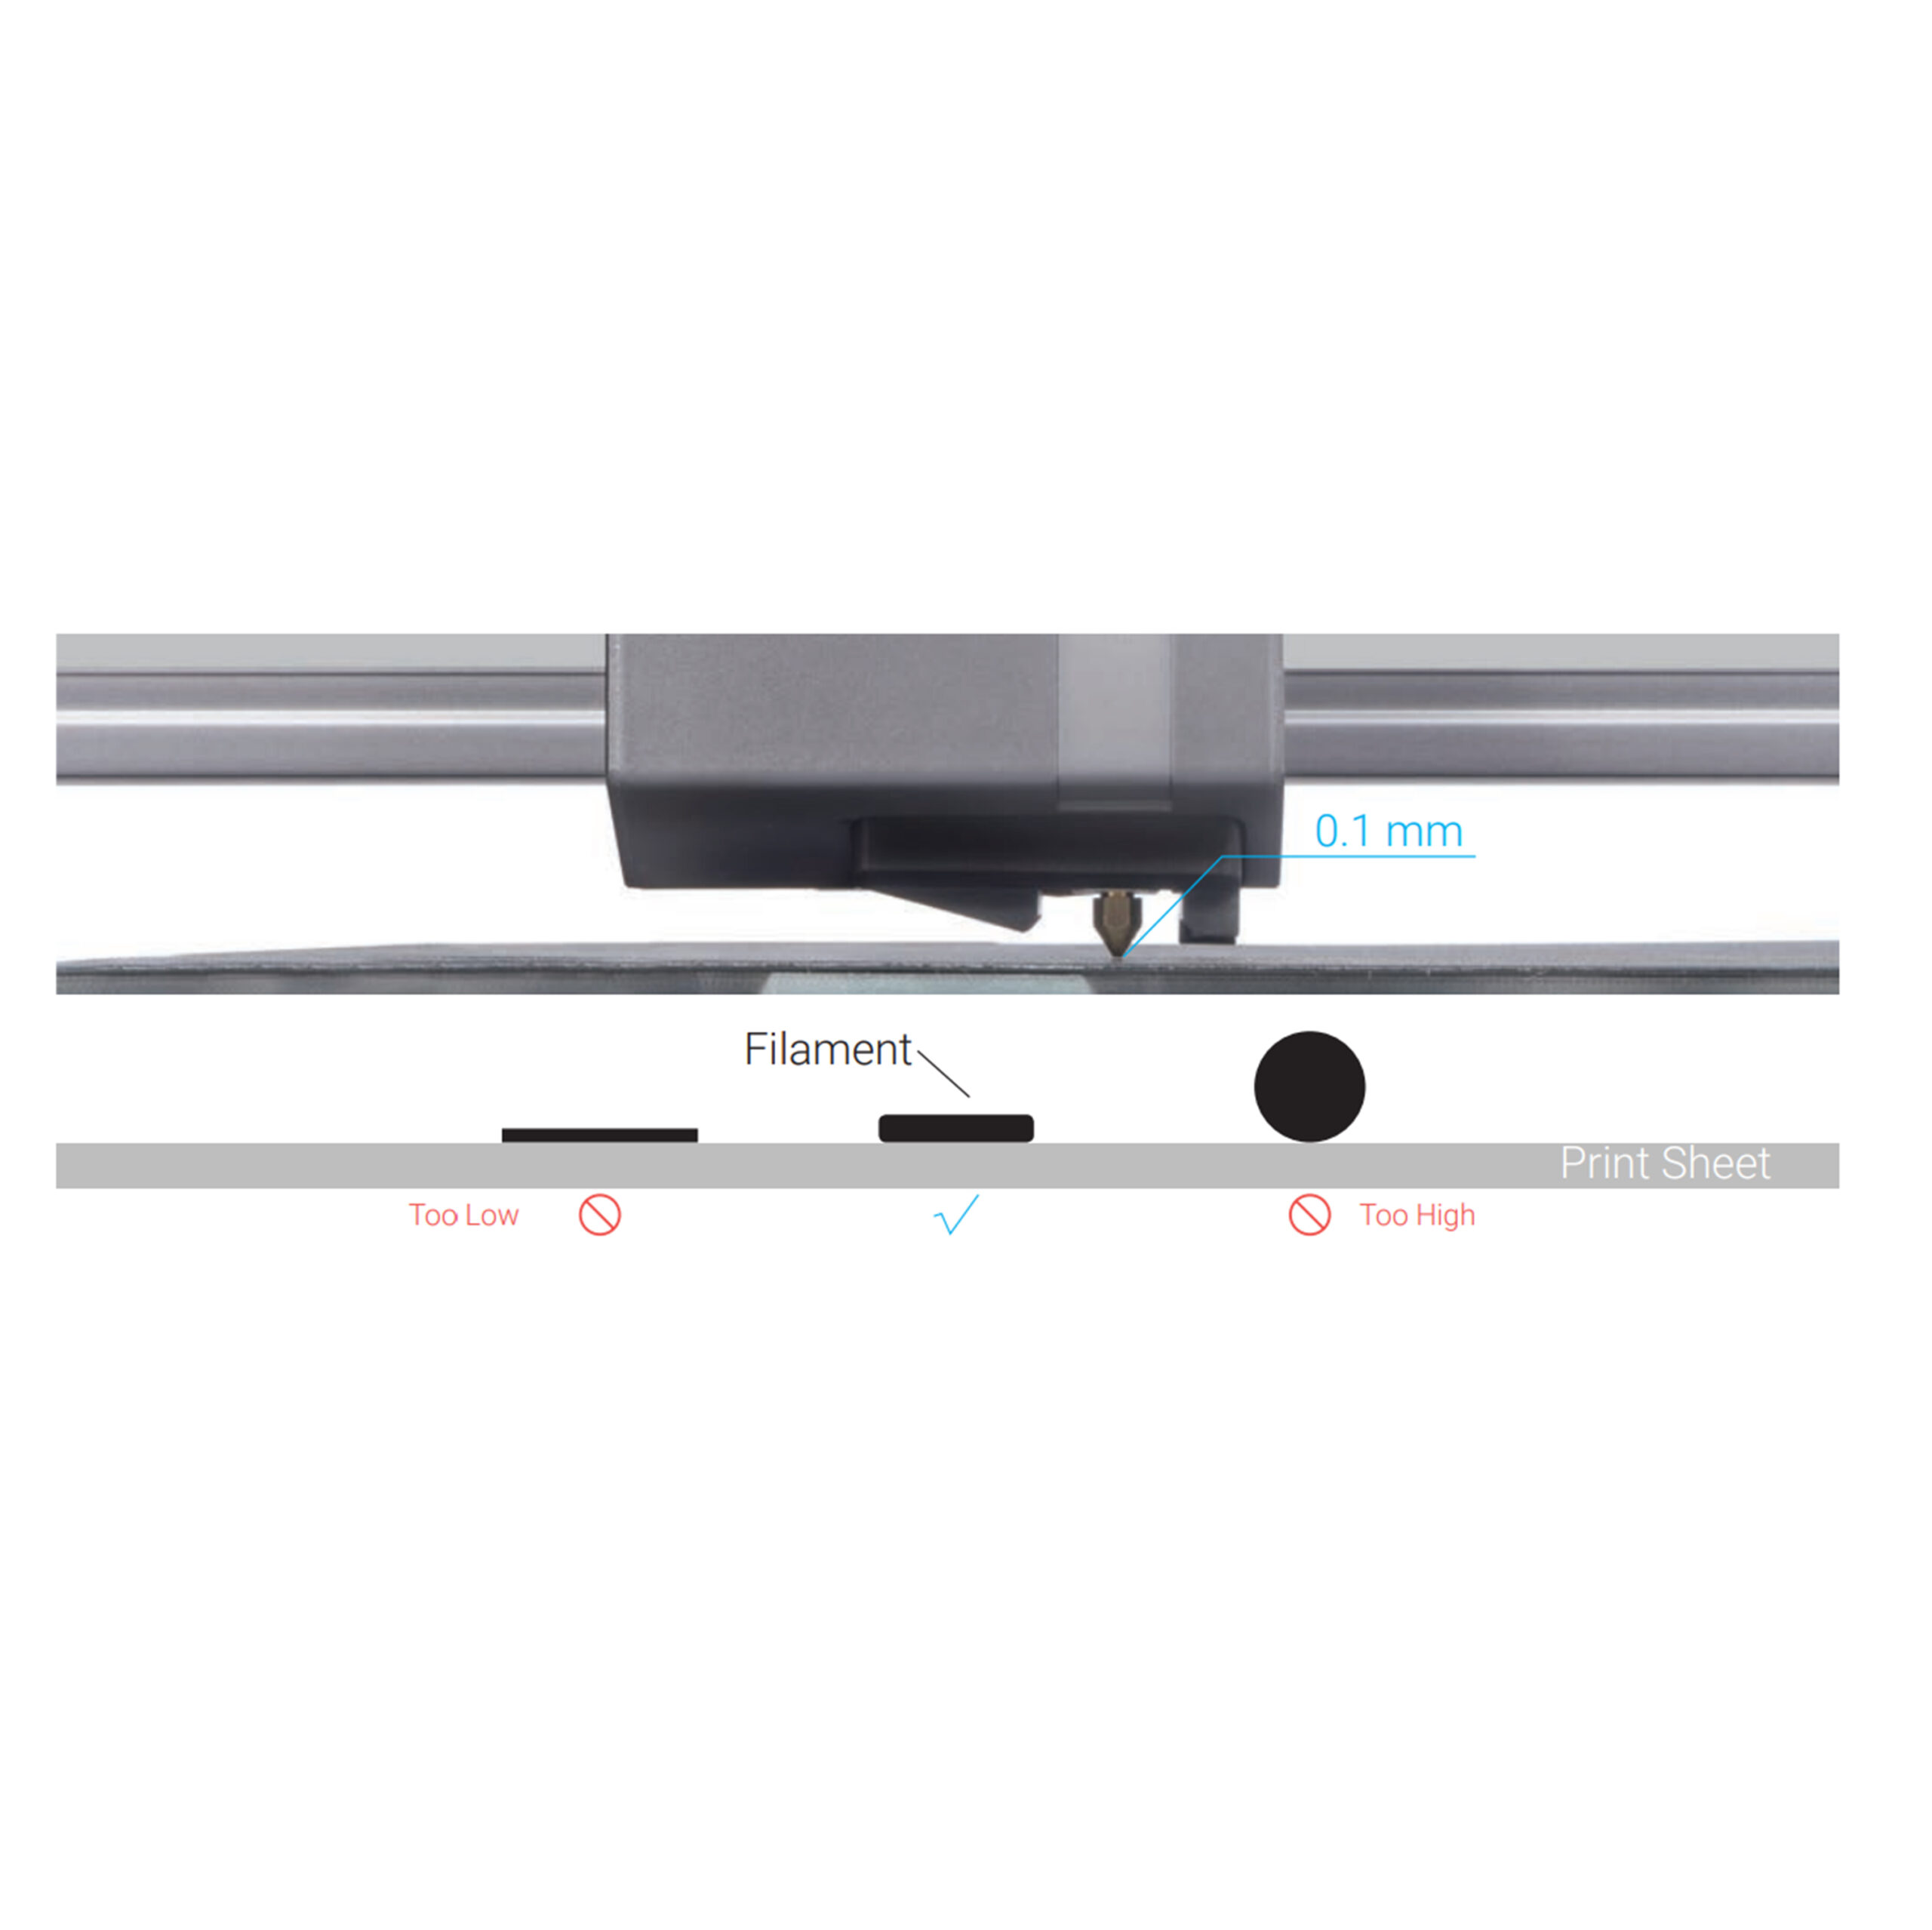
After the snapmaker had been converted, „Auto Leveling“ was carried out on the panel to digitally compensate for unevenness in the print bed. To prevent the model from becoming detached from the print bed during printing, a Z offset must be set manually so that the first printed layer adheres optimally to the print bed. To do this, we usually place a sheet of paper under the nozzle and lower the print head so that the paper can be pulled away between the print bed and nozzle with a little force.

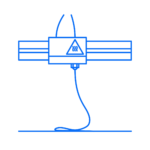
The filament can now be inserted into the printhead. To do this, the „hot end“ is heated to 200 ° C and the filament is fed in from above. Using the „load“ function in the panel, the filament is transported to the „hot end“ via gear wheels and melted.

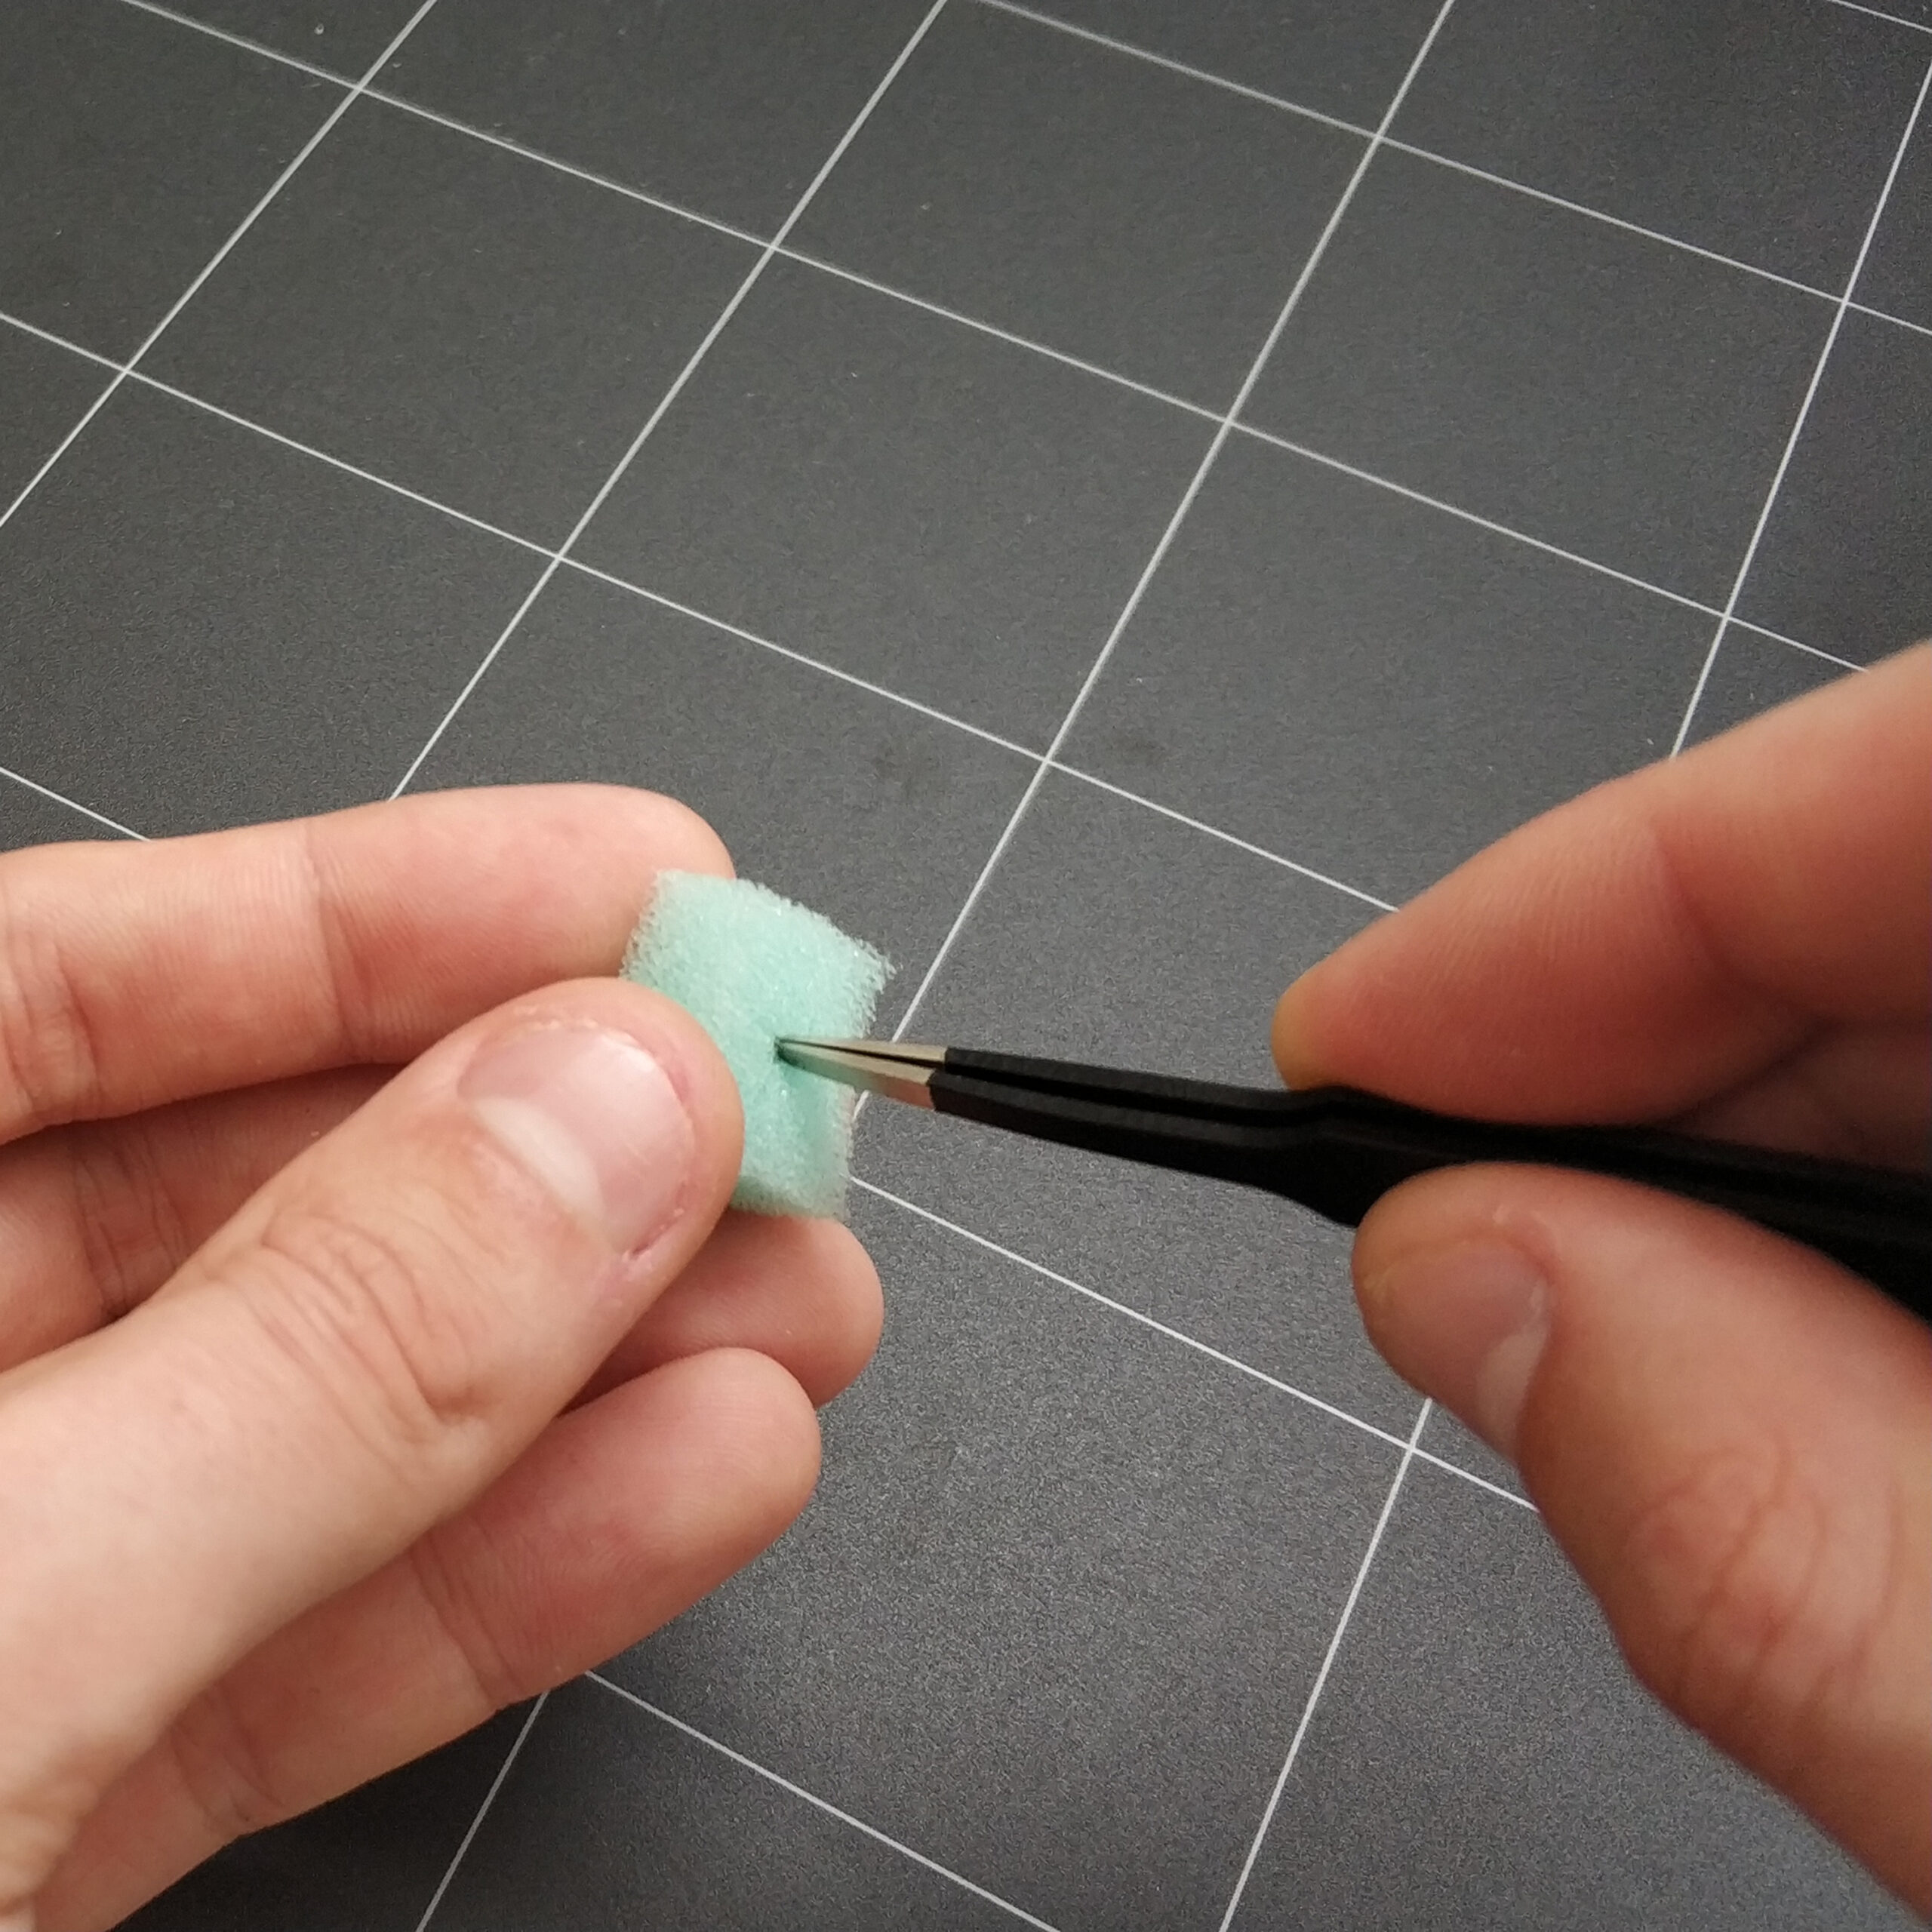
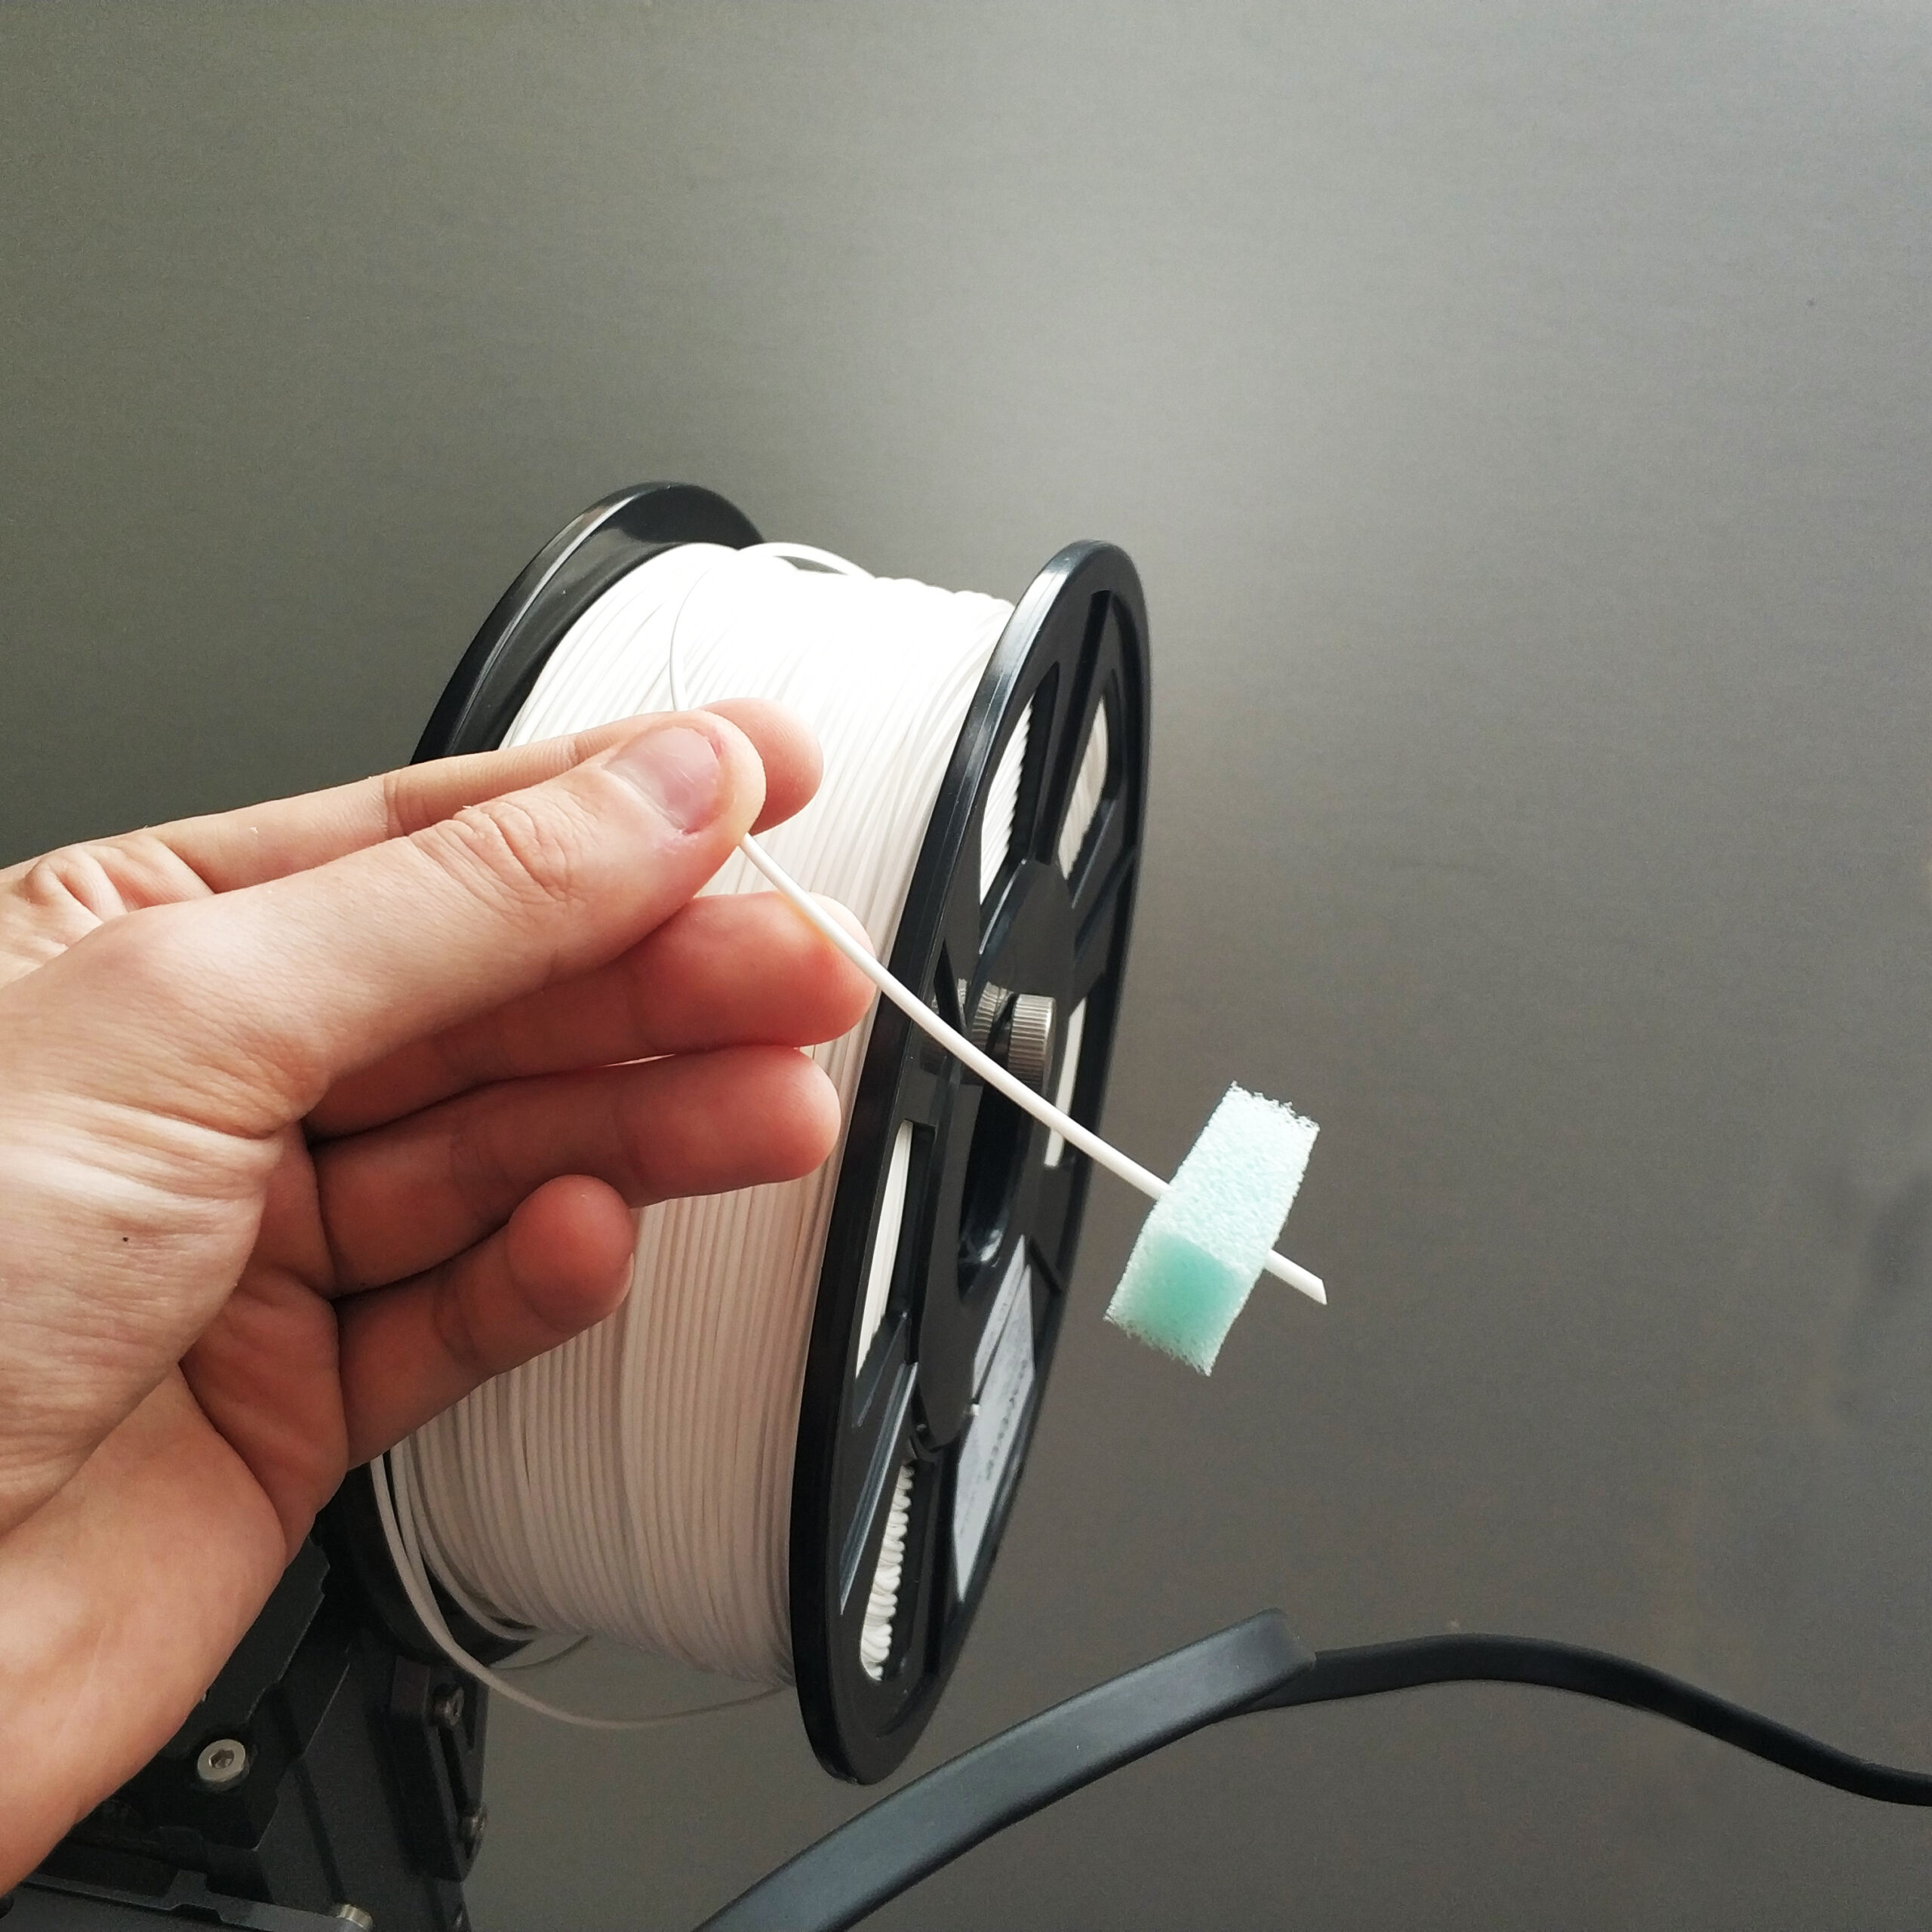
Before that, I cut a piece out of a sponge and pierced it. Then I put the filament through the sponge, which is supposed to keep dust and dirt from clogging the nozzle.

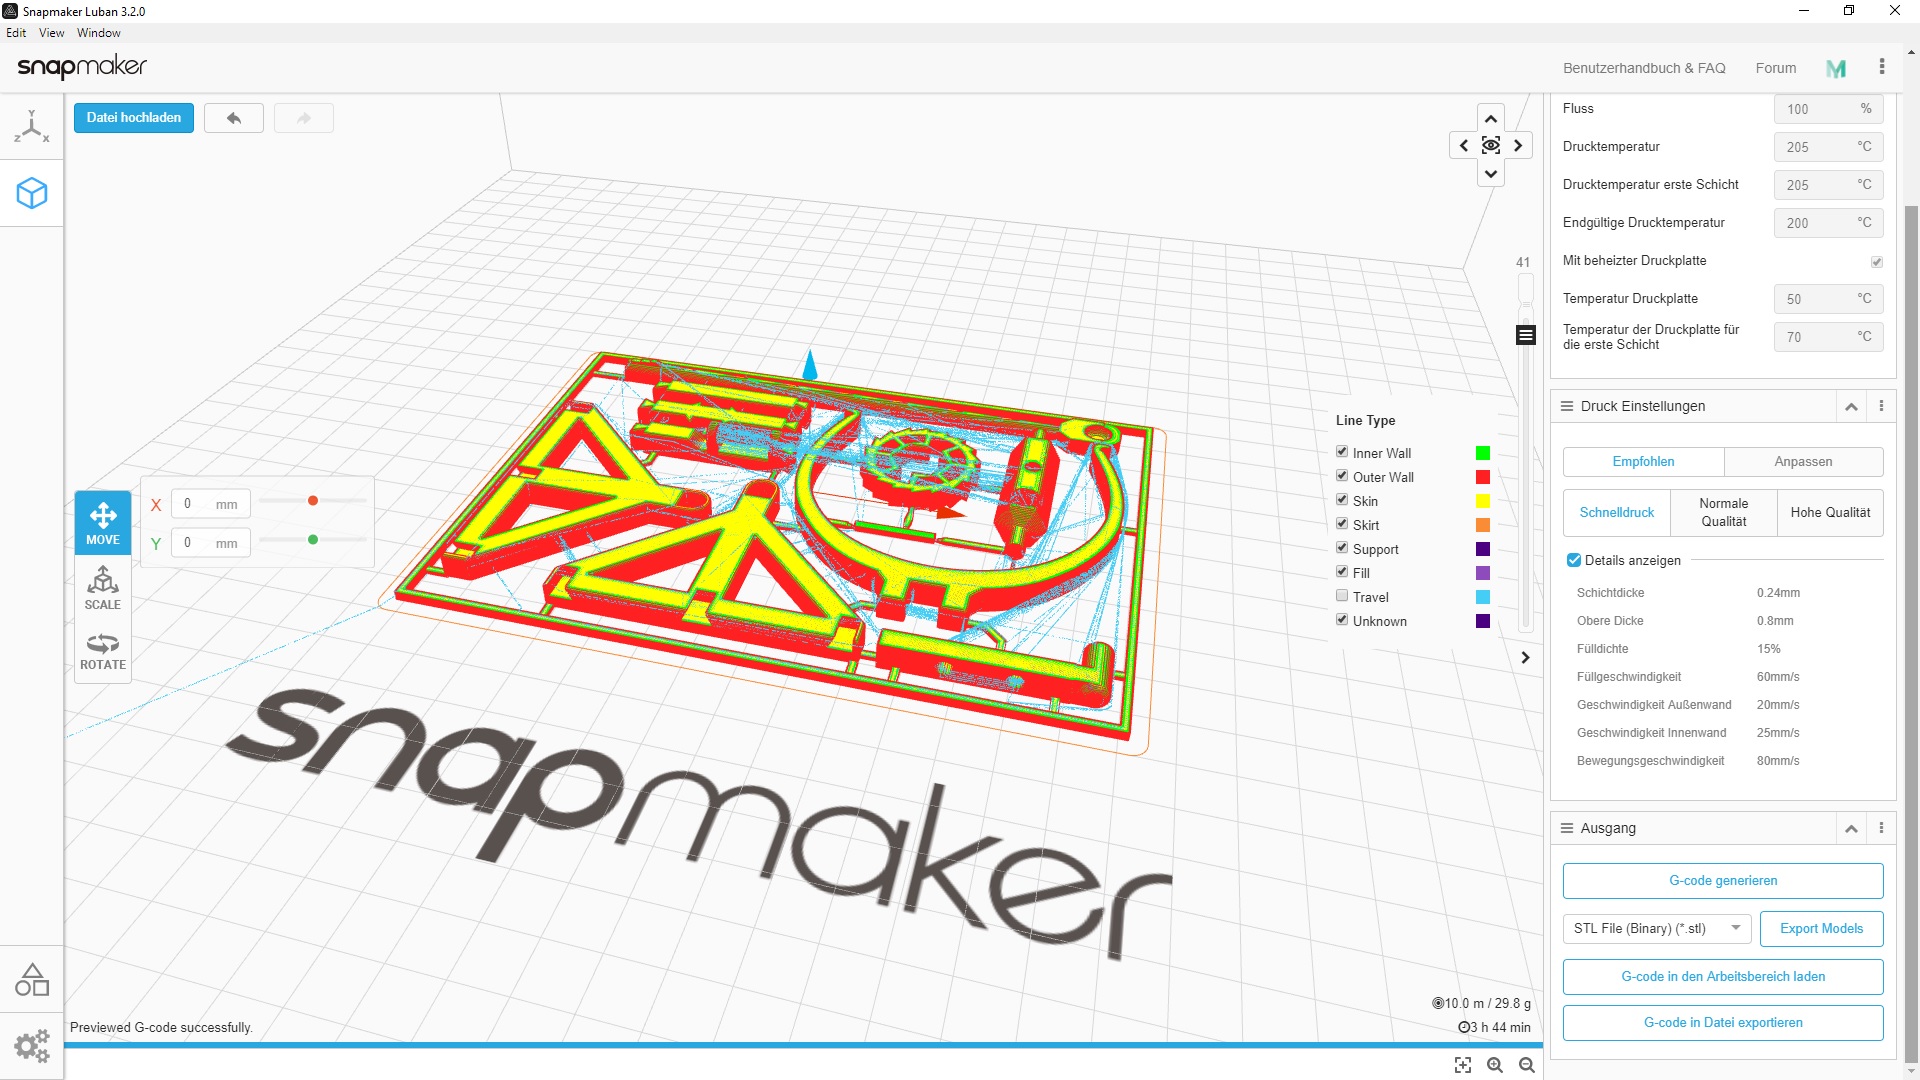
The G-code for the model was created in Luban with the „quick print“ option. The layer thickness is 0.24 mm. According to Luban, the print should take 3 hours and 44 minutes. As far as I know, it was only a little over 3 hours in real life. Approx. 30g of PLA filament were used for the print, which corresponds to approx. € 0.75 material value.

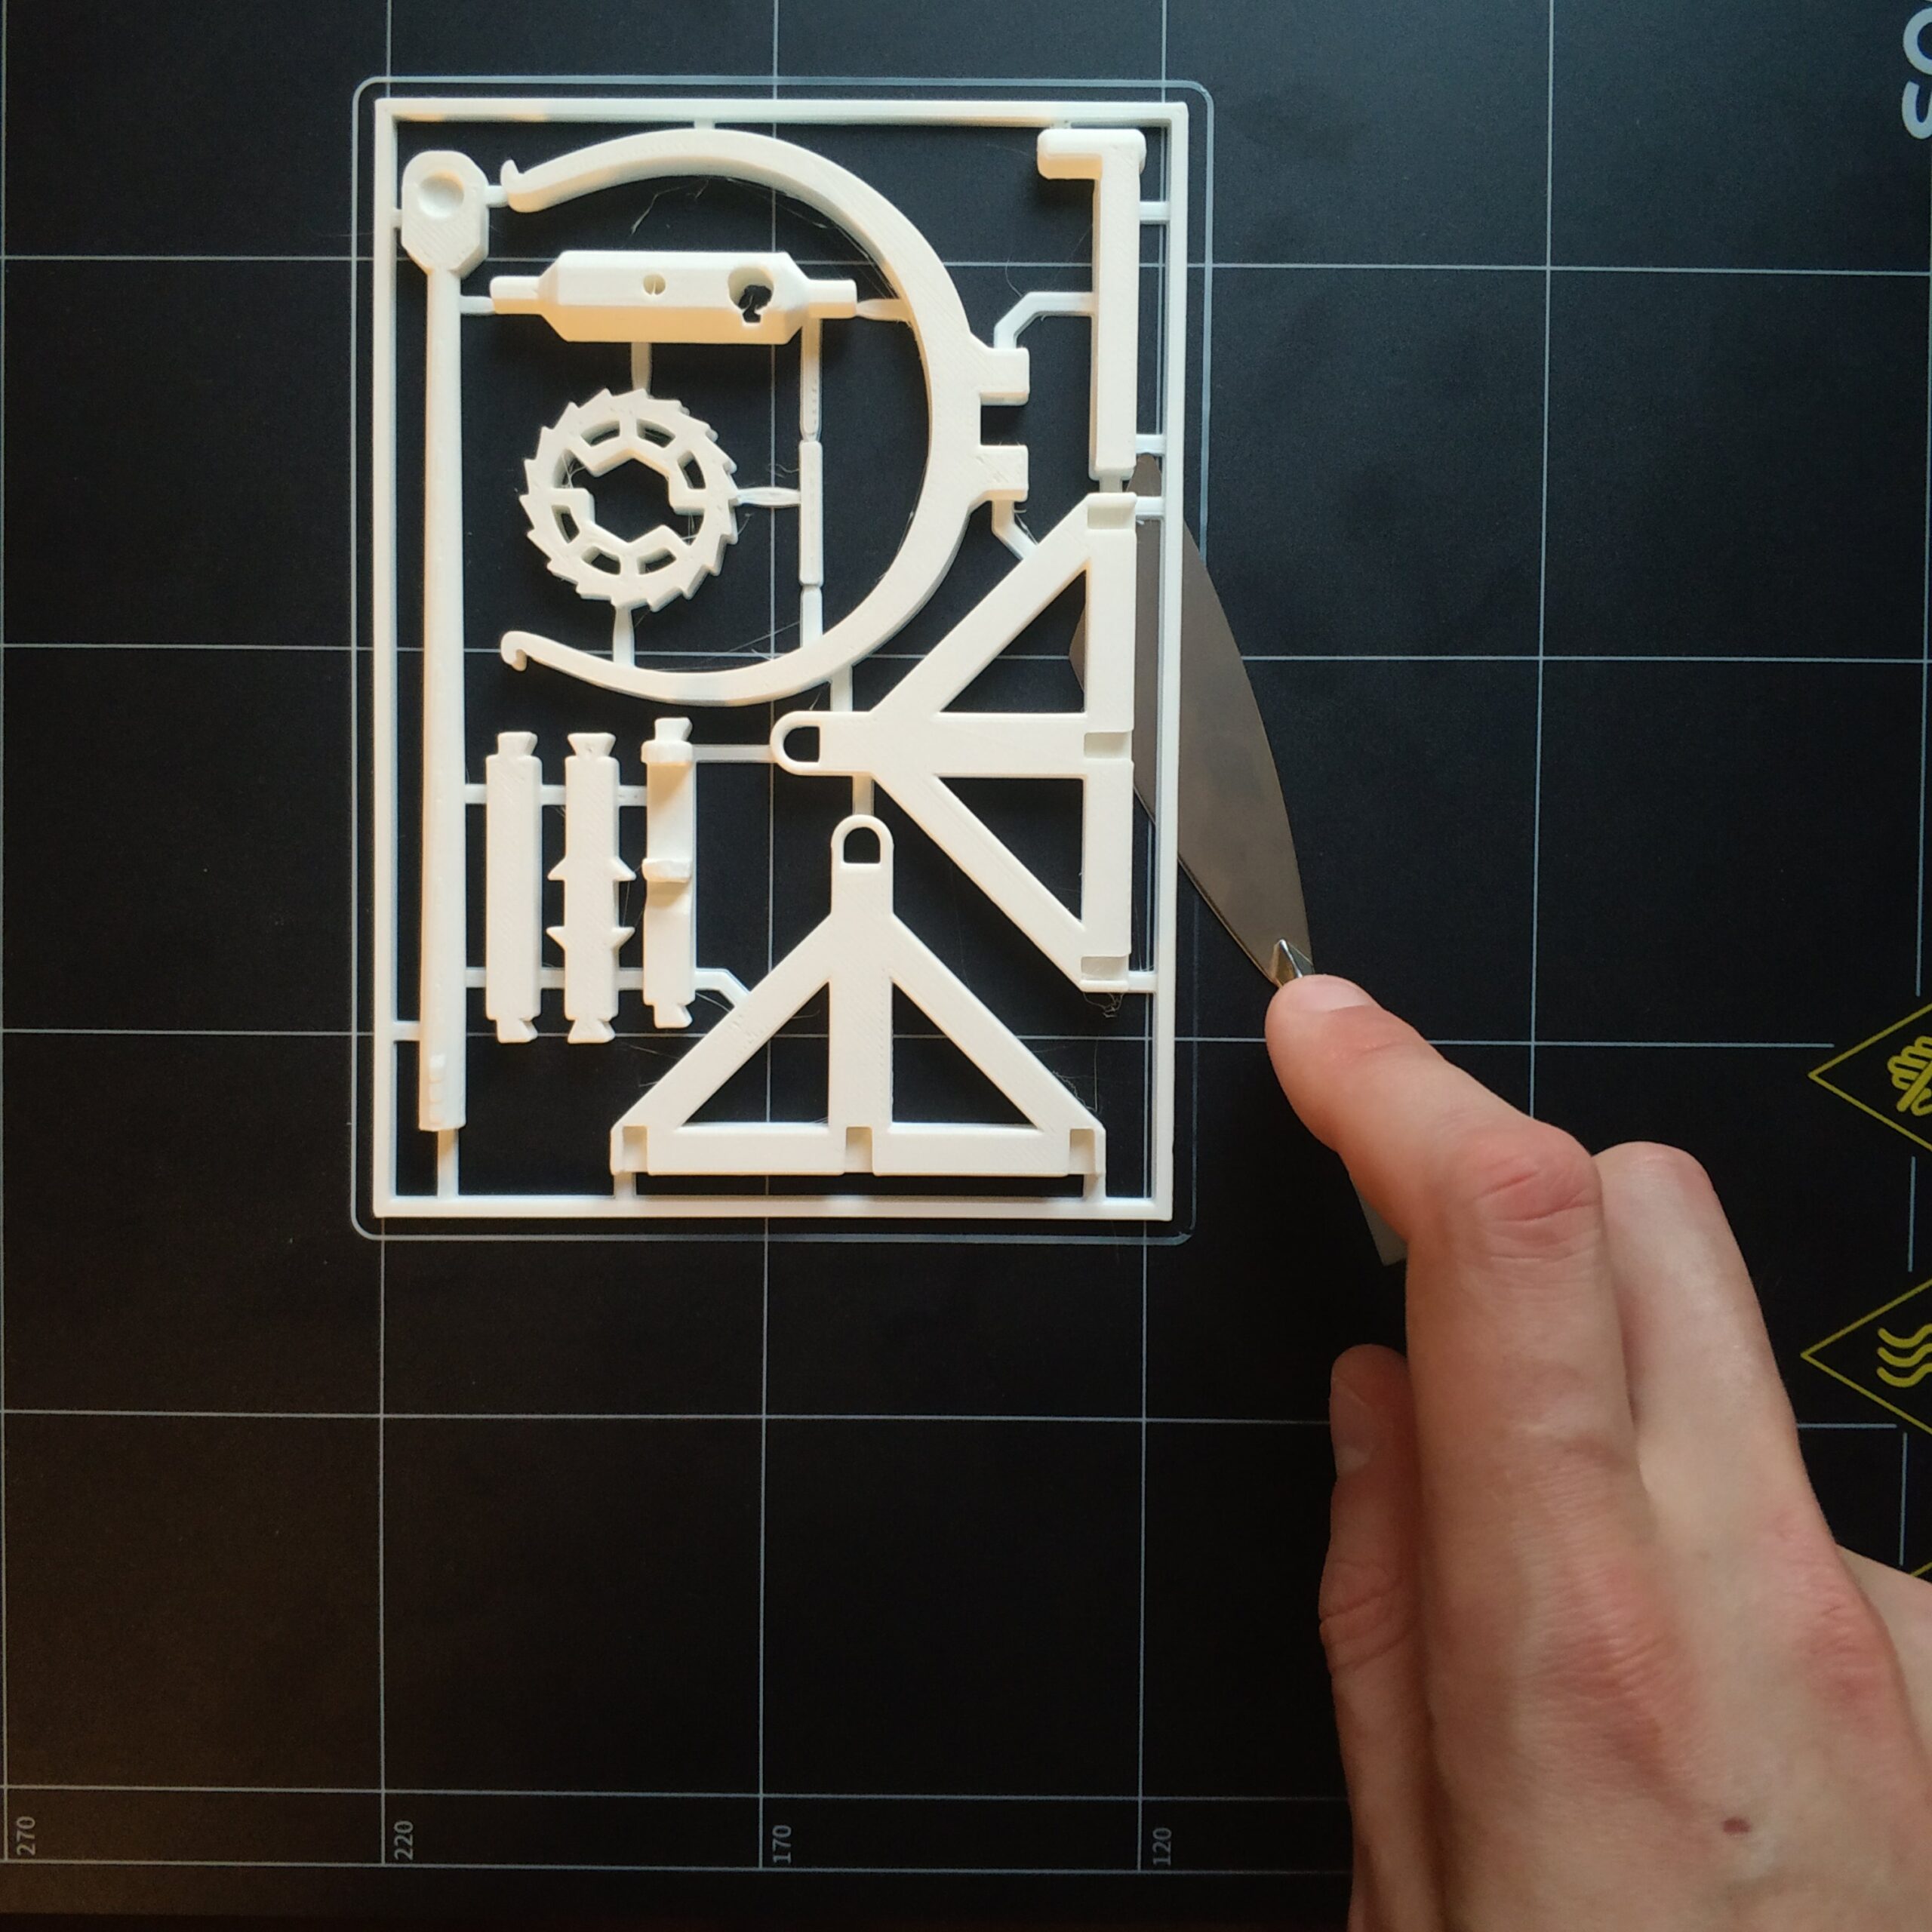
After printing, I tried to remove the print using the flexible printing plate, but without success. I assume that it works better with thicker and higher pressures, because these are stiffer and do not deform with the plate. So I gradually released the pressure with the supplied spatula. What could only be removed with a knife was the so-called „skirt“ which is pulled around the model before printing. It is used to remove the first impurities from degenerate filament and to optically limit the print area.

Degenerate plastic is created if it is heated for too long without being processed. The polymer structures of the plastic disintegrate, losing their properties and some of the molecules burn in this state.

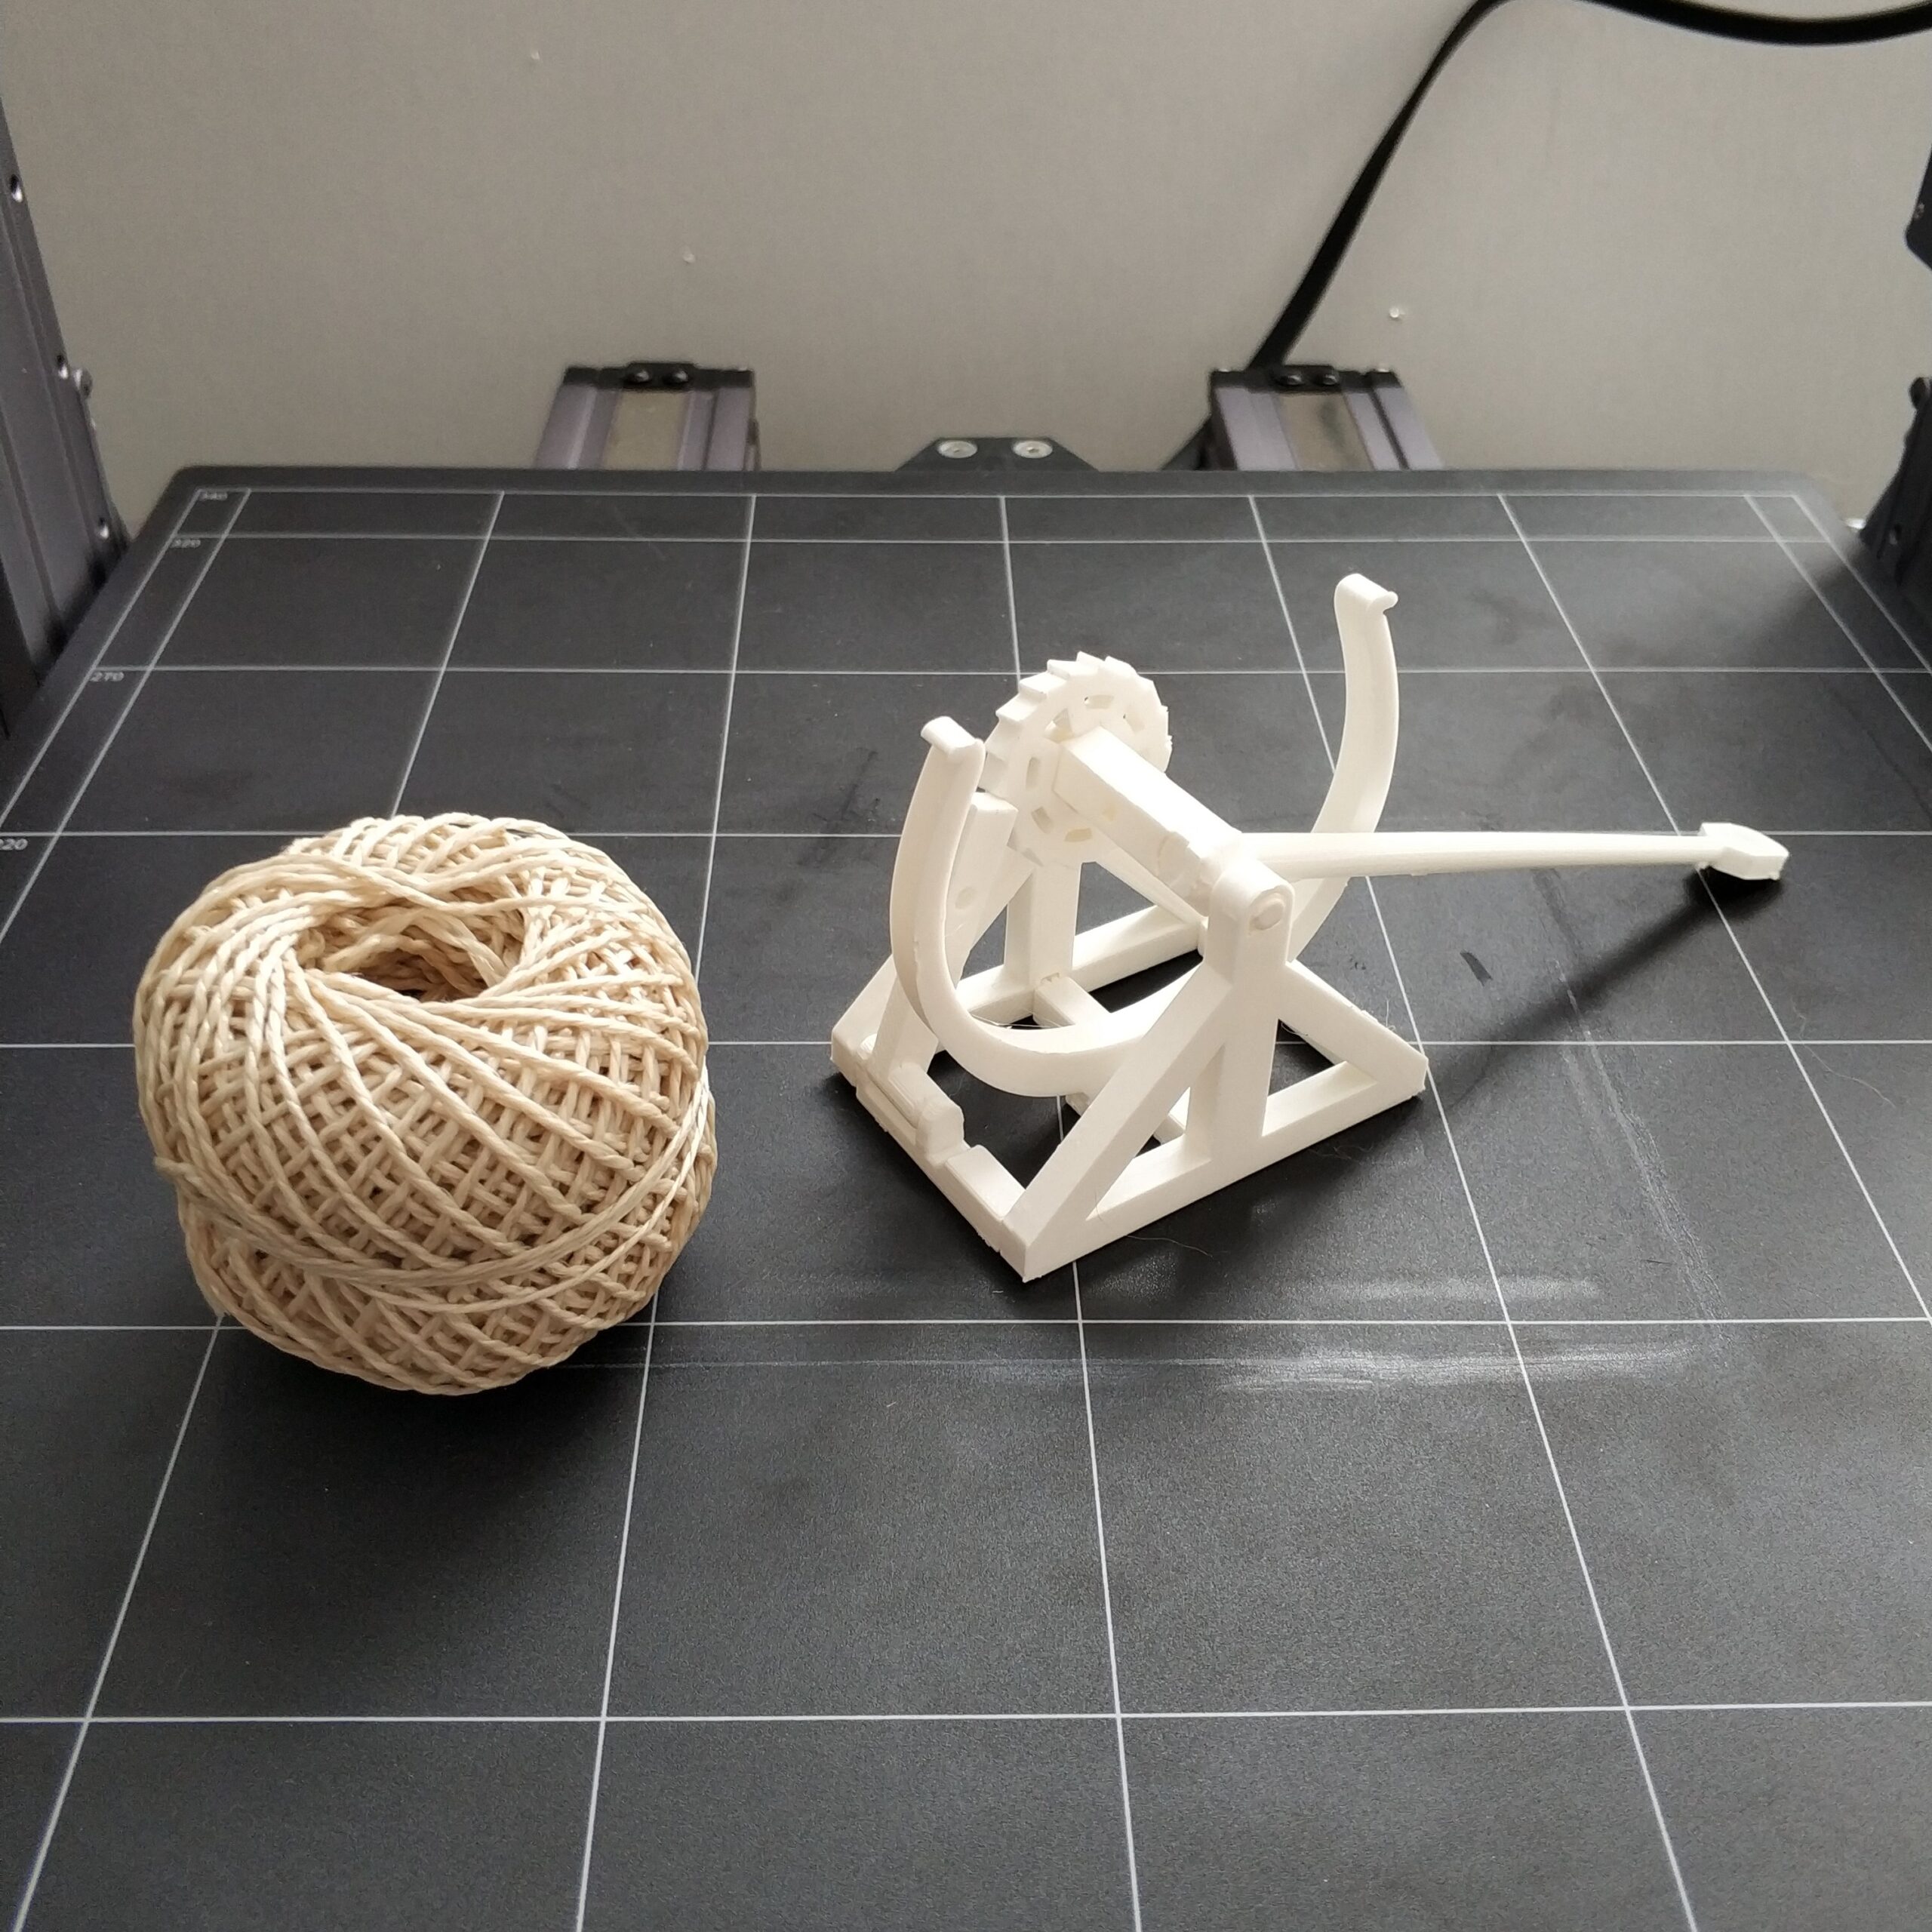
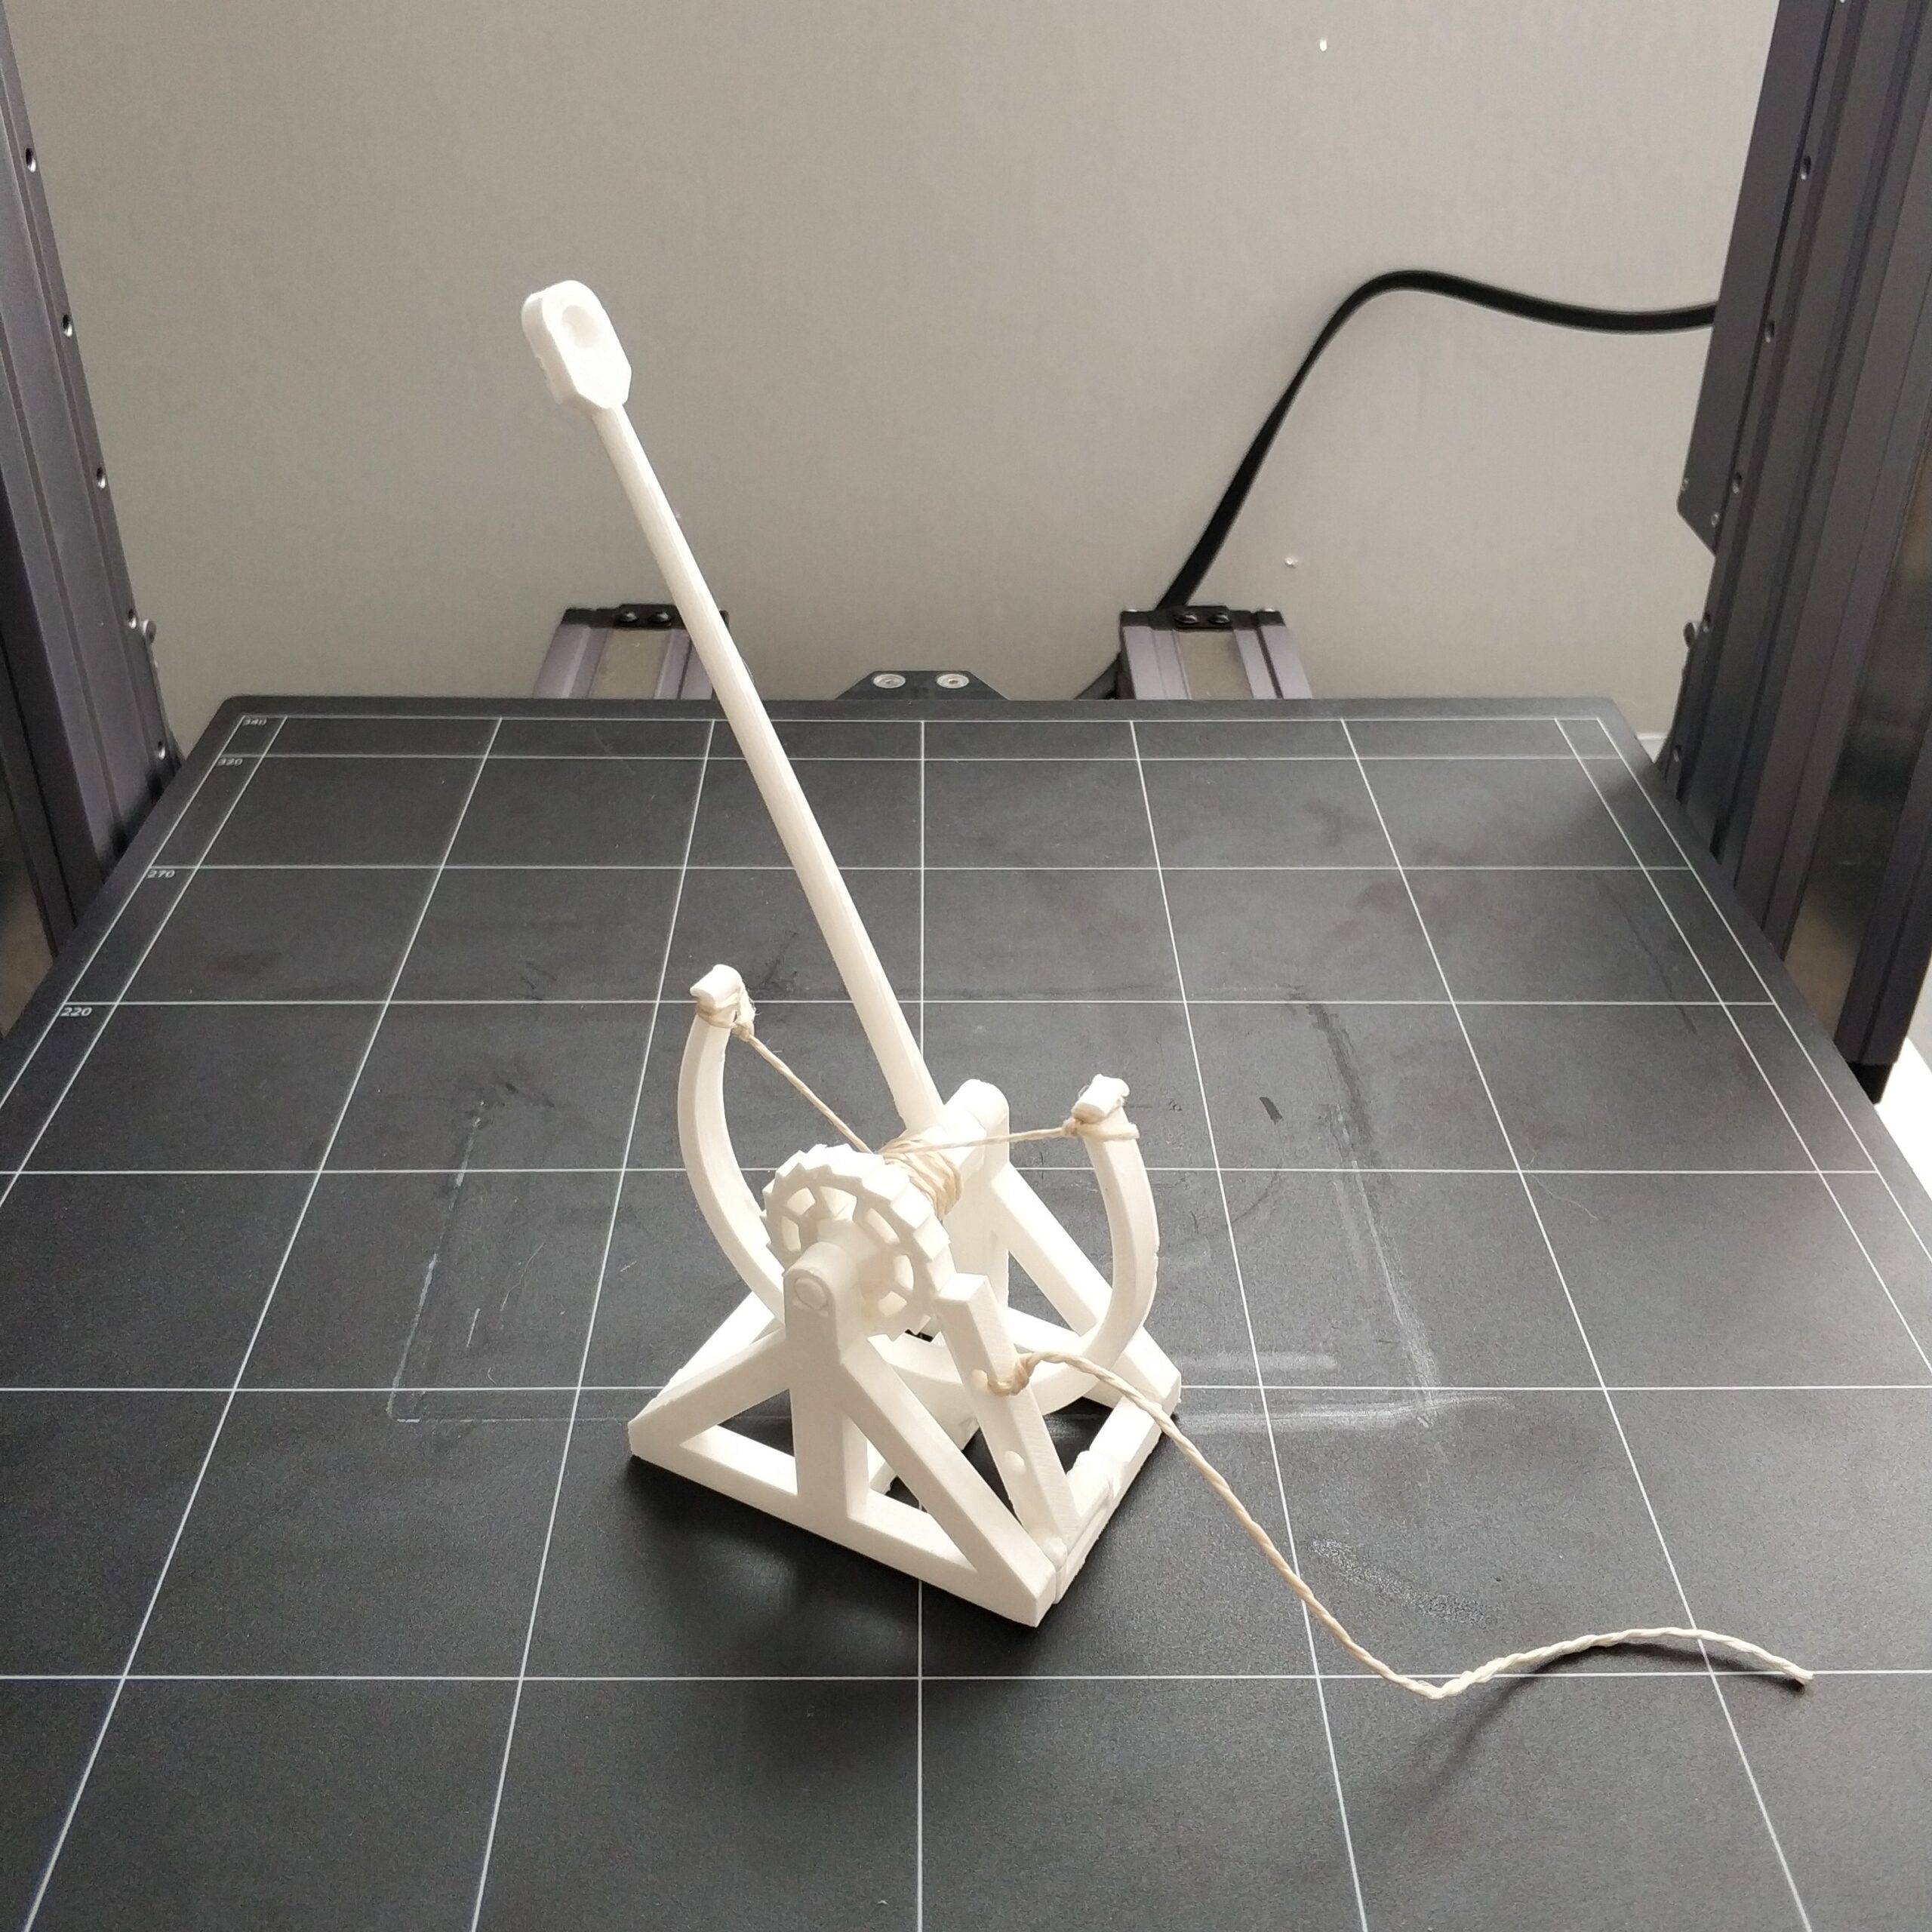
After removing the parts and putting them together, I bought some string at the hardware store to tension the catapult. That was about 30cm. The catapult was tested with cat treats. Unfortunately the treats flew in a high arc and landed on the cats‘ heads when they could have hunted for them.

Shopping Basket