Klimaanlagen Fensteradapter

Projekte

Projects

Klimaanlagen Fensteradapter

Air Conditioning Window Adapter

08.2020

Überblick

Overview
Geplantes Budget
planed budget
0
Fortschritt
progress

Design

Prepare

Build

Test

Done!

Maschienen und Werkzeuge
Machines and tools
Druckzeit ca. 7h 30min / benutztes Filament: 74g PLA  <=> ~1,85€

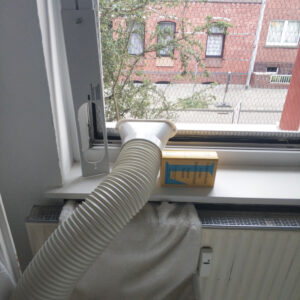
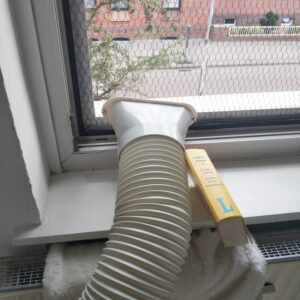
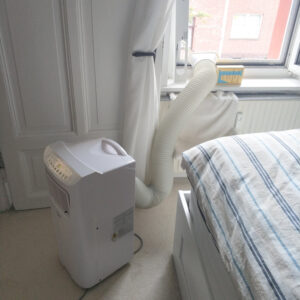
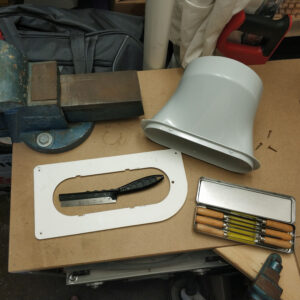
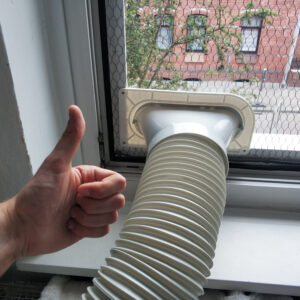
Bei über 30°C ist eine Klimaanlage ein Segen. Die warme Abluft muss über eine Rohr nach draußen abgeführt werden. Leider hat unsere Klimaanlage wie vermutlich viele andere auch nur einen Adapter für US Amerikanische Fenster. Dumm nur wenn man ein erste Welt Fenster hat und keine gute Möglichkeit hat, das Abluftrohr am Fenster anzubringen. Glücklicherweise habe ich für das Schlafzimmerfenster, als Mückenschutz und Absturzsicherung für unsere Katzen einen Holzrahmen mit bespanntem Hasendraht und Fliegengitter gebaut, an dem ein eigener Adapter befestigt werden kann.

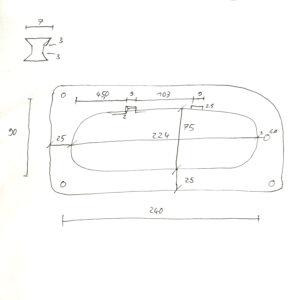
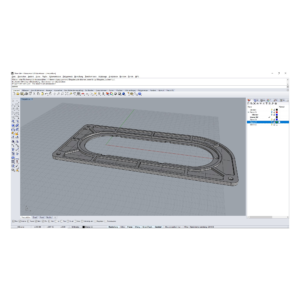
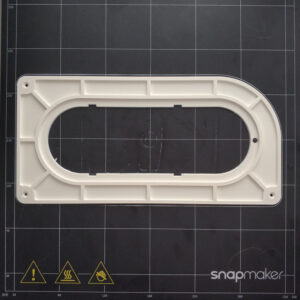
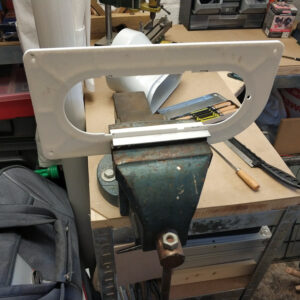
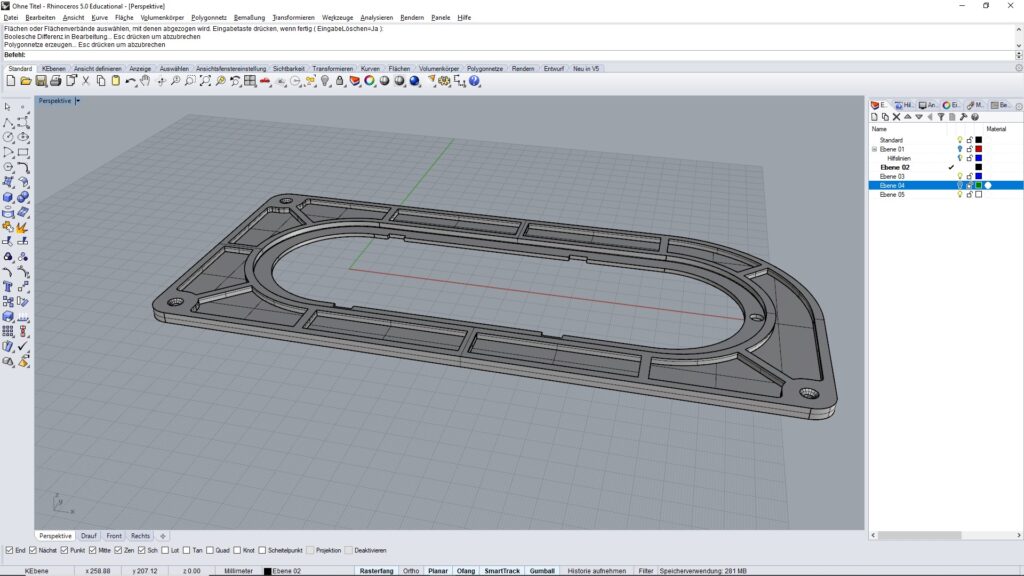
Für die Maße des Adapters habe ich eine schnelle Handskizze gemacht. In Rhino habe ich das Modell gebaut wo ich aber leider die Rastschlitze falsch gesetzt habe. Diese musste ich dann nach dem 3D Druck nacharbeiten. Das CAD Modell im Download bereich ist aber überarbeitet.

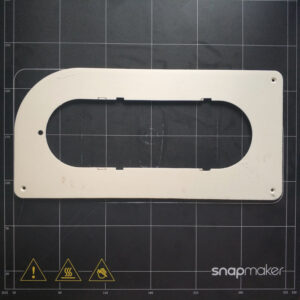
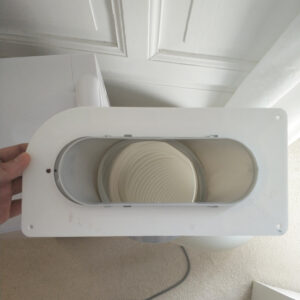
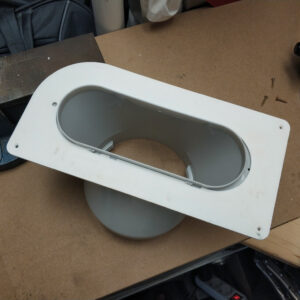
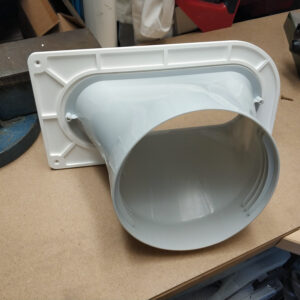
Der Adapter ist für eine „Suntec“ Klimaanlage passend und kann sowohl hochkant als auch waagerecht festgeschraubt werden. Dafür sind Senkungen sowohl auf der Vorder- als auch auf der Rückseite. Im Video sieht man, dass ich mich zuerst für ein symmetrisches Design entschieden habe, habe dann aber des 3D Drucks wegen eine Seite Glatt gemacht.

Leider muss das Fenster weiterhin ganz oder teilweise geöffnet bleiben, was die Effizienz nicht unbedingt begünstigt.

Print time approx. 7h 30min / used filament: 74g PLA  <=> ~1,85€

At over 30 °C, air conditioning is a blessing. The warm exhaust air must be discharged outside via a pipe. Unfortunately, like many others, our air conditioning only has an adapter for US American windows. It’s a pity if you have no first world window and so don’t have a good way of attaching the exhaust pipe to the window. Fortunately, for the bedroom window, as a mosquito repellent and fall protection for our cats, I built a wooden frame with harnessed rabbit wire and fly screen, to which a separate adapter can be attached.

For the dimensions of the adapter I made a quick hand sketch. I built the model in Rhino, but unfortunately I set the locking slots incorrectly. I then had to rework these after the 3D printing. The CAD model in the download area has been revised.

The adapter is suitable for a „Suntec“ air conditioning system and can be screwed on both vertically and horizontally. There are countersunk holes on the front as well as on the back. In the video you can see that I first opted for a symmetrical design, but then made one side smooth because of the 3D printing.

Unfortunately, the window still has to remain fully or partially open, which does not necessarily improve efficiency.

3D Model

3d model 3d model,blender,obj,3ds,maya,dxf,dae,stl,vrml,x3d,file by z9z1rc
     

Snapmaker erster 3D Druck

Projekte

Projects

Snapmaker erster 3D Druck

Snapmaker first 3D Print

08.2020

Überblick

Overview
Geplantes Budget
planed budget
~ 0
Fortschritt
progress

Design

Prepare

Build

Test

Done!

Maschienen und Werkzeuge
Machines and tools
Druckzeit ca. 3h / benutztes Filament: 29,8g PLA  <=> ~0,75€

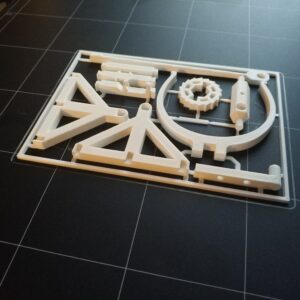
Als erstes 3D gedrucktes Teil wollte ich etwas flaches drucken was schnell geht. Dummerweise hat es dann am Ende doch 3 Stunden gedauert.

Das Modell ist von der Plattform thingiverse.com wo es für alles Mögliche 3D druckbare Modelle gibt. Das Model ist von dem User Bribro12.

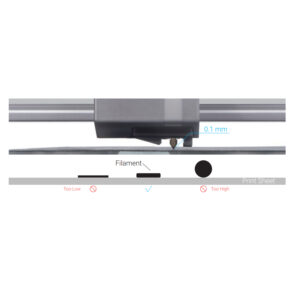
Nach dem Umbau des Snapmakers wurde über das Panel, das „Auto Leveling“ ausgeführt um Unebenheiten im Druckbed digital auszugleichen. Um zu verhindern das sich das Model während des Druckens vom Druckbett löst, muss manuell ein Z Offset eingestellt werden sodass die erste gedruckte Schicht  optimal auf dem Druckbett haftet. Dazu wir normalerweise ein Blatt Papier unter die Düse gelegt und der Druckkopf soweit abgesengt, dass das Papier mit etwas Kraft zwischen Druckbett und Düse weggezogen werden kann.

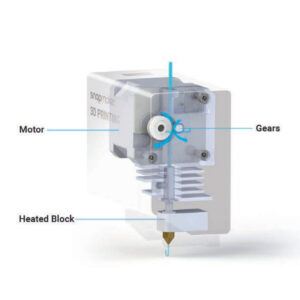
Nun kann das Filament in den Druckkopf eingeführt werden. Dazu wird das „Hot End“ auf 200°C erhitzt und das Filament von oben zugeführt. Über die „load“ Funktion im Panel wird das Filament über Zahnräder zum „Hot End“ transportiert und geschmolzen.

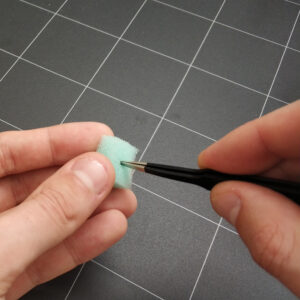
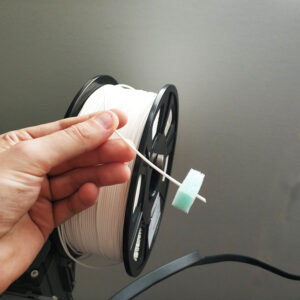
Zuvor habe ich ein Stückchen aus einem Schwamm ausgeschnitten und durchstochen. Dann habe ich das Filament durch den Schwamm gesteckt, der verhindern soll, dass Staub und Schmutz die Düse verstopft.

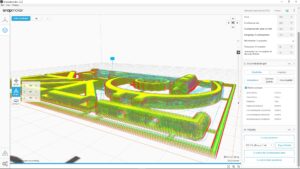
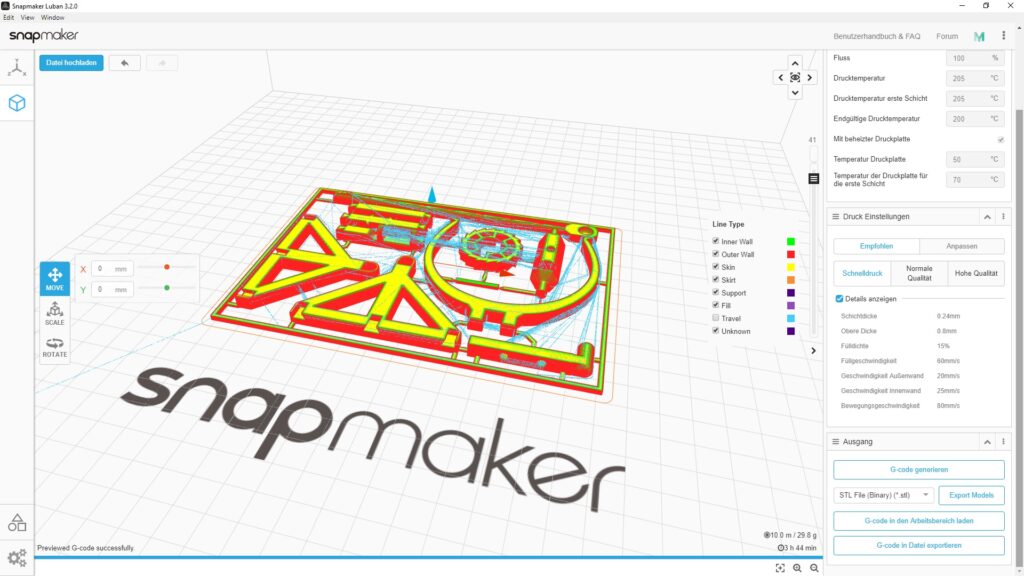
Der G-Code für das Model wurde in Luban mit der Option „Schnelldruck“ erstellt. Dabei beträgt die Schichtdicke 0,24mm. Laut Luban soll der Druck 3 Stunden und 44 min dauern. In echt waren es soweit ich weiß nur etwas mehr als 3 Stunden. Es wurden für den Druck ca. 30g PLA Filament verbraucht was umgerechnet ca. 0,75€ Materialwert entspricht.

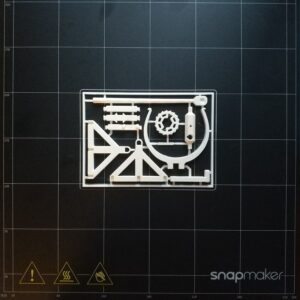
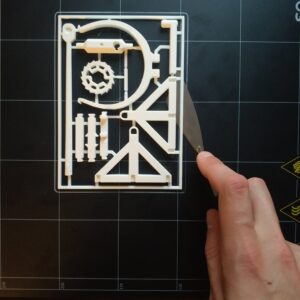
Nach dem Druck habe ich versucht über die biegsame Druckplatte den Druck abzulösen aber ohne Erfolg. Ich gehe davon aus das es besser klappt bei Dickeren und höheren Drucken, da diese Steifer sind und sich nicht mit der Platte verformen. So habe ich mit dem mitgelieferten Spatel den Druck nach und nach abgelösten. Was nur mit einem Messer ablösen konnte, war der sogenannte „skirt“ der vor dem Drucken um das Model gezogen wird. Er dient dazu erste Verunreinigungen durch degeneriertes Filament zu beseitigen und den Druckbereich optisch einzugrenzen. 

Degenerierter Kunststoff entsteht, wenn dieser zu lange unverarbeitet erhitz wird. Dabei zerfallen die Polymerstrukturen des Kunststoffs, verlieren dadurch ihre Eigenschaften und manche der Moleküle verbrennen in dem Zustand.

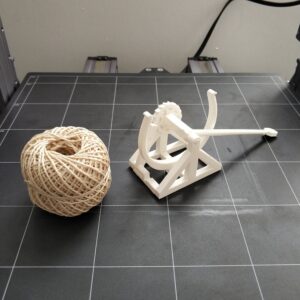
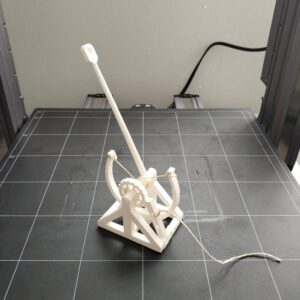
Nach dem Herauslösen und Zusammenstecken der Teile habe ich im Baumarkt etwas Schnur gekauft um das Katapult zu spannen. Das waren etwa 30cm. Getestet wurde das Katapult mit Katzen Leckerlies. Leider sind die Leckerlies im hohen bogen geflogen und sind er auf den Köpfen der Katzen gelandet als das sie danach hätten jagen können.

Print time approx. 3h / used filament: 29,8g PLA  <=> ~0,75€

As the first 3D printed part, I wanted to print something flat that could be done quickly. Unfortunately it took 3 hours in the end.

The model is from the platform thingiverse.com where there are 3D printable models for everything. The model is from the user Bribro12.

After the snapmaker had been converted, „Auto Leveling“ was carried out on the panel to digitally compensate for unevenness in the print bed. To prevent the model from becoming detached from the print bed during printing, a Z offset must be set manually so that the first printed layer adheres optimally to the print bed. To do this, we usually place a sheet of paper under the nozzle and lower the print head so that the paper can be pulled away between the print bed and nozzle with a little force.

The filament can now be inserted into the printhead. To do this, the „hot end“ is heated to 200 ° C and the filament is fed in from above. Using the „load“ function in the panel, the filament is transported to the „hot end“ via gear wheels and melted.

Before that, I cut a piece out of a sponge and pierced it. Then I put the filament through the sponge, which is supposed to keep dust and dirt from clogging the nozzle.

The G-code for the model was created in Luban with the „quick print“ option. The layer thickness is 0.24 mm. According to Luban, the print should take 3 hours and 44 minutes. As far as I know, it was only a little over 3 hours in real life. Approx. 30g of PLA filament were used for the print, which corresponds to approx. € 0.75 material value.

After printing, I tried to remove the print using the flexible printing plate, but without success. I assume that it works better with thicker and higher pressures, because these are stiffer and do not deform with the plate. So I gradually released the pressure with the supplied spatula. What could only be removed with a knife was the so-called „skirt“ which is pulled around the model before printing. It is used to remove the first impurities from degenerate filament and to optically limit the print area.

Degenerate plastic is created if it is heated for too long without being processed. The polymer structures of the plastic disintegrate, losing their properties and some of the molecules burn in this state.

After removing the parts and putting them together, I bought some string at the hardware store to tension the catapult. That was about 30cm. The catapult was tested with cat treats. Unfortunately the treats flew in a high arc and landed on the cats‘ heads when they could have hunted for them.

Snapmaker Laser Test

Projekte

Projects

Snapmaker Laser Test

Snapmaker Laser Test

08.2020

Überblick

Overview
Geplantes Budget
planed budget
0
Fortschritt
progress

Design

Prepare

Build

Test

Done!

Maschienen und Werkzeuge
Machines and tools

Um mich mit dem Laser vertraut zu machen habe ich ein paar Tests gemacht.

Schneiden

Anfangs ging ich noch davon aus das Luban nur Bilder verarbeiten kann und Schnitte nur durch tiefes Gravieren gemacht werden können. Nach erneuter Recherche im Internet habe ich dann herausgefunden, dass Luban Vektorpfade aus SVG Grafiken akzeptiert. Beim lasern hat man drei Optionen, Schwarz und Weiß, Graustufen und Überträger. Mit der Option „Überträger“ können jene Vektorpfade aus SVG Dateien verarbeitet werden.

Beim Schneiden kann man die Schnittgeschwindigkeit, die Leistung und die Anzahl der Durchgänge mit Z Zustellung einstellen. Da der Laser nur 1600mW Leistung hat, habe ich die Leistung immer auf 100%.

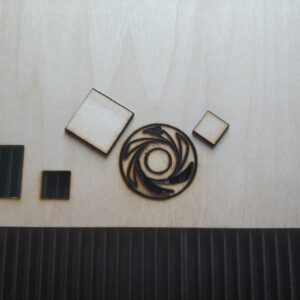
Der Versuch mit der blenden Form war sehr schlecht und hat das Material stark verbrannt. Grund dafür ist die viel zu langsame Schnittgeschwindigkeit (140mm/min). Basierend auf diesen Erkenntnissen habe ich die Schnittgeschwindigkeit signifikant erhöht.

Bei den drei Versuchen habe ich folgende Schnittwerte getestet.

erste Viereck: 400mm/min, 3x mit -0,5mm in Z

zweites Viereck: 600mm/min, 2x mit -0,5mm in Z

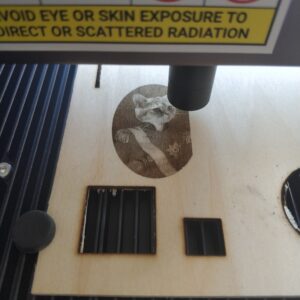
Portrait Oval: 500mm/min, 2x mit -0,7mm in Z

Dabei hat es nur beim ersten Versuch geklappt das 1,7mm Dicke Sperrholz (vermutlich Pappel) zu durchtrennen. Um Zeit zu sparen wollte ich in Versuch zwei nur 2 Durchgänge machen und die Schnittgeschwindigkeit erhöhen. Das hat aber nicht geklappt und so habe ich die Schnittgeschwindigkeit in Versuch drei wieder reduziert und die Z Zustellung etwas erhöht.

Wenn ich das gleiche Material erneut lasere werde ich die Werte des letzten Versuchs nehmen aber mit 400mm/min.

Gravur

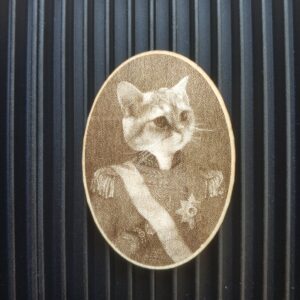
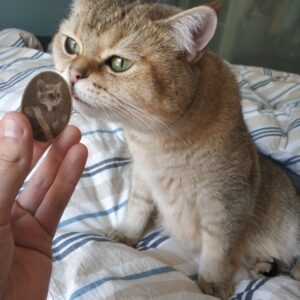
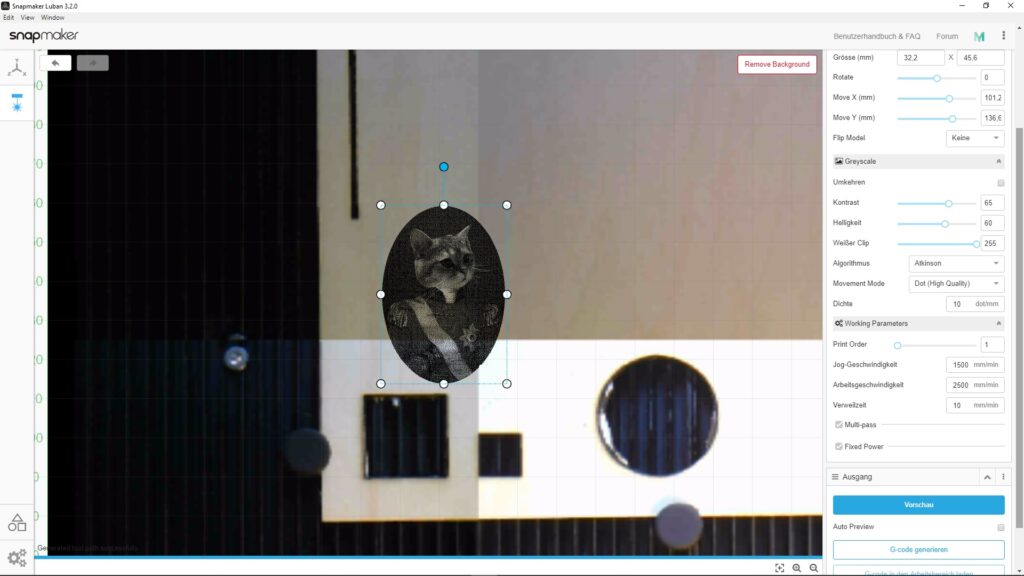
Für das Gravieren habe ich die Option Graustufen gewählt und sowohl Kontrast als auch Helligkeit erhöht, da das Bild recht dunkel und auch kontrastarm ist. Da das zu lasernde Bild recht klein ist habe ich die Punktdichte auf 10 Punkte/mm erhöht. Bei größeren Bildern sollte die Punktdichte wohl verringert werde, da dies die Bearbeitungszeit unnötig erhöht und eine derart hoher Detailgrad nicht nötig ist. Als Algorithmus für die Bildverarbeitung habe ich „Atkinson“ gewählt. Die Leistung habe ich beim Gravieren auf 25% reduziert. Beim den aller ersten Gravierversuchen habe ich die Leistung schrittweise von 2%, auf 5% und dann auf 15% erhöht. Die Ergebnisse waren mit 15% aber nicht zufriedenstellend. Daher habe ich gleich bei 25% Leistung gestartet, was anscheinend genau richtig war.

Die Zeit für das Gravieren betrug ca. 45min.

To get used to the laser, I did a few tests.

Cutting

At first I assumed that Luban can only process images and that cuts can only be made by deep engraving. After researching the internet again, I found out that Luban accepts vector paths from SVG graphics. When it comes to lasering, you have three options, black and white, grayscale and carrier. With the option „Transmitter“ those vector paths from SVG files can be processed.

When cutting, you can set the cutting speed, the power and the number of passes with Z infeed. Since the laser only has 1600mW power, I always have the power at 100%.

The attempt with the blind shape was very bad and burned the material badly. The reason for this is the much too slow cutting speed (140mm/min). Based on these findings, I significantly increased the cutting speed.

In the three attempts I tested the following cutting values.

first square: 400mm/min, 3x with -0.5mm in Z

second square: 600mm/min, 2x with -0.5mm in Z

Portrait oval: 500mm/min, 2x with -0.7mm in Z

It only worked on the first attempt to cut through the 1.7mm thick plywood (probably poplar). In order to save time, I wanted to try two and only do 2 passes and increase the cutting speed. But that didn’t work and so I reduced the cutting speed in attempt three and increased the Z infeed a little.

If I re-laser the same material I will use the values from the last attempt, but with 400mm/min.

Engraving

For the engraving, I chose the grayscale option and increased both contrast and brightness, as the image is quite dark and also poor in contrast. Since the image to be lasered is quite small, I increased the point density to 10 points / mm. With larger images, the point density should be reduced, as this unnecessarily increases the processing time and such a high level of detail is not necessary. I chose „Atkinson“ as the algorithm for image processing. I reduced the engraving power to 25%. In the very first engraving attempts, I gradually increased the output from 2%, to 5% and then to 15%. However, at 15% the results were unsatisfactory. So I started right away at 25% power, which apparently was just right.

The time for engraving was about 45 minutes.

Snapmaker 2.0 Schutzgehäuse

Projekte

Projects

Snapmaker 2.0 Schutzgehäuse

Snapmaker 2.0 enclosure

07.2020

Überblick

Overview
Geplantes Budget
planed budget
0
Fortschritt
progress

Design

Prepare

Build

Test

Done!

Maschienen und Werkzeuge
Machines and tools

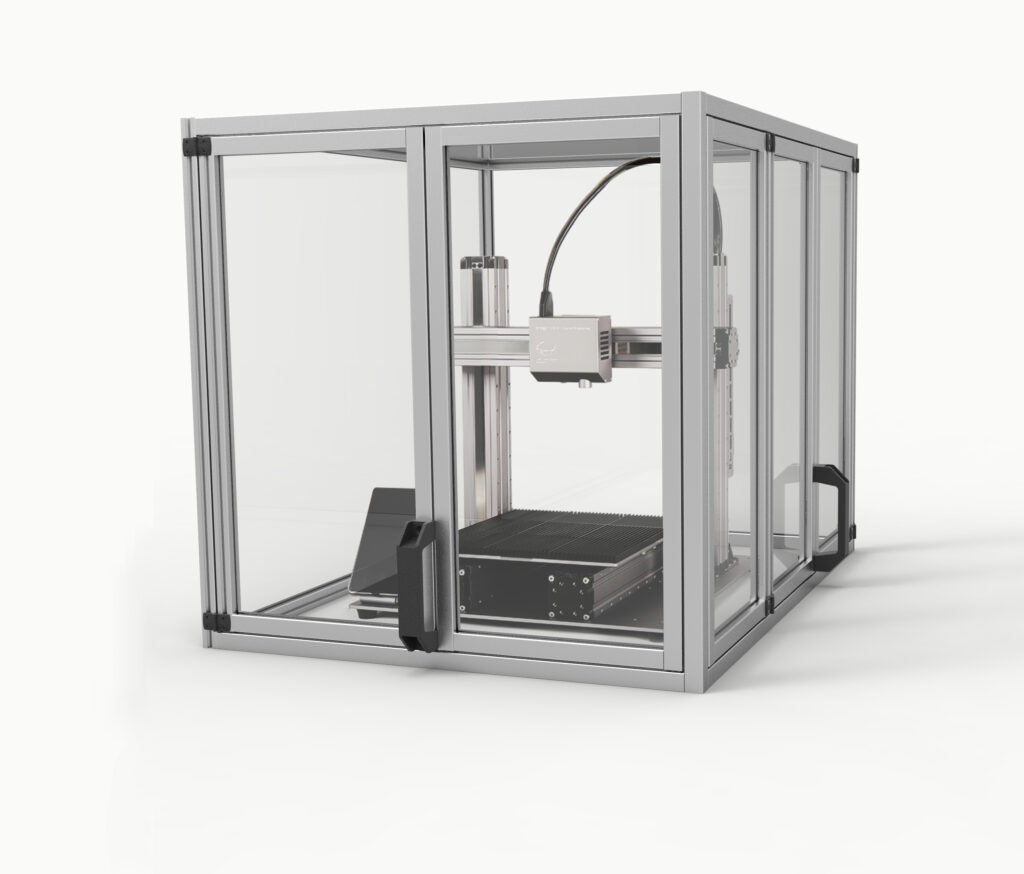
Der Snapmaker hat verschiedene aufsätze, die verschiedene Gestaltungsmöglichkeiten bieten. Dazu gehören ein 3D-Druck Kopf, ein Laser und eine Frässpindel. Um mich und meine Katzen for den diversen gefahren besser zu schützen, habe ich ein Schutzgehäuse, aus 20x20mm Aluminiumprofilen und 2mm starken PC (Polycarbonat) Platten entworfen.

Das Schutzgehäuse soll neben herumfliegenden Spänen und Teilen auch die Geruchs- und Lärmbelästigung mindern. Das sogenannte „hotend“ des 3D-Druck Kopfes wird wie der Name vermuten lässt heiß und ist keine gute Kombination mit Fingern und insbesondere neugierigen Katzennasen und Pfoten. Gleiches gild auch für den Laser wobei hier eigentlich zusätzlich eine Schutzfolie im 450nm Bereich von Nöten wäre.

Im weiteren Verlauf, soll auch eine Absaugung mit Aktivkohlefilter, LED stripes und eine Halterung für 3D-Druck Spulen installiert werden.

The Snapmaker has different attachments that offer different design options. This includes a 3D printing head, a laser and a milling spindle. To better protect myself and my cats from the various hazards, I designed a protective housing made of 20x20mm aluminum profiles and 2mm thick PC (polycarbonate) plates.

In addition to flying chips and parts, the protective housing is also intended to reduce odor and noise pollution. The so-called „hotend“ of the 3D printing head gets hot, as the name suggests, and is not a good combination with fingers and especially curious cat noses and paws. The same applies to the laser, although a protective film in the 450nm range would actually be required here.

In the further course, a ventilation system with activated carbon filter, LED stripes and a holder for 3D printing coils will also be installed.

3D Model

3d model 3d model,blender,obj,3ds,maya,dxf,dae,stl,vrml,x3d,file by z9z1rc